Zendesk alternative

Zendesk alternative guide: 15 platforms to compare

Review today’s leading Zendesk alternatives—pricing, automation, QuickBooks sync, and more.

Zendesk alternative guide: 15 platforms to compare Read More »

Your inbox is blowing up, and your customer service agent is flipping through multiple tabs to close a single ticket. As an all-in-one platform, Zendesk helps support teams navigate this chaos by streamlining ticket routing, agent assignments, and ensuring nothing—and no one—gets lost in the shuffle. 💭 ˚💬⋆。˚💻

That said, Zendesk has announced that Zendesk Sell, its sales CRM tool, is being retired. If you’ve been relying on Sell for your sales workflows, it’s time to plan your next move. Shifting sooner rather than later prevents a last-minute scramble. For some businesses, that shift is a chance to rethink what they really need, like stronger automation or a CRM that works hand-in-hand with their QuickBooks data. In that case, you’d need a dedicated QuickBooks CRM.

Here at Method CRM, we’ve been supporting QuickBooks-based businesses for more than 14 years. Method is a top-rated customer management software, loved by business owners for its real-time, two-way QuickBooks sync, no-code customizable workflows, and customer lifecycle automations.

We’ve rounded up more than a handful of popular CRMs and help desk tools in this guide. We’ll also explore what to consider when evaluating a Zendesk alternative, and how Method can add value to your growing business by eliminating time-consuming processes and offering solutions that fit the way you work. 👩🏻‍💻📓✍🏻💡

Customize workflows and watch your team thrive.

Zendesk at a glance

Zendesk is a cloud-based customer service and help desk platform that’s built to handle large volumes of support tickets across multiple channels. For companies with a high volume of customer support activity, Zendesk gives structure and visibility into what’s happening, who’s handling it, and how fast issues are getting resolved.

Zendesk’s core strengths

Here’s what Zendesk does well:

  • 💬 Omnichannel support: You can handle conversations from email, chat, social media, and voice through a unified dashboard.
  • 📱 App marketplace: Zendesk has a massive marketplace with hundreds of third-party add-ons.
  • 👤 AI-powered support: Chatbots and automation tools handle common issues and surface answers from your knowledge base. These bots can reduce repetitive tasks and speed up response times for simpler requests.
  • 🏷️ Sales CRM: Zendesk Sell gives teams easy-to-follow pipeline tracking and sales automation features that pair seamlessly with Zendesk’s support tools. While it’s being sunsetted, it showed how Zendesk could bridge the gap between customer support and sales.

Zendesk’s pain points

While Zendesk is powerful, there are some potential points of friction for users: 

  • 💲 Pricing: As Zendesk is considered a premium service, there’s a higher barrier to entry. The “Suite” plan starts at $55 per agent/month, but more economical options limit key features, like agent capacity. The Professional plan jumps to $115 per user/month.
  • 🤔 Admin complexity: Setting up workflows, automations, and permissions can be challenging for new users. There’s also no built-in way to visualize dependencies or group related triggers unless you’re on an Enterprise plan. 
  • 🕔 Tiered support: Zendesk’s own customer support is limited based on your plan. Lower-tier users may face slower response times or have more limited access to human support.
  • Sales CRM retirement: As mentioned, Zendesk Sell is being discontinued. While Zendesk promises support during the transition, teams that relied heavily on Sell for workflows and pipeline tracking still face the challenge of having to migrate to another CRM and losing the native link between sales and support.

Decision framework: How to choose a help desk

A help desk is your frontline tool for handling customer inquiries, support requests, and internal escalations.

And if you’ve decided that Zendesk isn’t the right fit (whether it’s too pricey or doesn’t suit your business needs), what are your options?

Here’s a quick framework to help guide your decision when choosing a help desk:

  • Ticketing depth vs. CRM visibility: Some tools focus strictly on support tickets. Others offer broader visibility into customer data, past customer interactions, and purchase history. Decide if you need a support-only system or one that connects with your customer relationship management flow.
  • Required channels: Make sure your help desk supports the messaging platforms your customers use, like Gmail, WhatsApp, live chat, or even voice chat. Some tools do better than others at providing multi-channel support.
  • Budgeting: Always consider more than just the base price. Look at the full pricing model, including add-ons, potential user growth, and possible increased costs with higher-plan tiers over time. Think long-term. As a general rule, consider your budget over 12–24 months.
  • Need for accounting or e-commerce integrations: Using QuickBooks, Shopify, or Microsoft? Choose a platform that syncs well with your current stack to avoid siloed systems and data entry headaches.
  • Scalability and workflow customization: As your team grows, so do your workflow automation needs. Look for flexible tools that adjust to your growing needs.

With the right help desk software, you keep your ticketing system organized and your customer support teams focused.

Customize workflows and watch your team thrive.

Quick compare: 15 Zendesk alternatives

There’s no shortage of customer service software, but not all of them will match your needs, budget, or team setup.

Here’s a look at Zendesk alternatives that offer different strengths.

1. Method CRM

Method CRM - Alternative to NetSuite - Method Blog

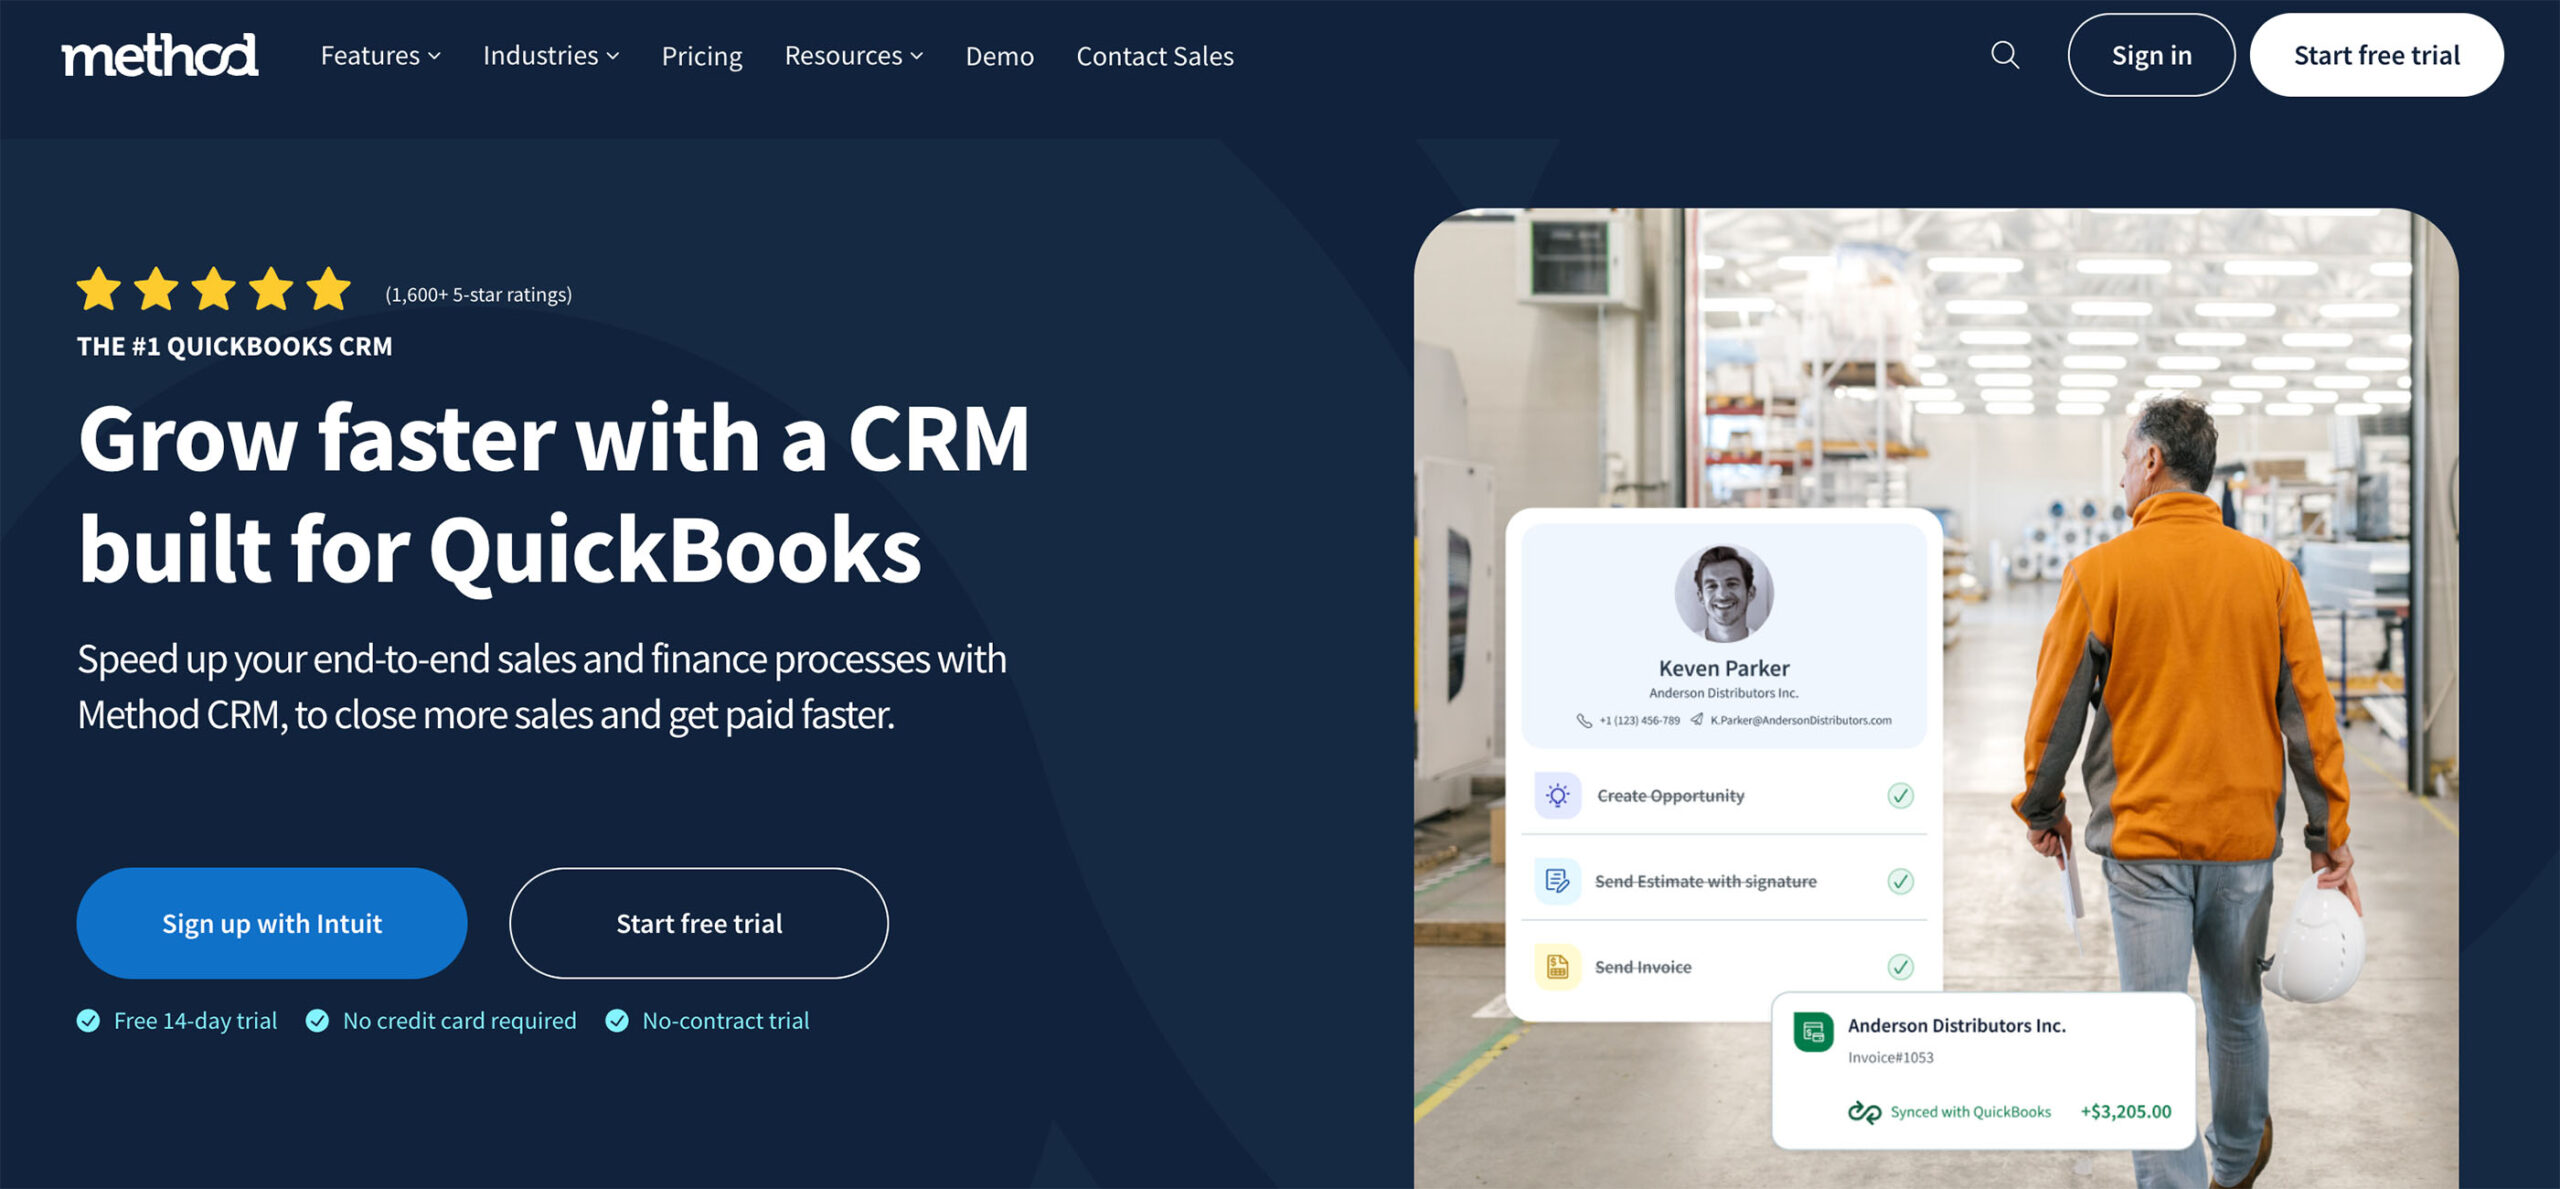
Method is a top CRM software choice for businesses that run on QuickBooks, offering a two-way sync. This means that when you update an invoice or payment in Method, it instantly updates in QuickBooks (and vice versa).

Customers, vendors, employees, invoices, sales orders, items (products and services), purchase orders, bills, and more are synced in real time.

Method also allows businesses to tailor their workflows and create a personalized experience for their customers with a customizable portal (where they can easily view invoices, make payments, and stay on top of support-related information).

Pros:

  • Real-time, two-way sync with QuickBooks Online and Desktop.
  • Fully customizable workflows, screens, and fields using a no-code editor.
  • Customizable customer portal.
  • Built-in automation for estimates, payments, and lead tracking.
  • Support resources, including knowledge-base, FAQs, chat, email, phone support, and expert customization services.
  • Works with Mailchimp, Gmail, Google Calendar, Outlook, and Zapier.

⚠️ Cons:

  • Built for QuickBooks and Xero users and not compatible with other accounting software.

🏷️ Starter price: Starts at $27/user/month (Contact Management plan). Method CRM also offers a free trial

2. Freshdesk

Developed by Freshworks, a popular service management software, Freshdesk is their take on the cloud-based help desk platform. It brings omnichannel support, funneling customer queries from email, phone, live chat, social media, and even the website widgets you use into one workspace.

What sets Freshdesk apart is its built-in AI-powered assistant, Freddy AI. Freddy automates ticket sorting, suggests help articles, flags urgent issues with sentiment analysis, and auto-resolves routine queries to keep operations moving fast.

Pros:

  • Generous free plan includes ticketing, knowledge base, and basic automation.
  • Freshdesk’s chatbot tool allows you to build rule-based chat responses without coding.
  • Robust self-service portals for customer issues before you intervene.

⚠️ Cons:

  • Chat and telephony integrations can feel limited without paid add-ons.
  • Core omnichannel features are pushed into higher tiers.

🏷️ Starter price: Free plan up to two agents. Growth plan is at $15/agent/month.
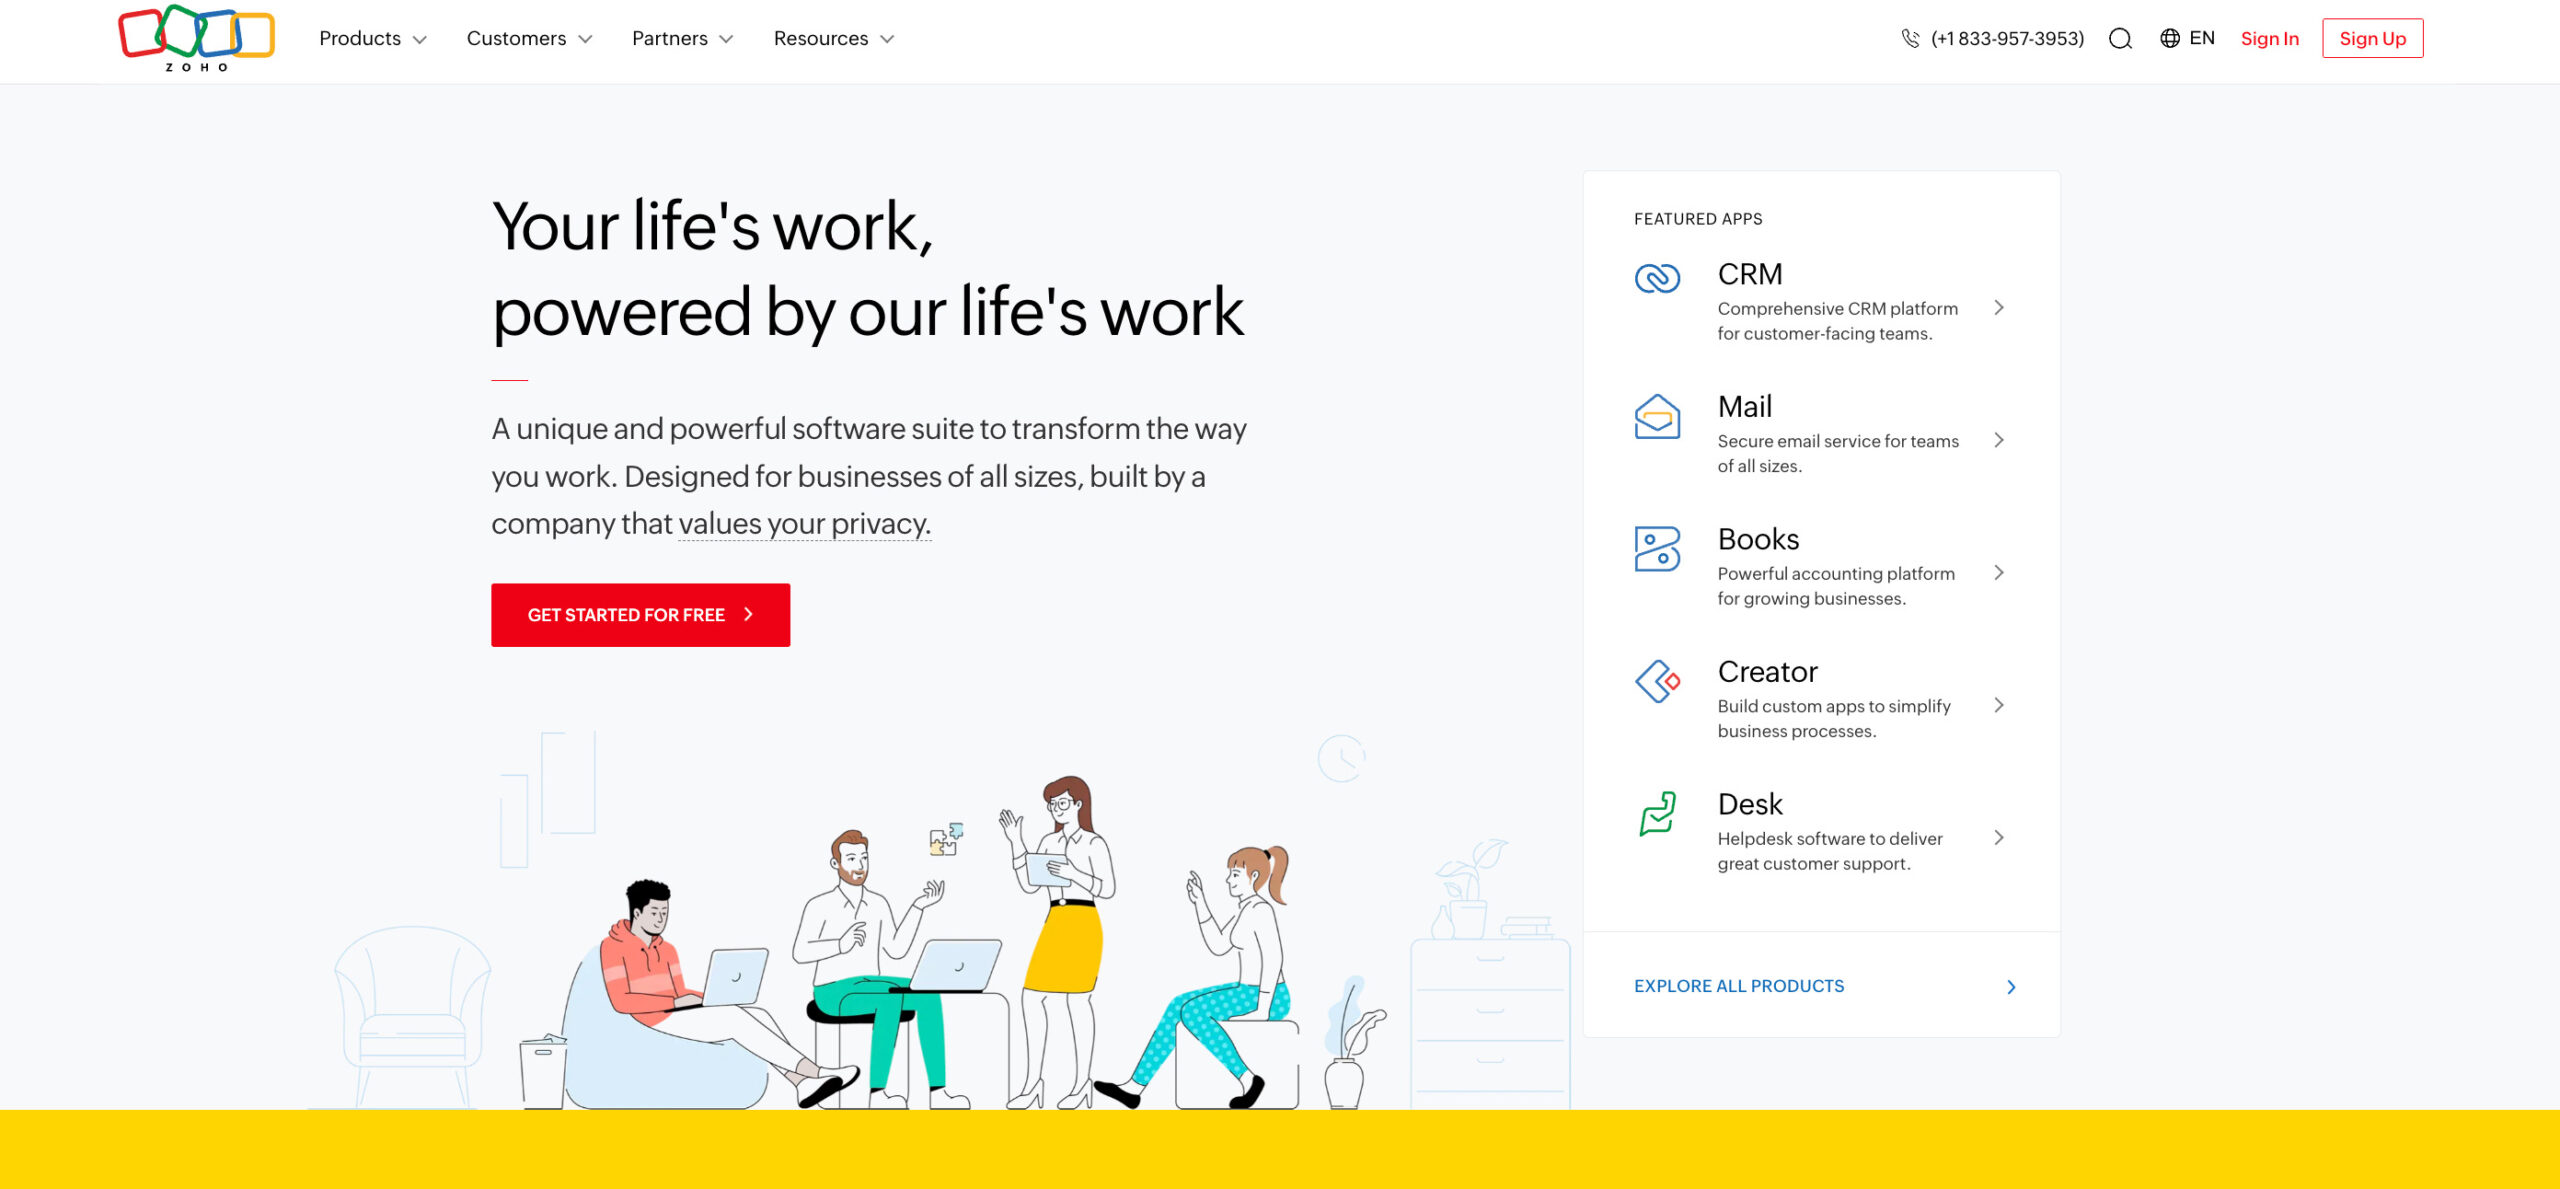
3. Zoho Desk

Zoho Desk is part of the larger Zoho ecosystem, another well-known cloud-based software suite. It’s a more practical pick for small businesses wanting smart features without the price tag of Zendesk.

Zoho’s AI assistant, Zia, auto-tags tickets, detects anomalies in response times, and suggests help articles for both agents and customers. Zia can also offer reply suggestions to speed up responses. You’ll also find useful tools like “Blueprint,” a drag-and-drop tool that lets you set step-by-step rules for how tickets get handled.

Pros:

  • Zia AI helps with ticket tagging, sentiment analysis, anomaly detection, and auto-response suggestions.
  • “Blueprint” lets you build step-by-step workflows to standardize support processes.
  • Perfect integration with other Zoho apps like CRM, Analytics, and Projects.

⚠️ Cons:

  • The user interface can feel dense and less intuitive compared to others.
  • Automation setup, like assignment rules and service-level agreements (SLAs), has a steeper learning curve if you’re not using other Zoho tools.

🏷️ Starter price: Free for up to three agents. Standard plan starts at $14/agent/month.

4. HubSpot Service Hub

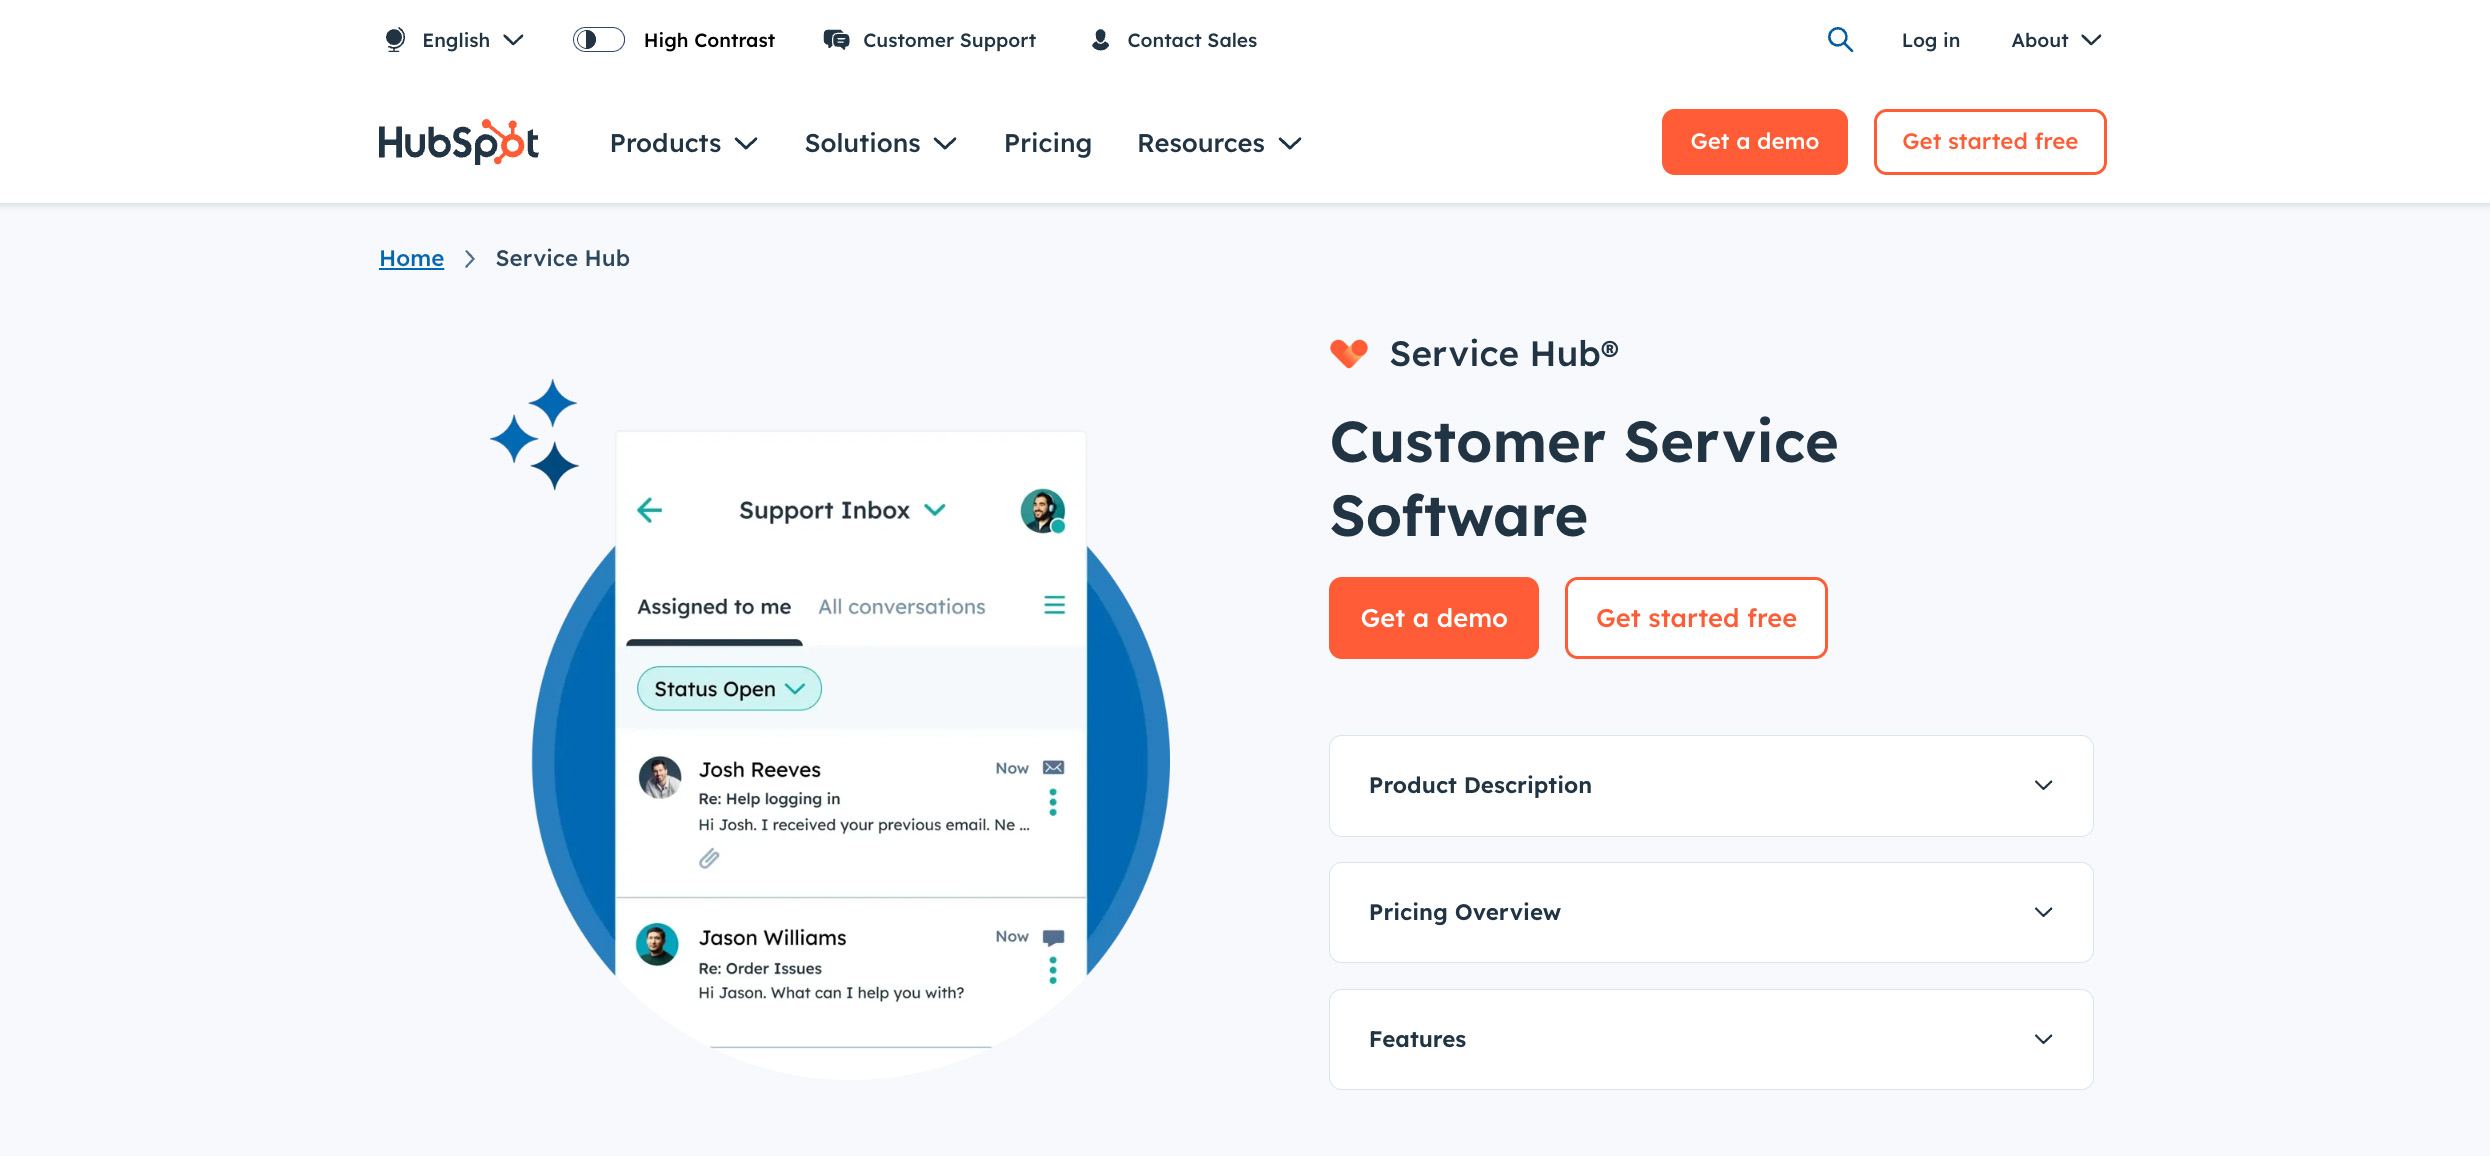
If you’re in the sales and marketing space, you’ve most likely heard of HubSpot. Service Hub is their customer support arm, designed to manage tickets, live chat, email, and social channels like Facebook and Instagram via the Hub’s social tools.

What makes Service Hub stand out is how well it connects with the rest of HubSpot’s ecosystem. The shared CRM means agents have full customer context wherever they go, and team collaboration is optimized.

You can automate ticket assignments, set up survey flows, and build reports without leaving the platform. The catch? Many more advanced features (SLAs, playbooks, custom reports) are gated behind higher-tier plans or require you to also pay for other Hubs.

Pros:

  • Native HubSpot CRM integration for a centralized ticketing system.
  • Dashboards connect support data with sales and marketing metrics.
  • Shared inbox supports automation, team email routing, and collision alerts.

⚠️ Cons:

  • The mobile app offers limited functionality compared to the full desktop version.
  • Add-ons for marketing and sales can drive up total costs fast.

🏷️ Starter price: Service Hub Starter is at $20/user/month.

5. Intercom

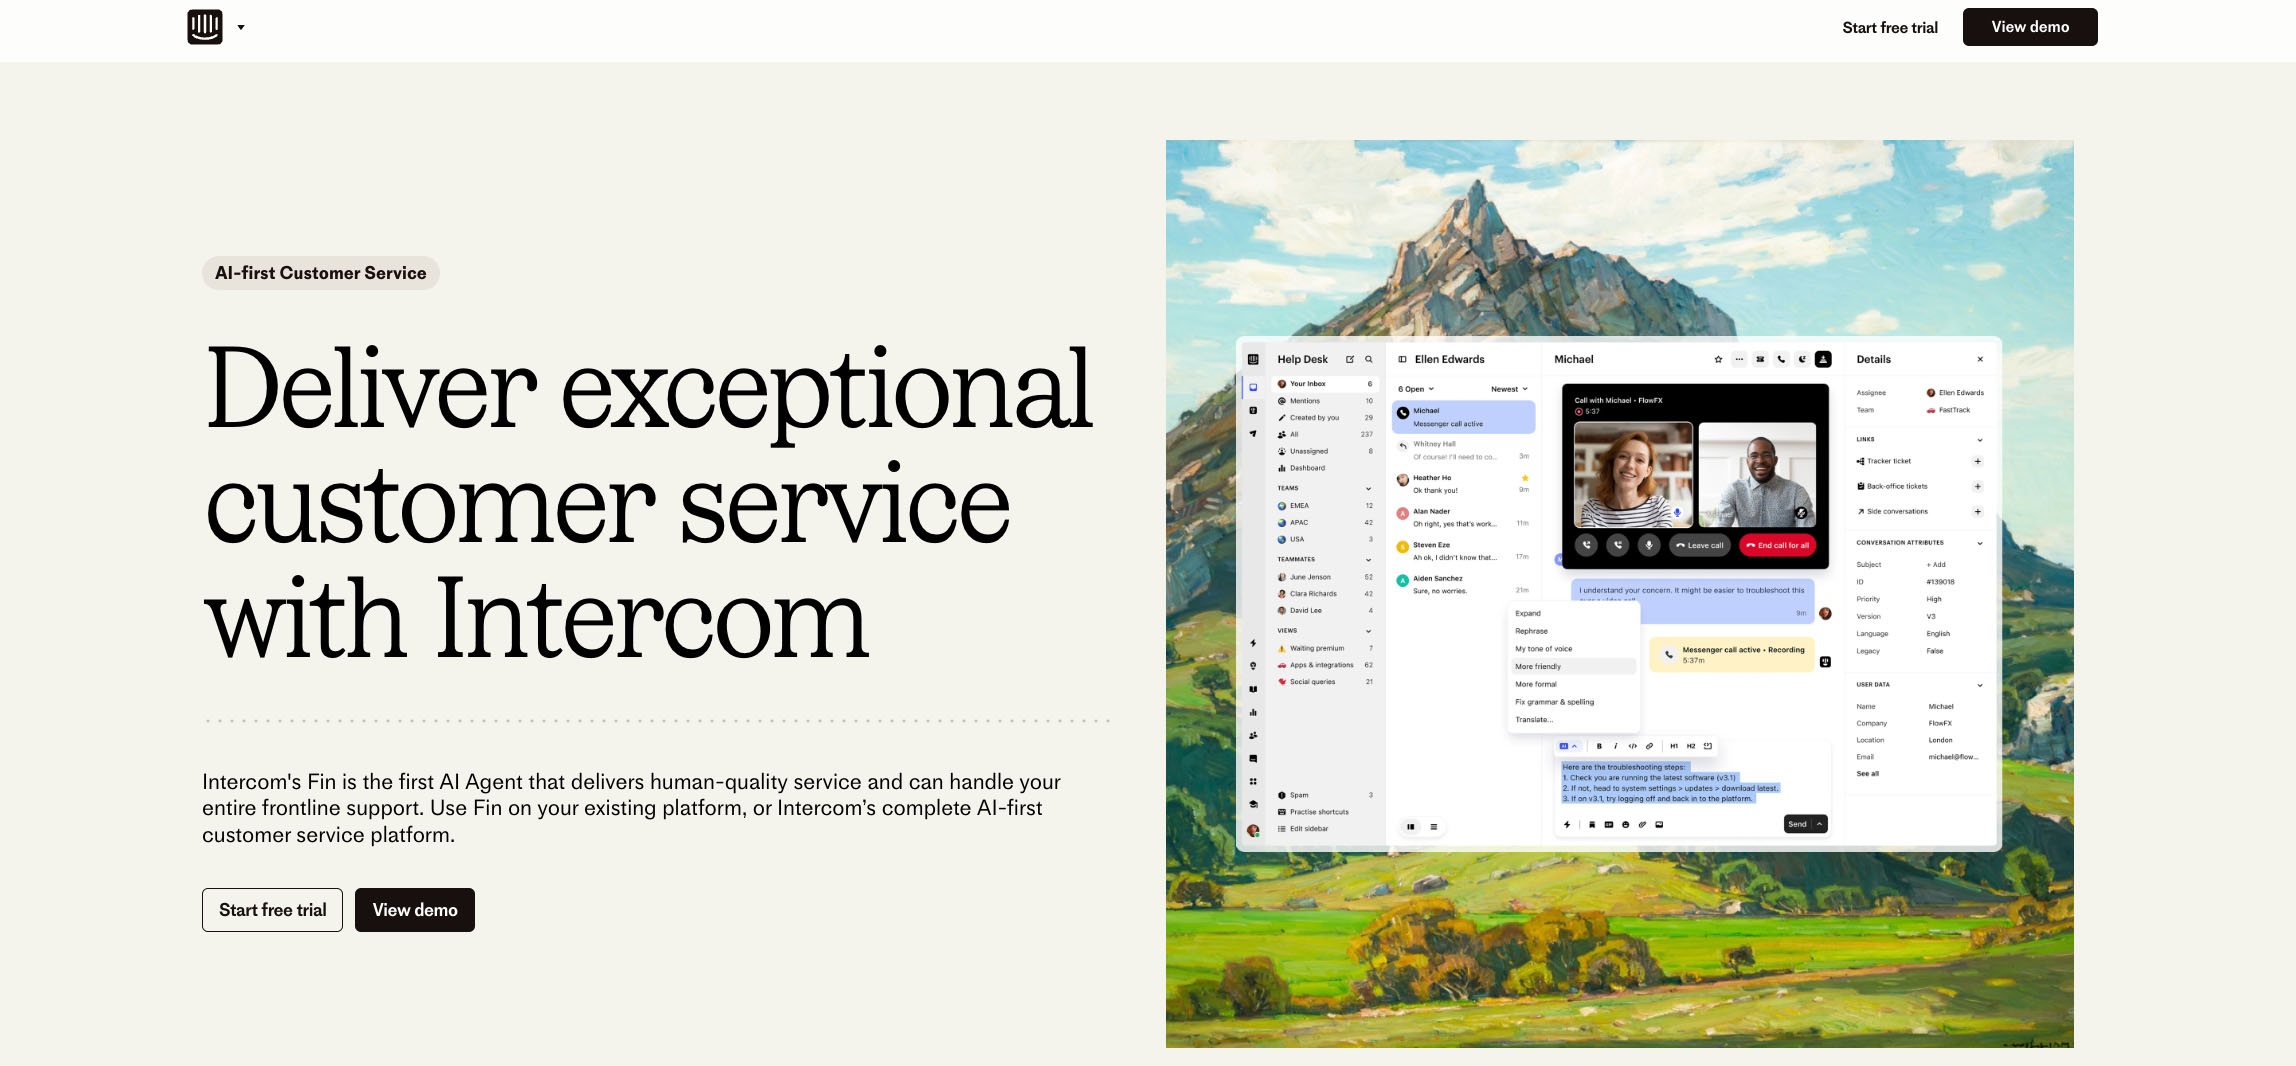
“It’s time to leave Zendesk behind,” is a statement Intercom uses on its website. This confidence comes from the platform’s push toward human-powered and AI-enhanced support, moving away from static ticketing and into more personalized chat experiences.

Intercom’s support solutions blend live chat, email, bots, and self-serve tools in one workspace. Its AI agent, Fin, automatically resolves common queries with natural-sounding answers trained on your help content.

Pros:

  • AI chatbot Fin responds to customer questions using your help articles without custom coding.
  • Messenger-first UI makes it easy to embed chat across apps and websites.
  • Integrates natively with Salesforce, HubSpot, Slack, and over 300 apps.

⚠️ Cons:

  • Basic support plan lacks full ticketing or analytics features.
  • AI Fin usage has separate pricing based on resolution volume.

🏷️ Starter price: $29/month (billed annually).

6. Help Scout

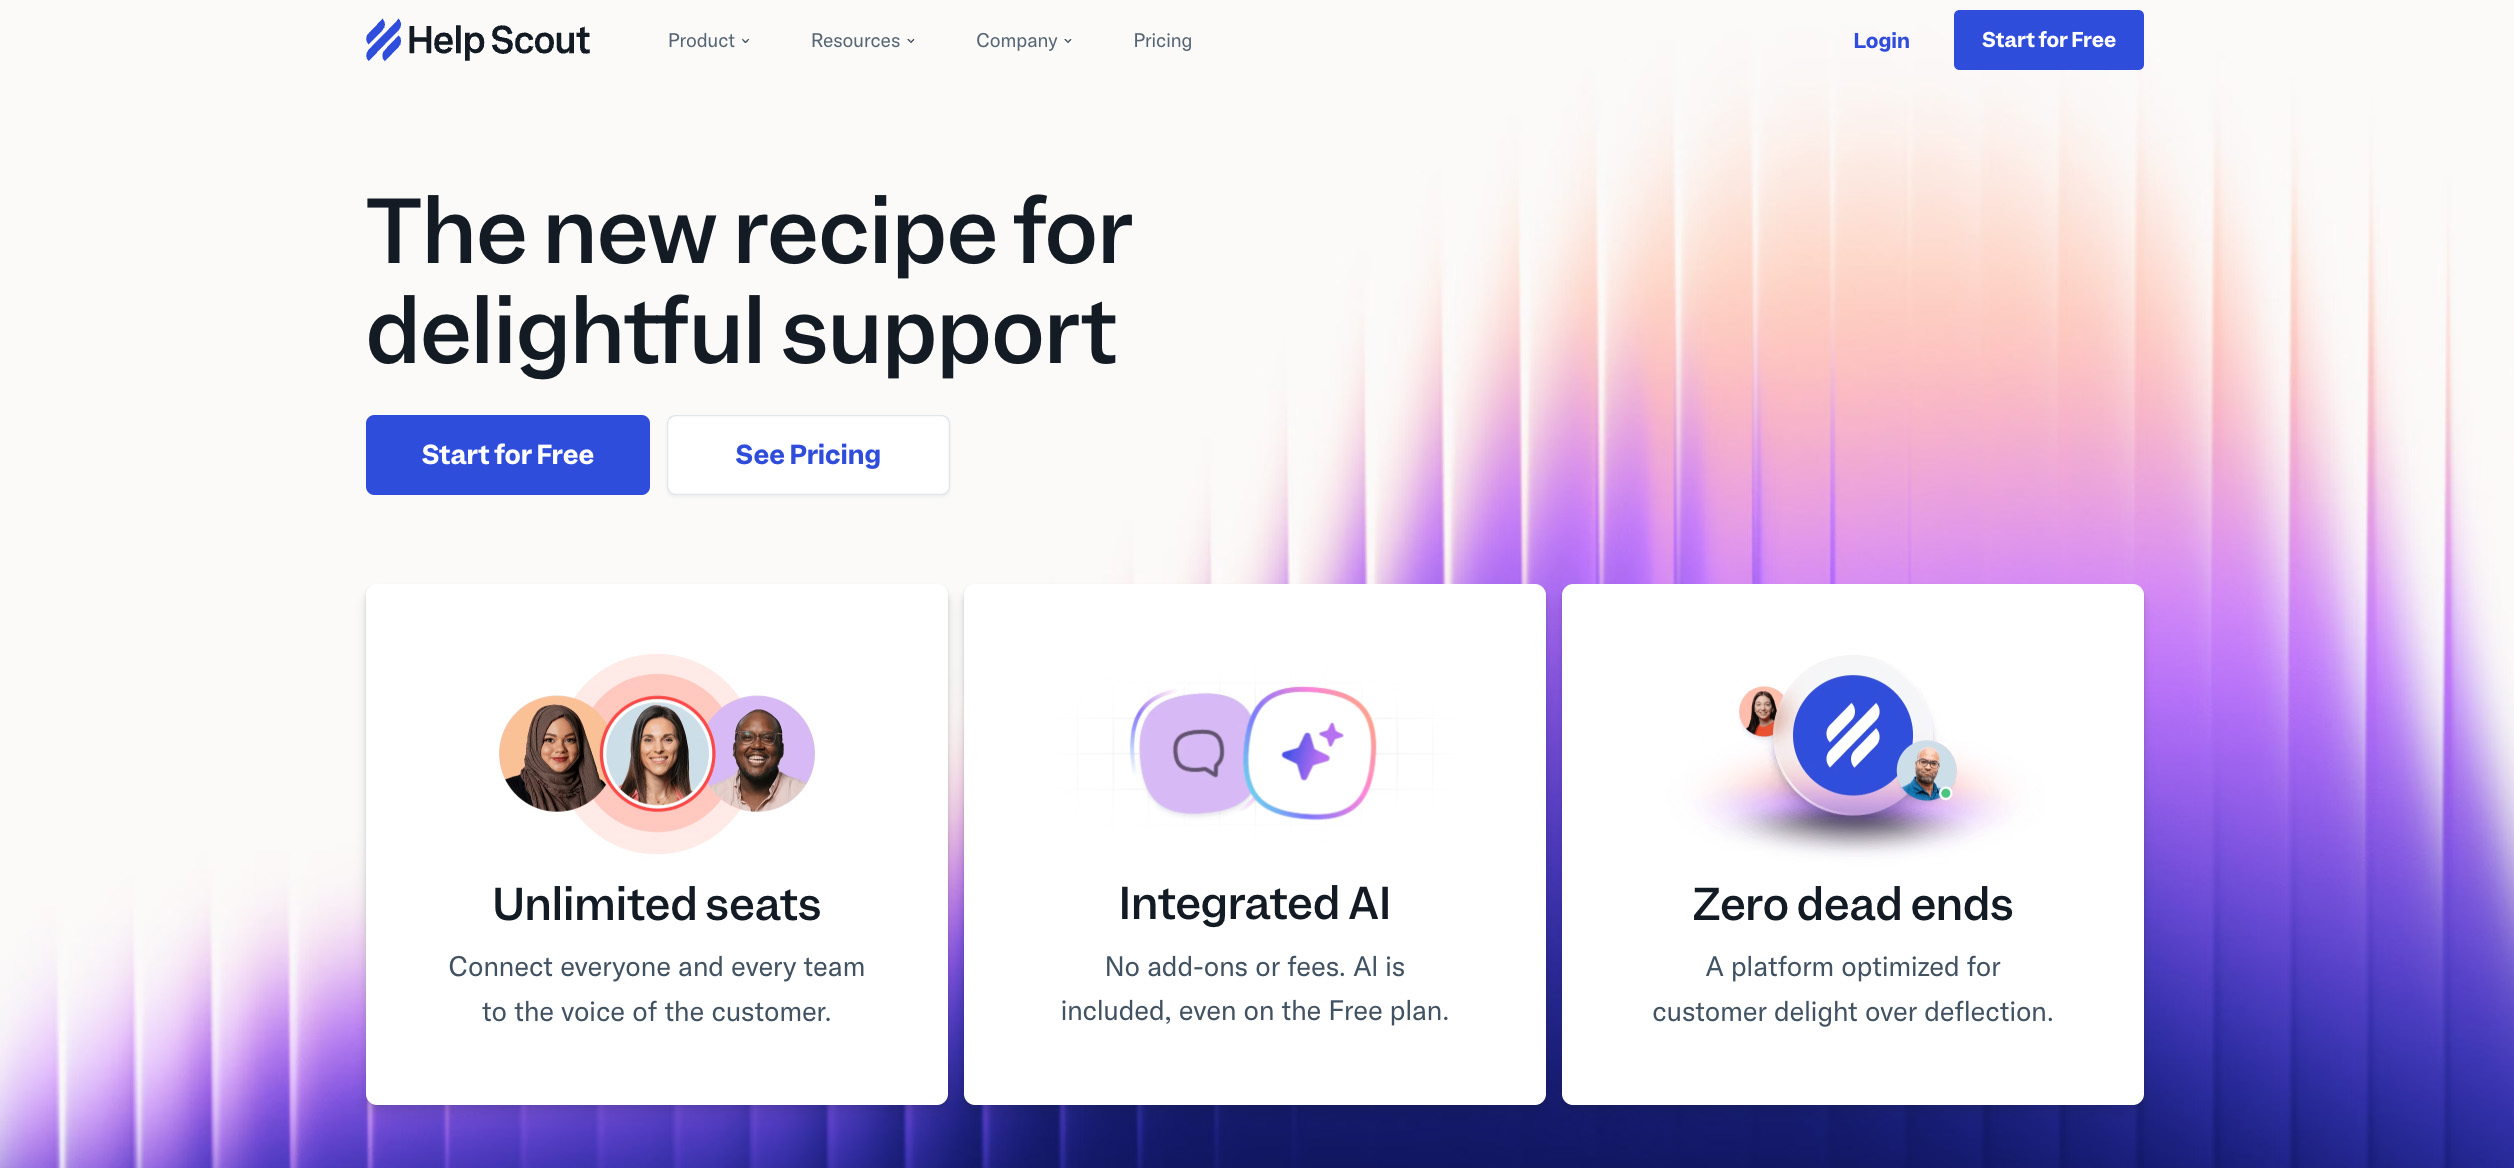
Help Scout offers a shared inbox experience that feels like a personal email but is built for teams. It’s made for small and mid-sized businesses that want a support tool that’s quick to learn, easy to use, and focused on customer conversations rather than making complex ticketing flows.

What makes Help Scout different is its focus on simplicity and human-first support. Instead of sending ticket IDs or robotic replies, the platform keeps emails personalized while still giving agents automation tools, saved replies, and internal notes to follow. Docs (their knowledge base tool) integrates right into replies and chat, so agents can link help content on the fly.

Pros:

  • Shared inbox works like email but adds automation, collision detection, and tagging.
  • Slack, HubSpot, and Shopify integrations come built-in.
  • The mobile app lets agents reply to conversations and check statuses on the go.

⚠️ Cons:

  • Functionality and reporting can feel basic unless you’re on higher plans.
  • There’s a lack of advanced and AI-powered features to streamline tasks.

🏷️ Starter price: Free plan available (up to 100 contacts). Paid plans start at $25/user/month.

7. Jira Service Management

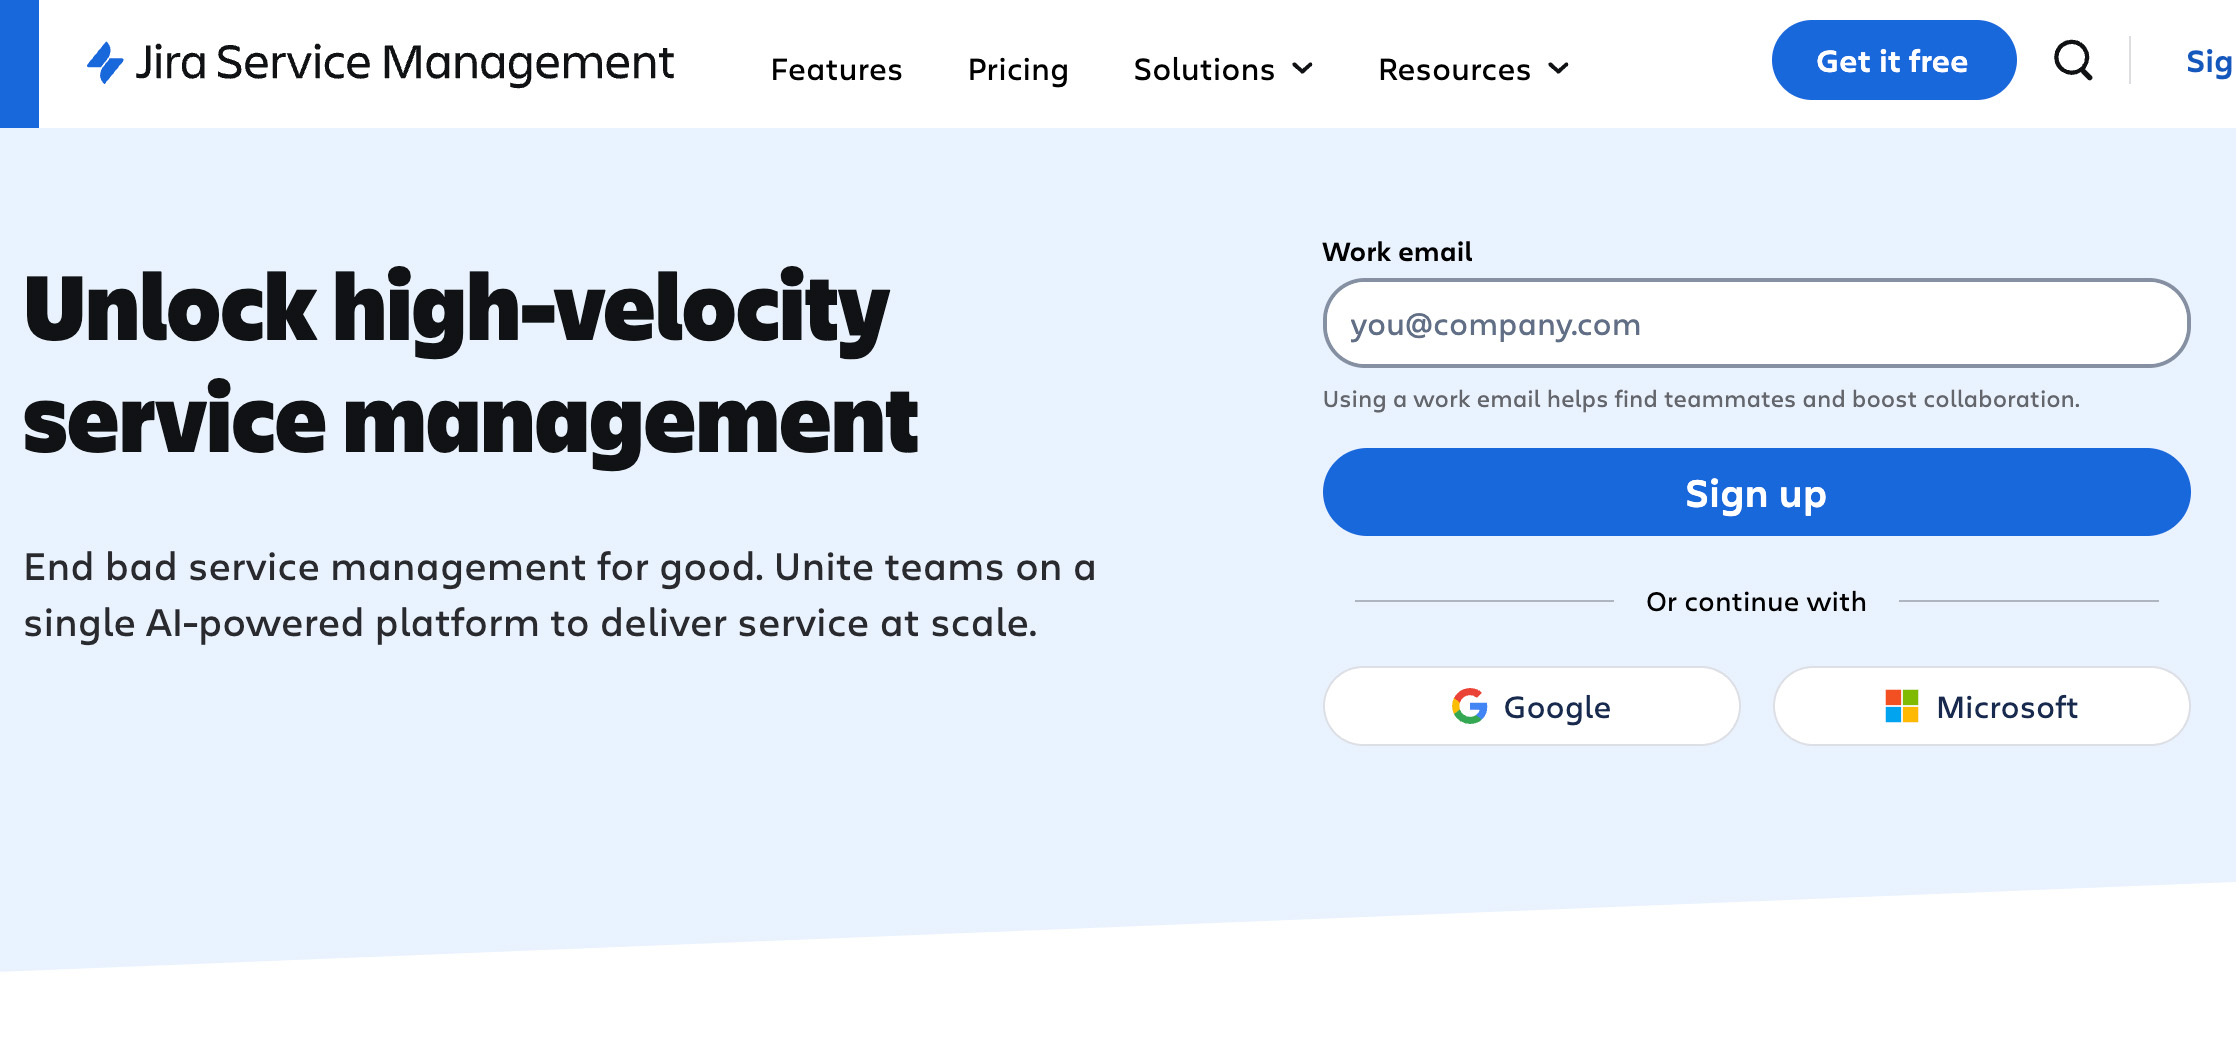
Jira Service Management is run by Atlassian, known for its project management tools. This help desk tool is made for IT, DevOps, and engineering teams because it connects service requests directly to development work.

Support teams can escalate bugs to engineers without switching platforms, while developers can track how incidents tie back to code changes, releases, or sprint tasks. This makes it a go-to pick for businesses already working in agile or development-heavy environments using Atlassian’s services.

Pros:

⚠️ Cons:

  • The platform can feel overwhelming to non-technical users without Jira experience.
  • Requires Confluence (at a separate cost) to use the full knowledge base functionality.

🏷️ Starter price: Free plan for three agents. Standard starts at $23.80/agent/month.

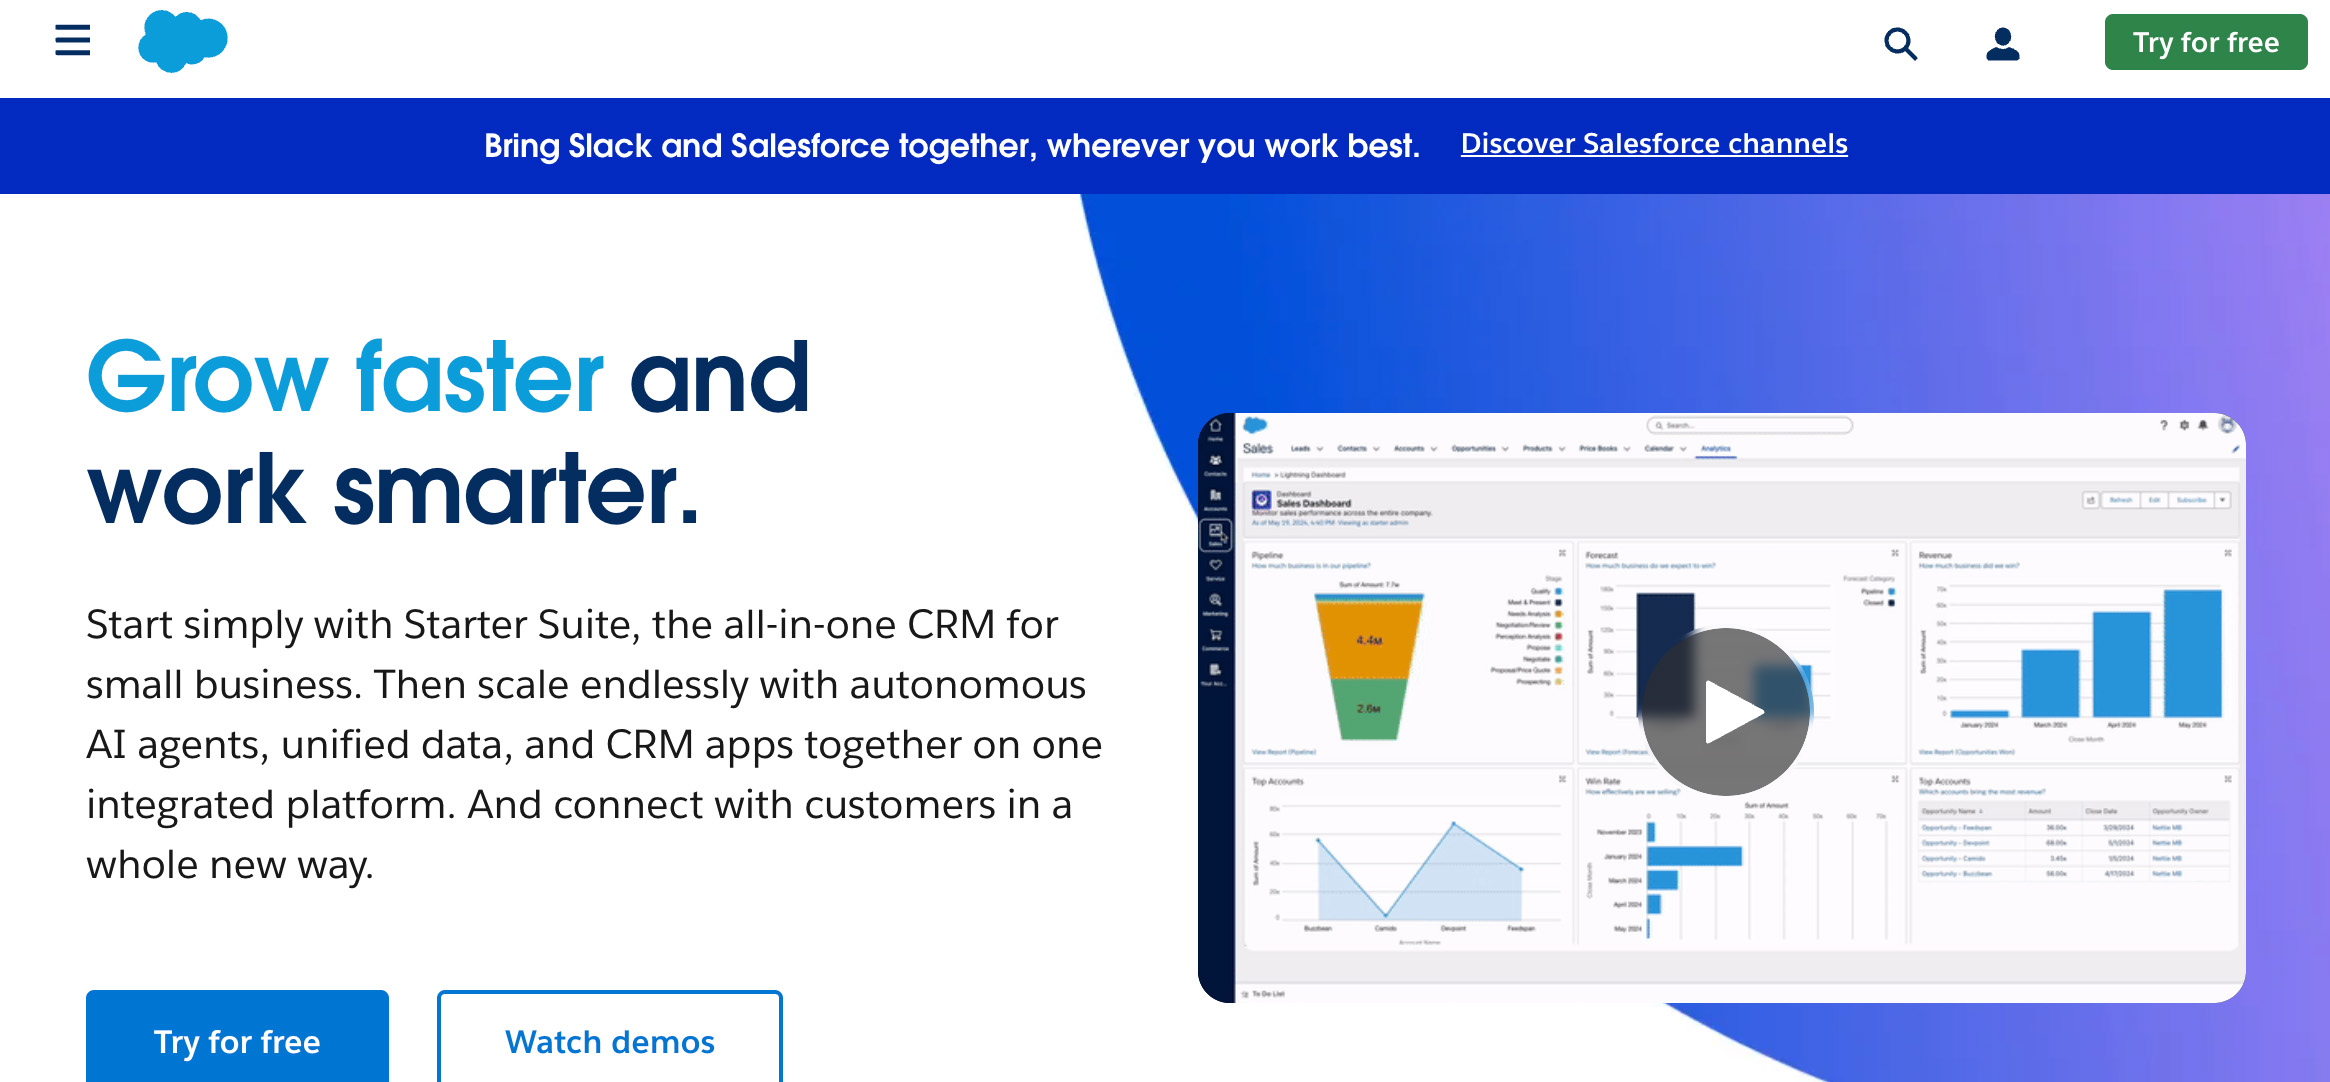
8. Salesforce Service Cloud

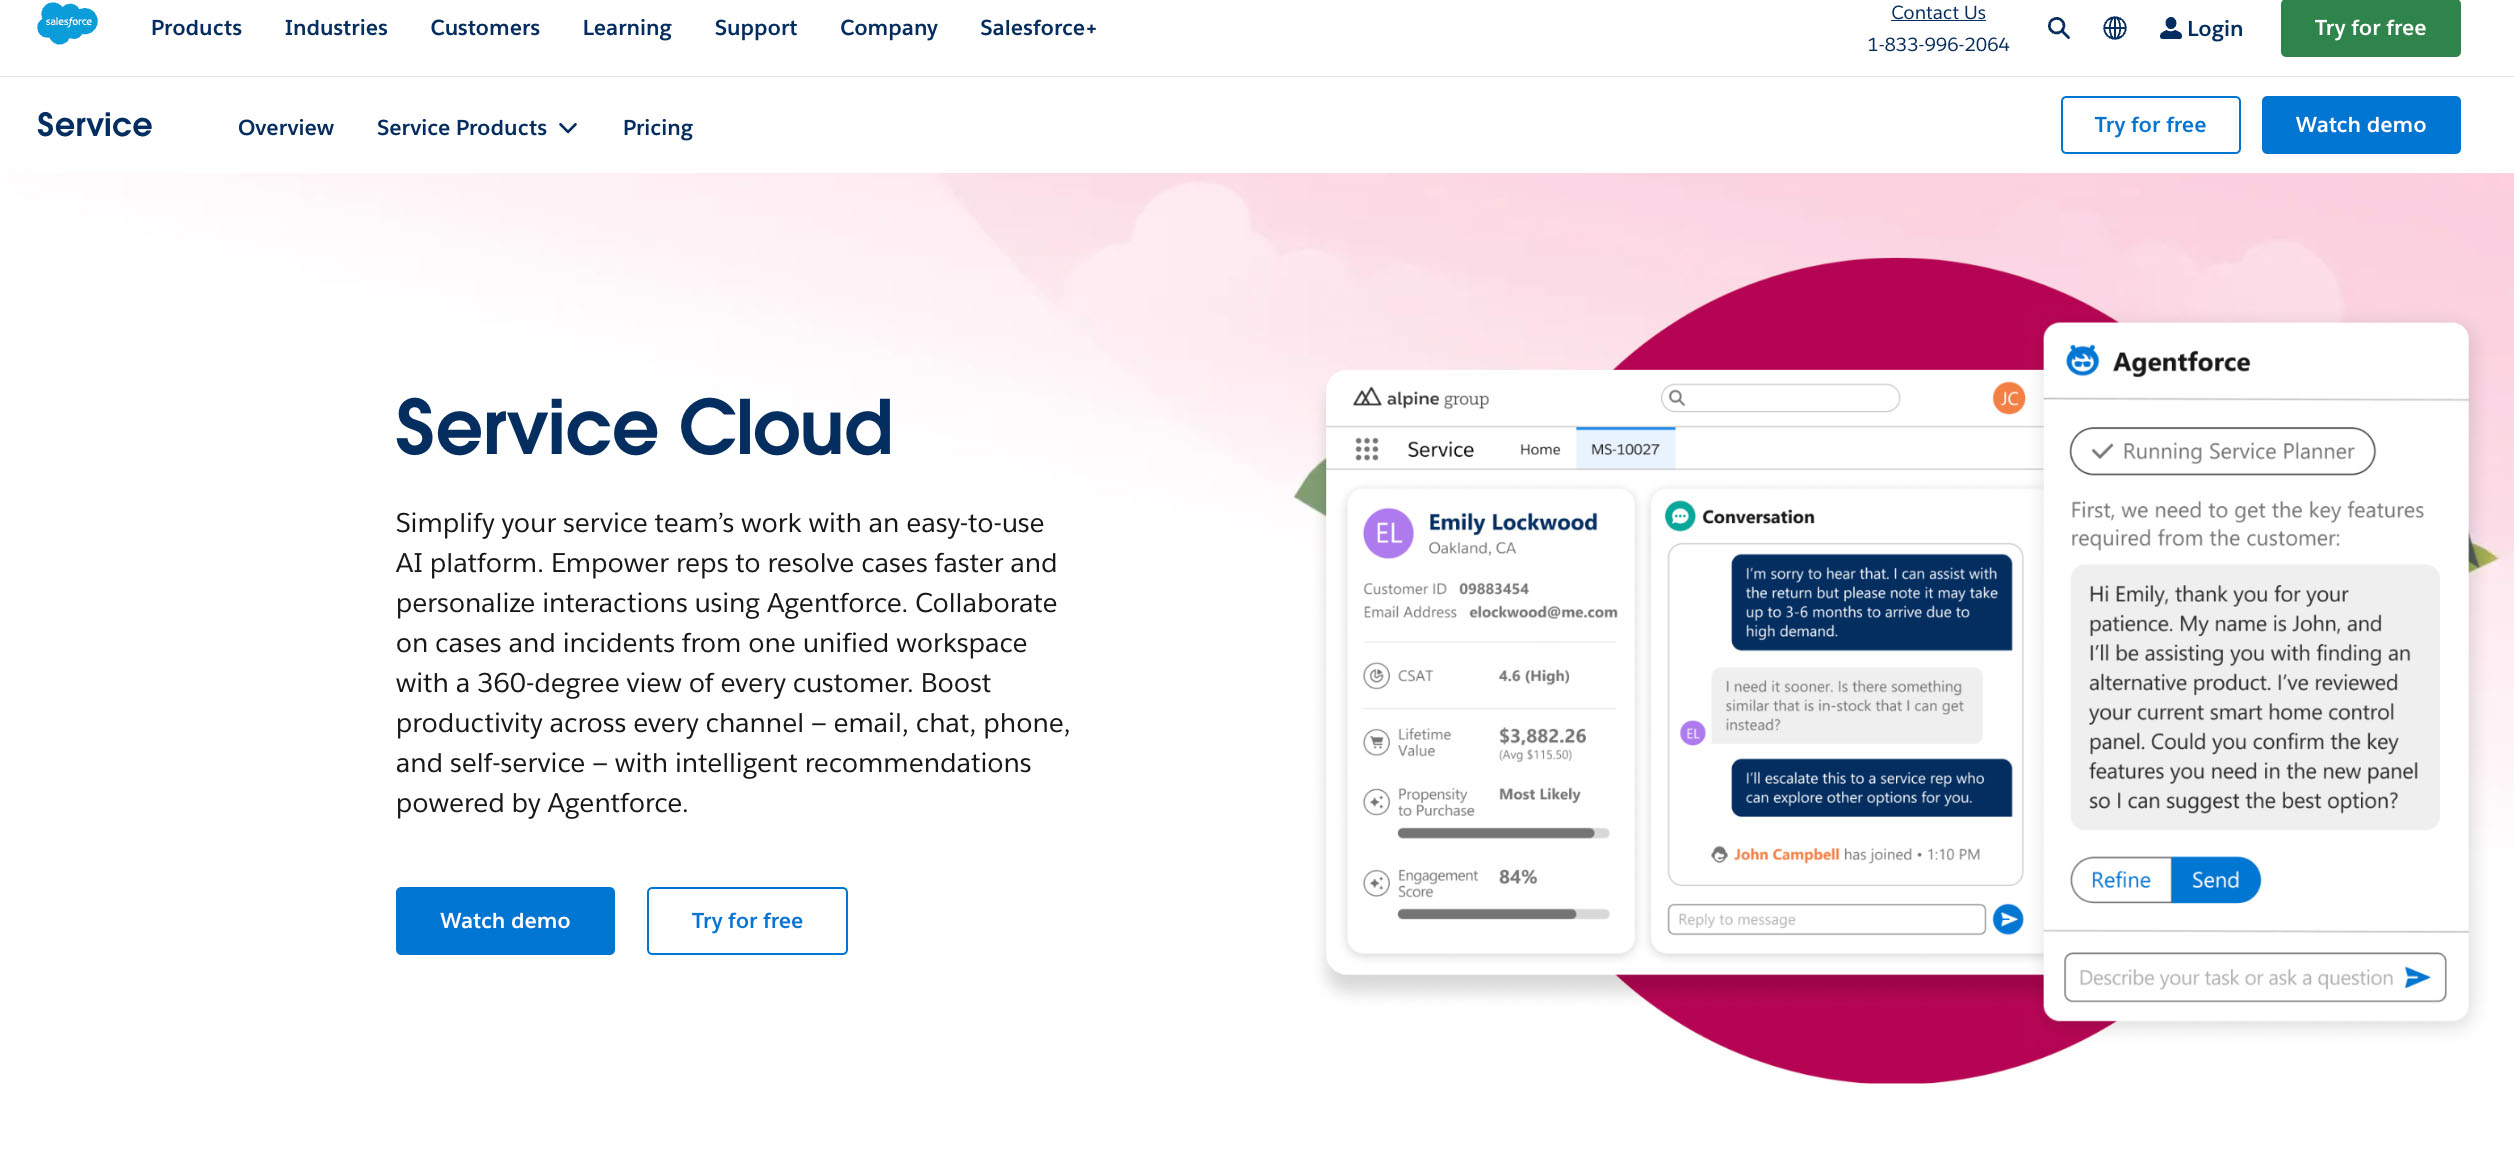
Powered by the Salesforce platform, the Salesforce Service Cloud is a powerful customer service solution aimed at mid-market to enterprise-level teams. It pulls customer data from across your business, from sales and marketing to commerce, so agents get a full customer view in every interaction.

The platform supports case management, live chat, knowledge base, email, voice, SMS, and AI-assisted workflows. Einstein, the platform’s AI-powered conversational assistant, suggests replies, predicts case resolution time, and flags sentiment changes in real time.

Pros:

  • Deep native integrations with Salesforce Sales Cloud, Marketing Cloud, and Commerce Cloud.
  • Visual Workflow Builder (Flow) helps automate complex processes without coding.
  • Easily connect Sales Cloud with thousands of apps on its AppExchange marketplace.

⚠️ Cons:

  • Initial setup can be complex, especially for teams without Salesforce admins.
  • There’s limited flexibility if you don’t use the full Salesforce ecosystem.

🏷️ Starter price: Sales Cloud plans start at $25/user/month (Starter Suite).

9. LiveChat

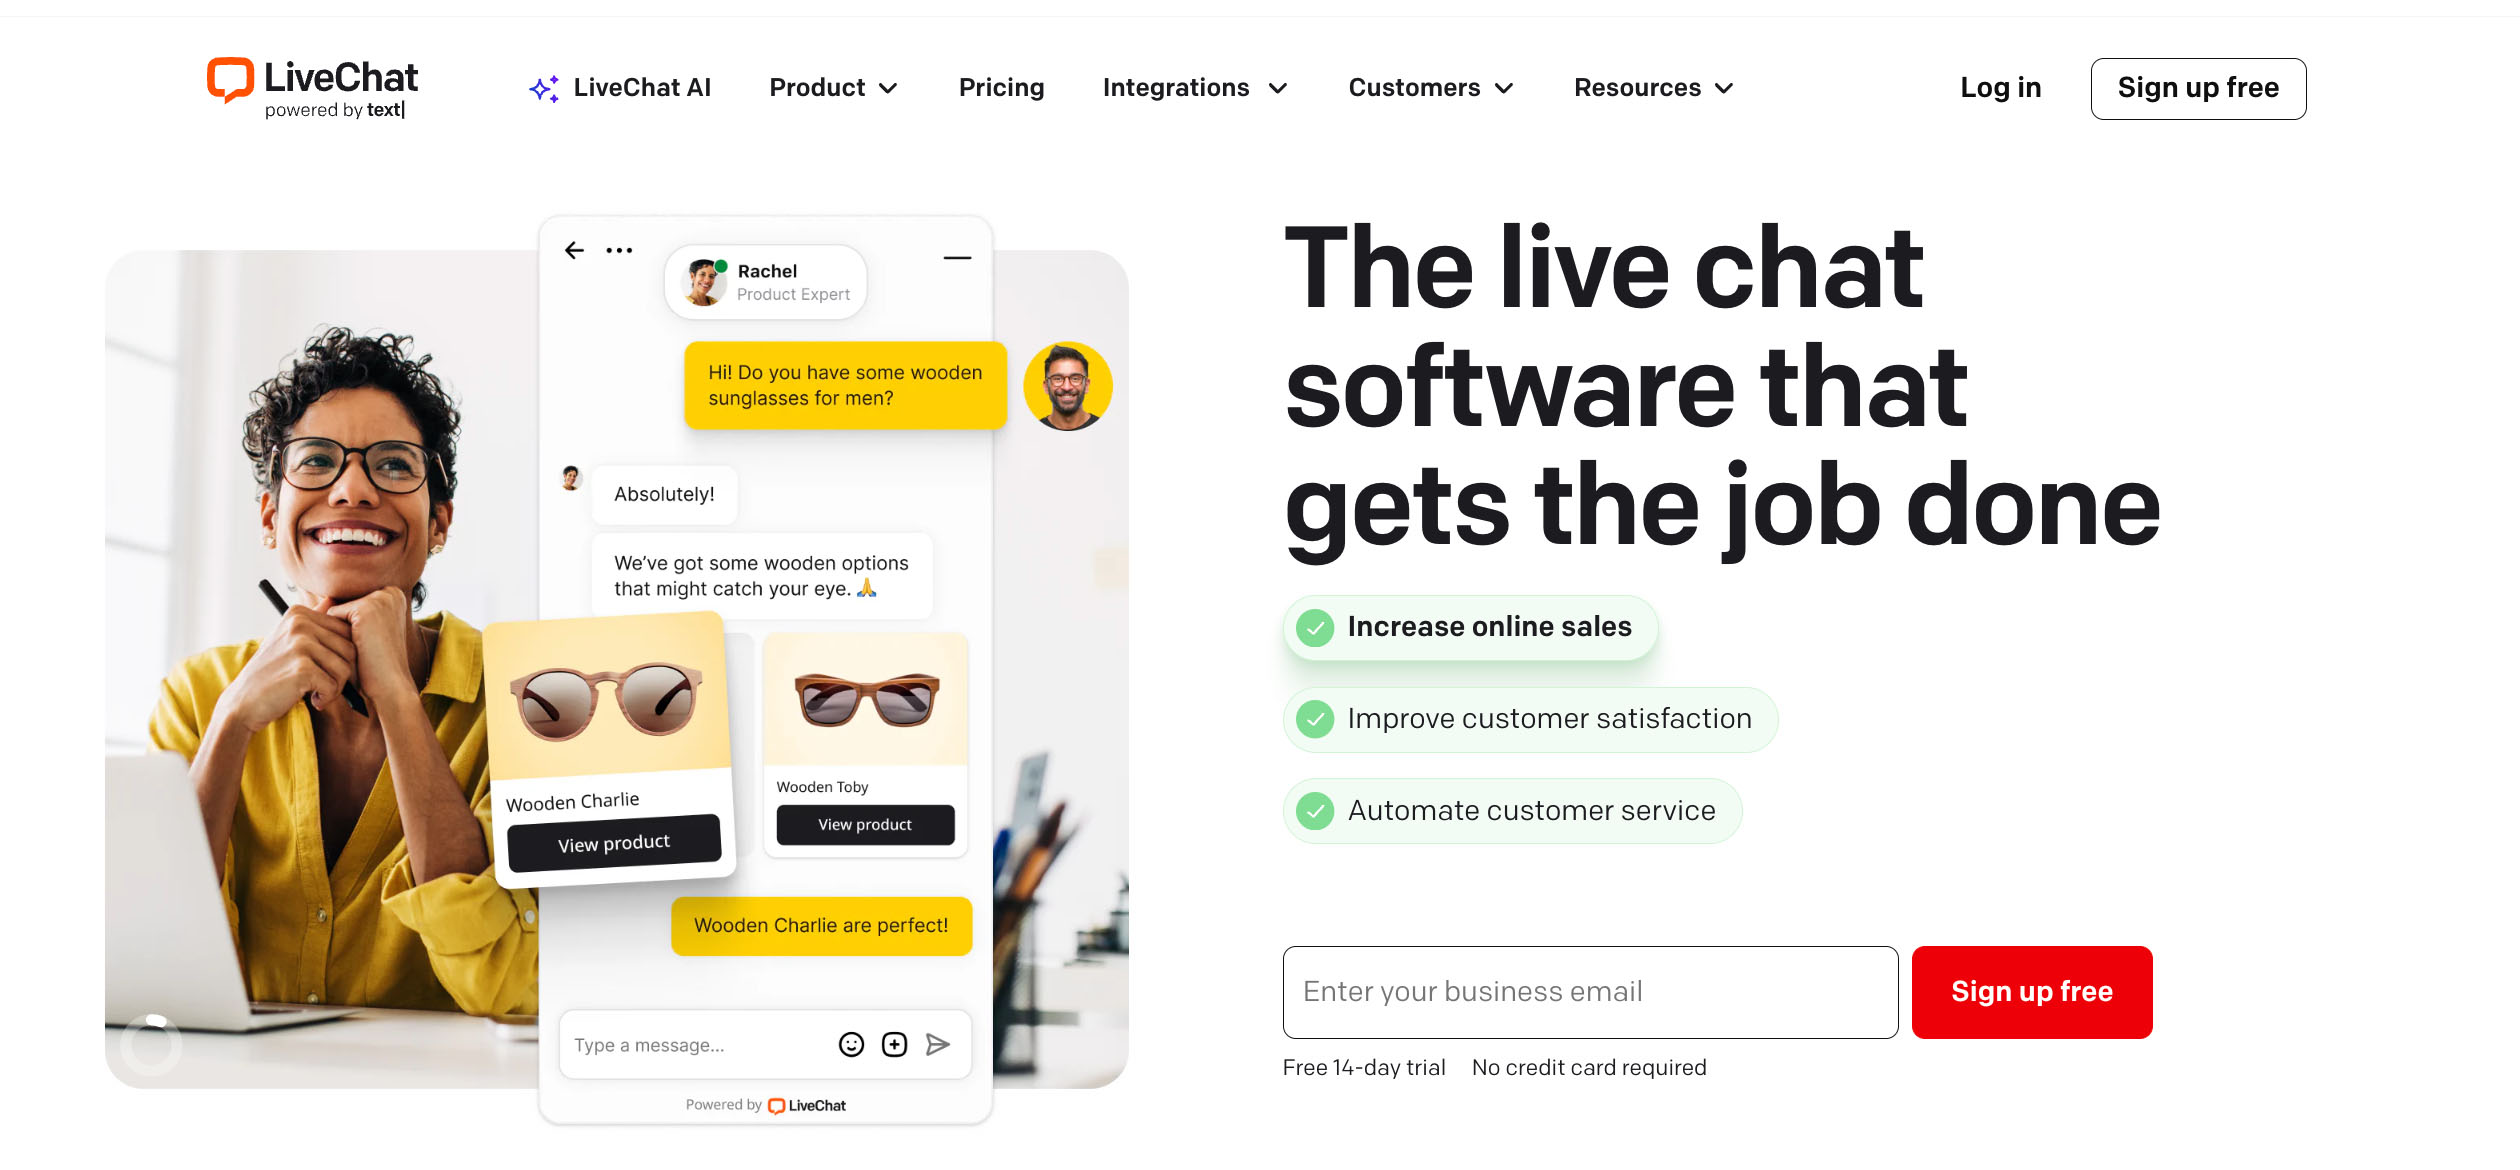
Looking for a tool that can do real-time customer communication well? LiveChat has you covered. You get a customizable chat widget that works across desktop, mobile, and web. But it’s an impressive one, being able to integrate with over 200 apps from its marketplace, including CRMs, payment gateways, and analytics tools.

With LiveChat’s more no-frills approach to live messaging, you get built-in features like agent routing, canned responses, chat transcripts, and chat tags. However, that also means you’ll rely a bit more than the others on integrations if you want ticket management, AI, or call support.

Pros:

  • Fast-loading chat widget with an intuitive interface and some customization options.
  • Real-time typing preview so agents can prep replies before users hit send.
  • Smooth integration with your favourite CRMs and third-party tools.

⚠️ Cons:

  • No built-in ticketing, phone, or chatbot tools.
  • Only provides basic reporting tools with no advanced analytics.

🏷️ Starter price: Starts at $20 per agent/month (single-user plan). Full-time support team plans start at $41 per person/month.

10. Kayako

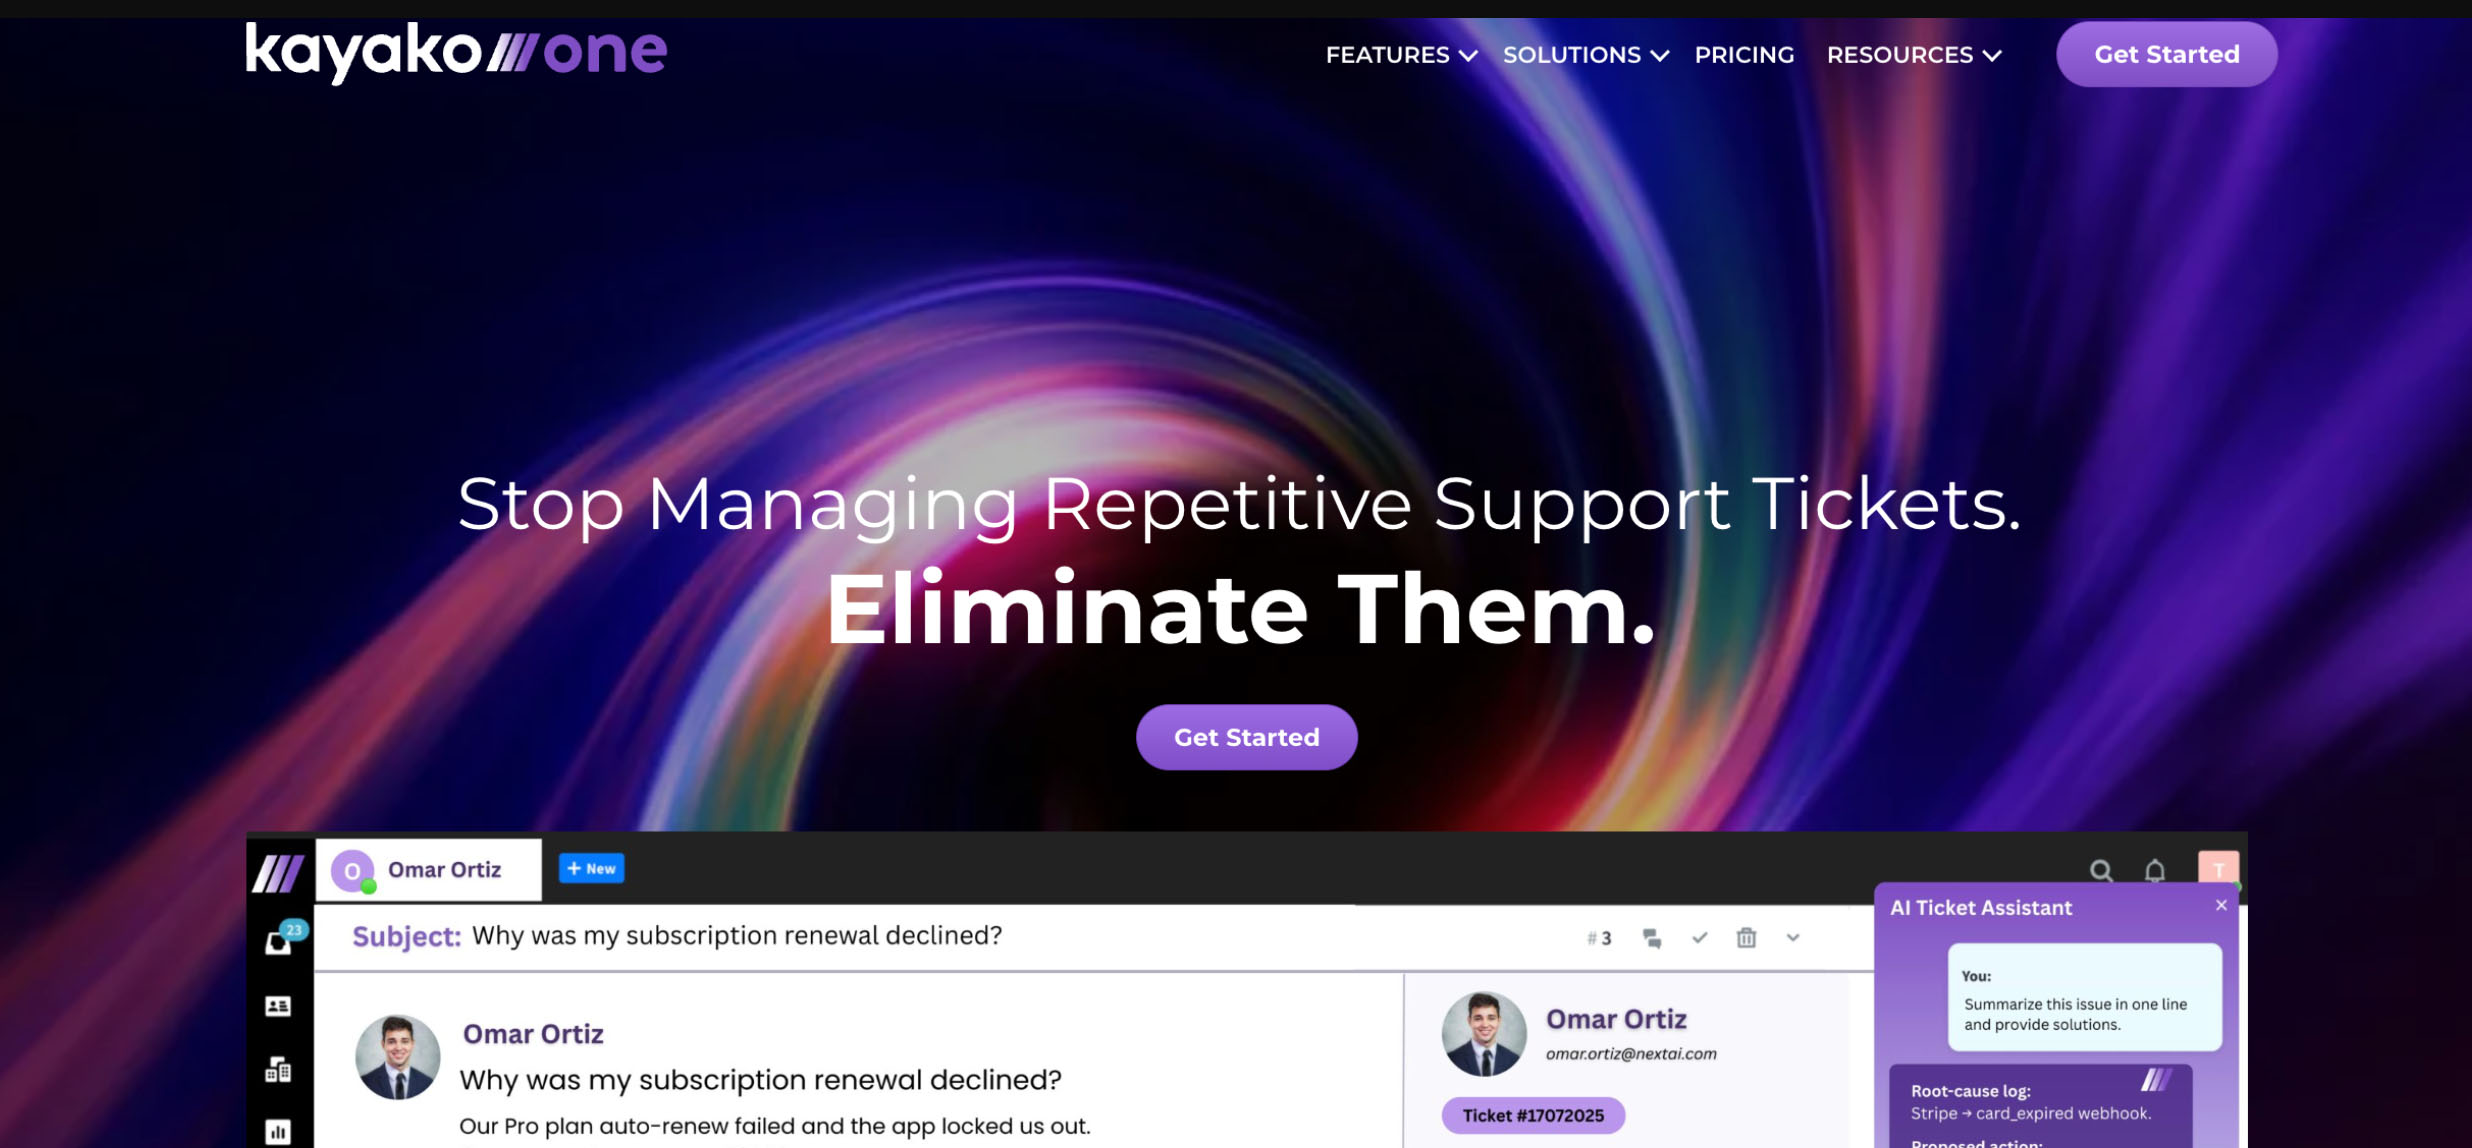
Kayako gives small and mid-sized teams a shared inbox that pulls in email, live chat, social media, and website messages into one view. Its “SingleView” technology connects every interaction to one customer thread. With workflow rules, triggers, and tags, you can assign, prioritize, and automate tickets.

As a help desk platform, live chat is integrated, so it’s easy to hand off conversations between agents using private notes, and you can even loop in outside vendors without paying for extra seats.

Pros:

  • Consolidates all channels into one customer thread.
  • Lets you add external collaborators without paying for extra agents.
  • Offers real-time live chat functionality for all plans.

⚠️ Cons:

  • User interface customization is limited.
  • Has fewer native integrations.

🏷️ Starter price: The Kayako One plan is $79/month 

11. Gorgias

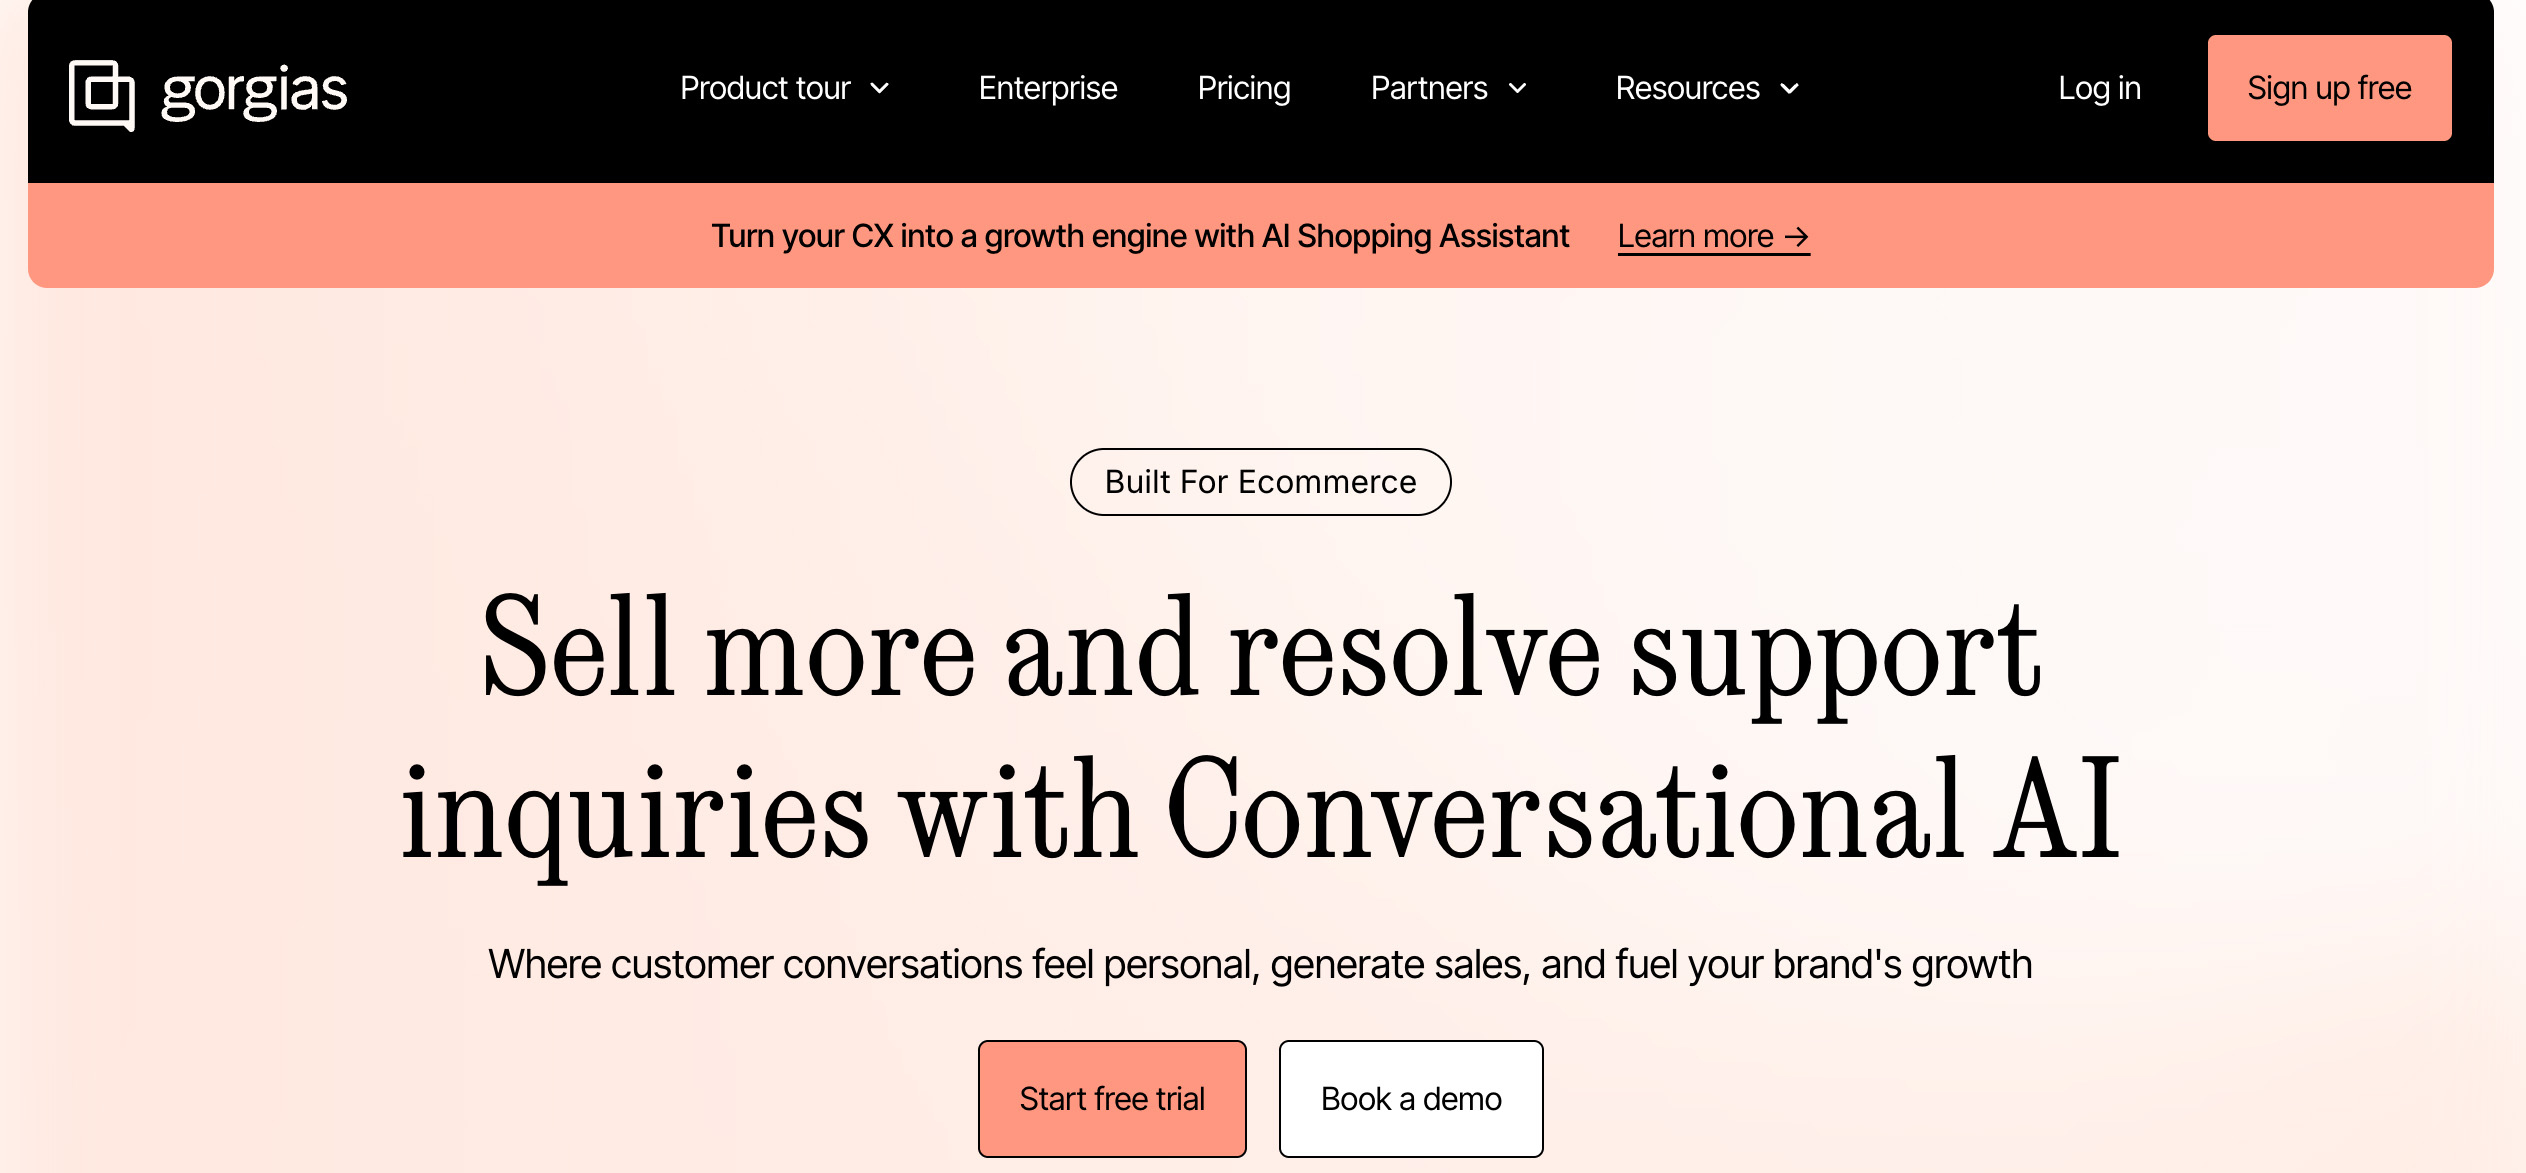
What makes Gorgias unique is its deep automation tailored for online stores. Agents can use Shopify-style macros to cancel orders, refund payments, and apply discounts directly within a conversation. It also auto-tags tickets by issue type (like “refund” or “tracking request”) and triggers replies using prebuilt flows.

With Gorgias’ conversational AI agent, it can suggest responses based on past answers and automate repetitive support tasks to speed things up.

Pros:

  • Shopify, BigCommerce, and Magento integrations let agents manage orders without leaving the inbox.
  • Automation rules can tag, assign, and respond to tickets without manual input.
  • Ad comment moderation and reply directly from the help desk.

⚠️ Cons:

  • Pricing can get expensive fast, especially for small teams managing high ticket volume.
  • As features are mostly centred around e-commerce support, this may not be ideal for other industries.

🏷️ Starter price: The Starter Plan, at $10/user/month, includes 50 tickets/month (no annual billing available).

12. HappyFox

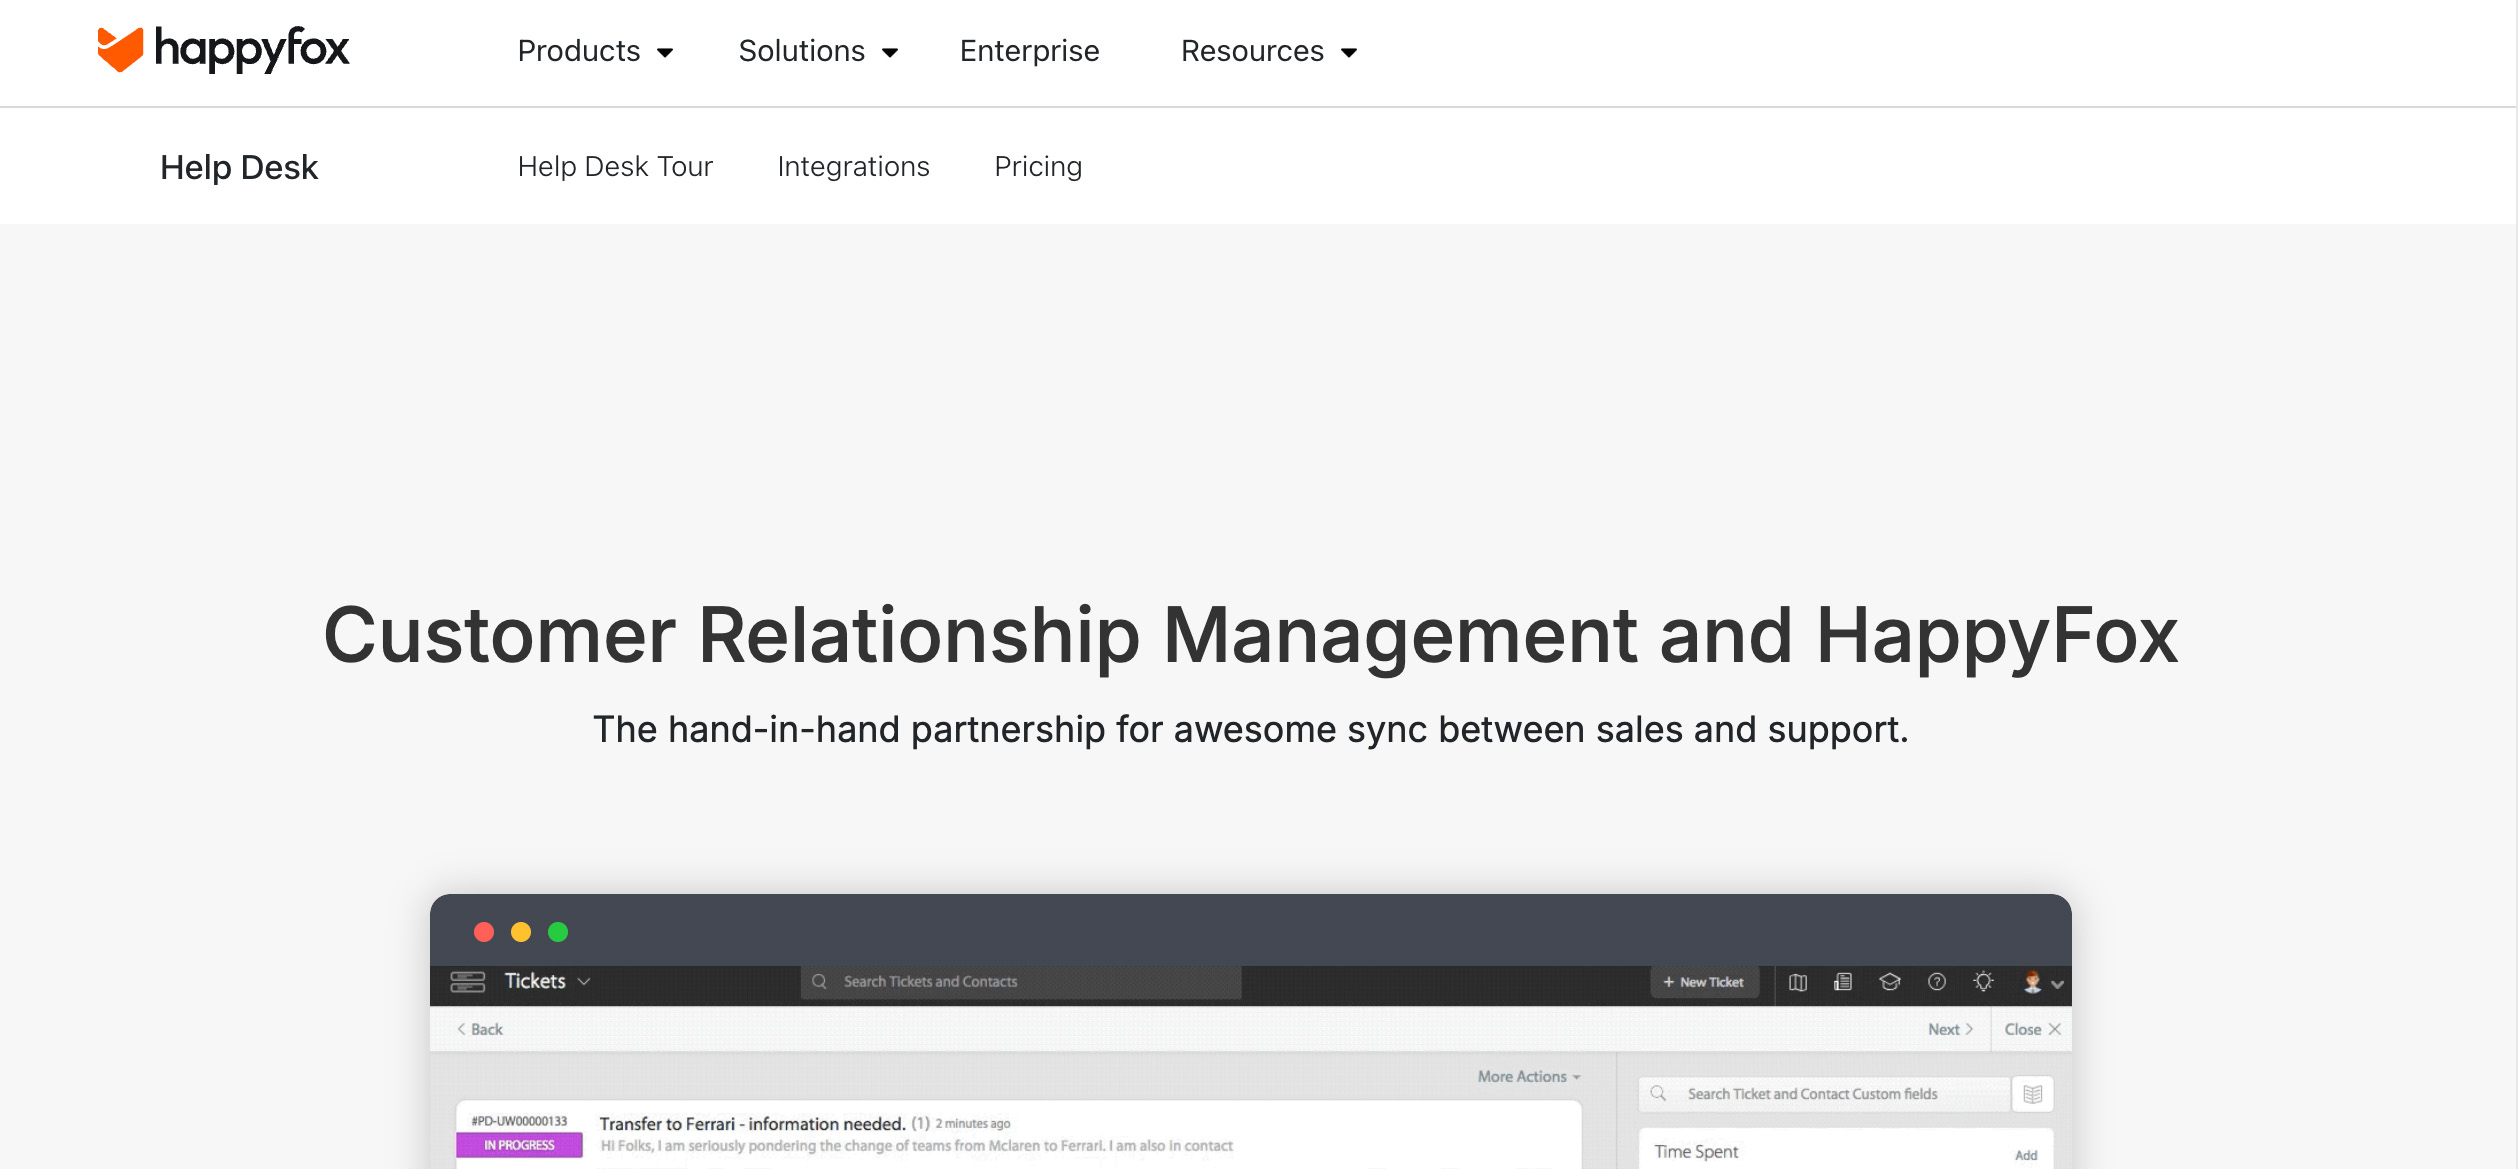
HappyFox is a ticketing-focused help desk platform with an easy-to-use interface. But don’t be fooled, as this is built for support-heavy teams that need deep customization and serious automation behind a shared inbox. Team members can automate assignments, escalations, and SLAs based on ticket type, customer priority, or team.

It’s a reliable pick for businesses that need heavy cross-department collaboration but want to avoid the price tag of more complex platforms.

Pros:

  • Streamlined ticketing with built-in automation.
  • Quick to set up, with flexible customization features.
  • SLA monitoring, auto-assignment, and prioritization rules keep workflows moving fast.

⚠️ Cons:

  • The mobile app lacks many desktop features.
  • Reporting tools may feel basic for teams needing deep custom insights.

🏷️ Starter price: Starts at $24/agent/month (unlimited tickets, annual billing).

13. Front

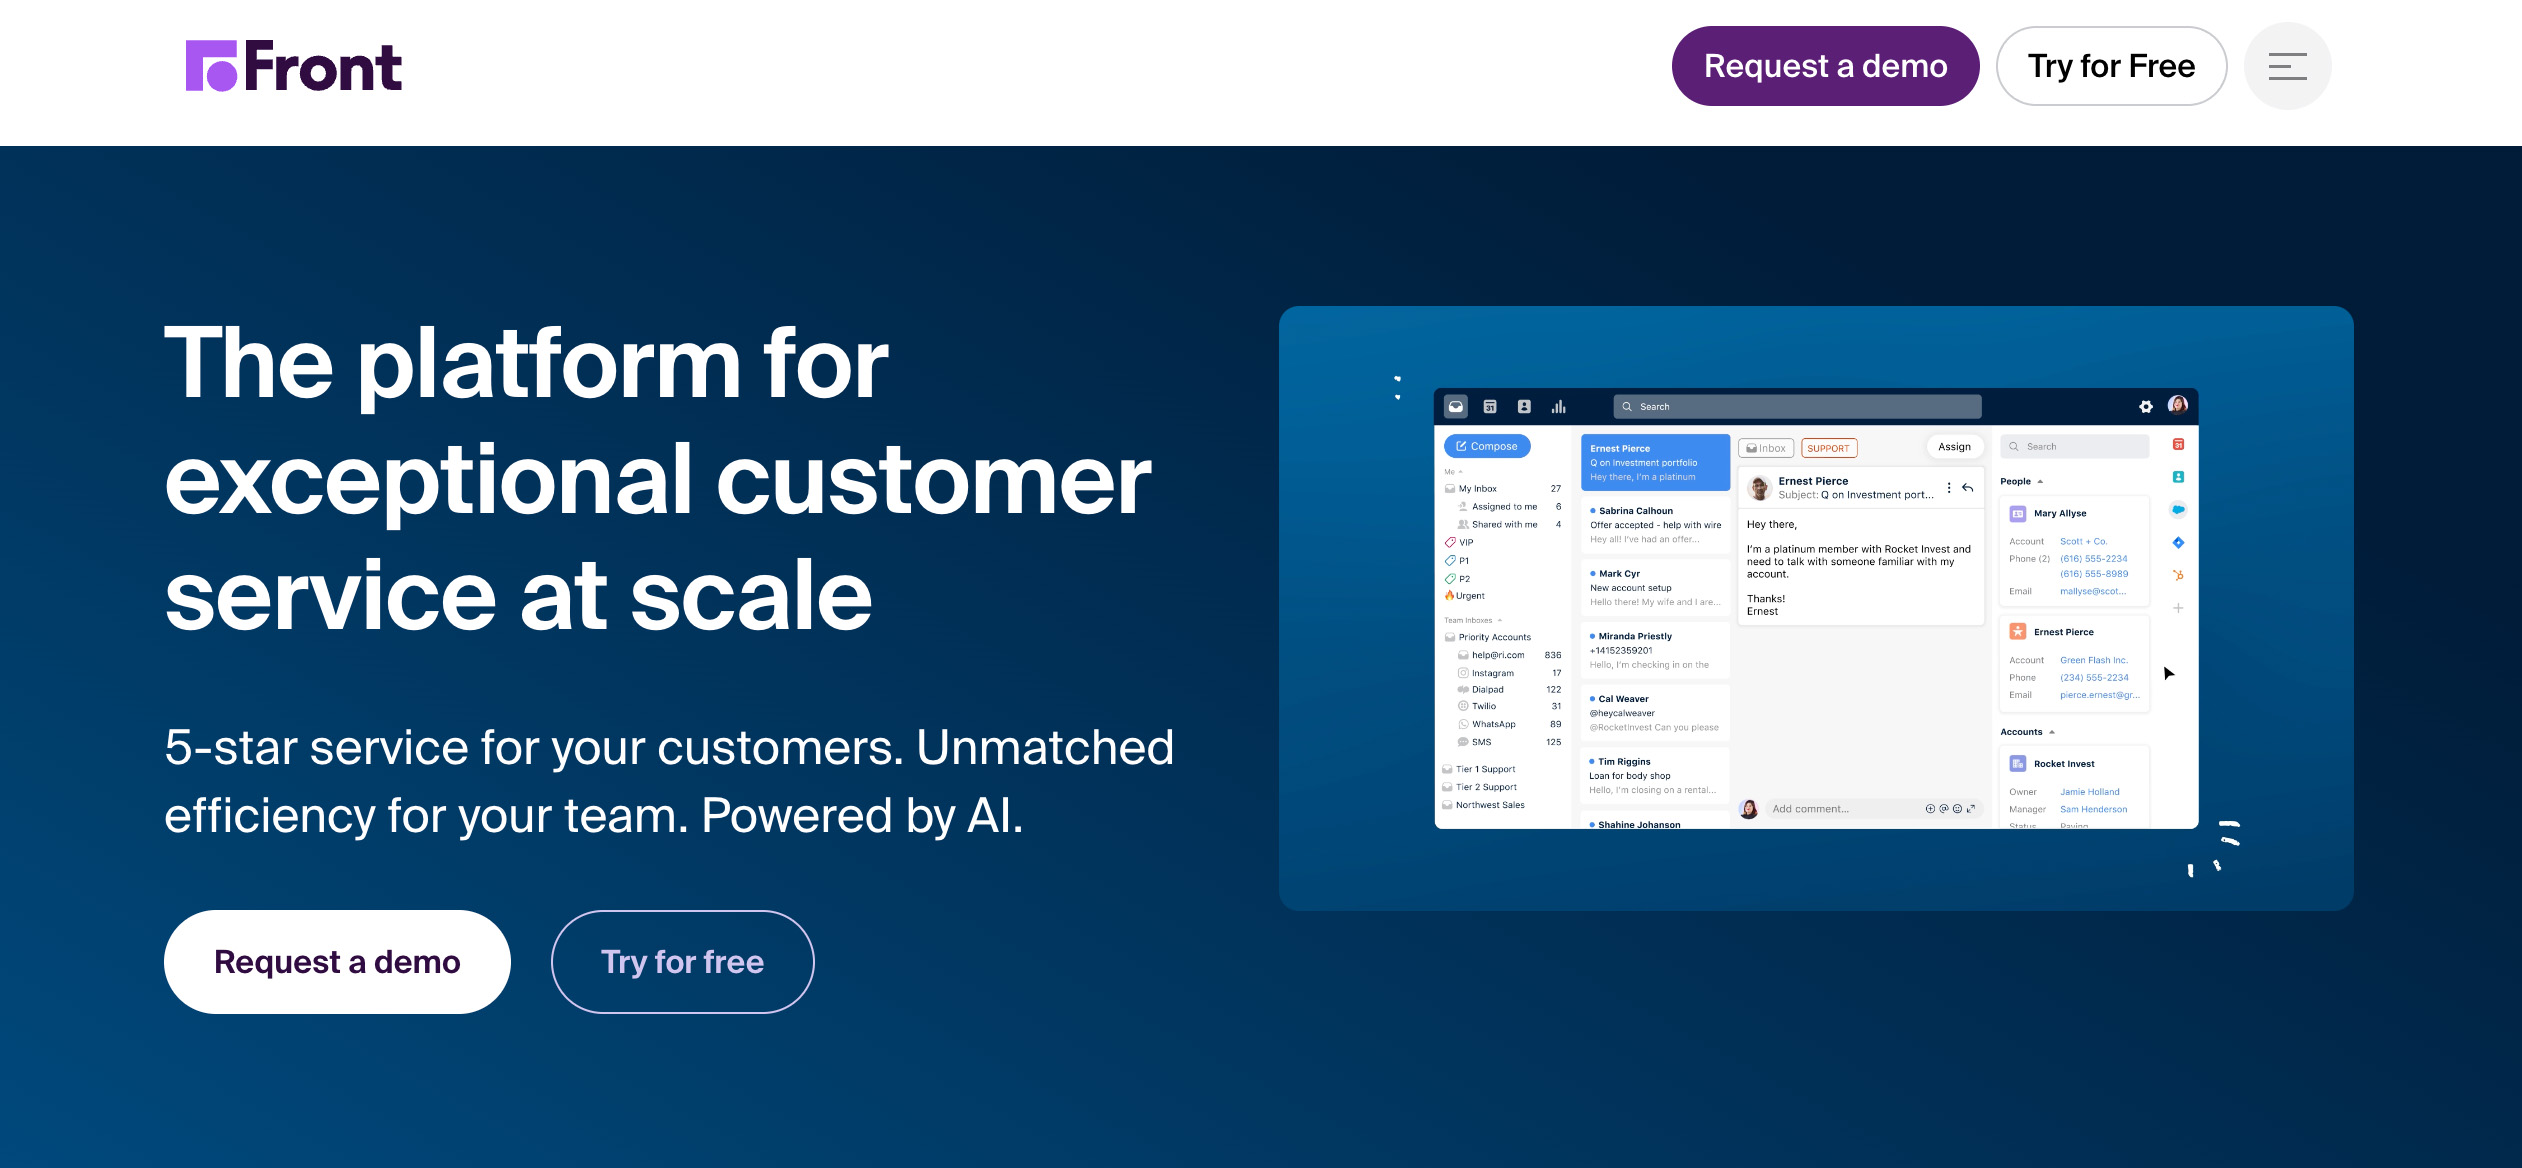
Looking for a help desk that doesn’t feel like a help desk? Front blends shared inbox simplicity with CRM-like features. So while teams become more efficient, they also offer a more personal way to respond to customers.

Front pulls in email, SMS, and social DMs into a single workspace so your team can reply, assign, and tag without toggling between tabs or forwarding messages. Agents can loop in teammates with internal comments and use routing rules to send the appropriate message to the right person based on sender, keywords, or priority.

Pros:

  • A lightweight, email-style interface that’s easy for new agents to use.
  • Internal notes keep collaboration clean.
  • Integrates with most popular CRMs, calendars, and project tools.

⚠️ Cons:

  • Doesn’t offer built-in full ticketing features like SLA tracking or escalation paths.
  • The mobile app is limited for agents managing high volumes.

🏷️ Starter price: Offers a Starter plan for $25/seat/month (up to 10 seats).

14. Gladly

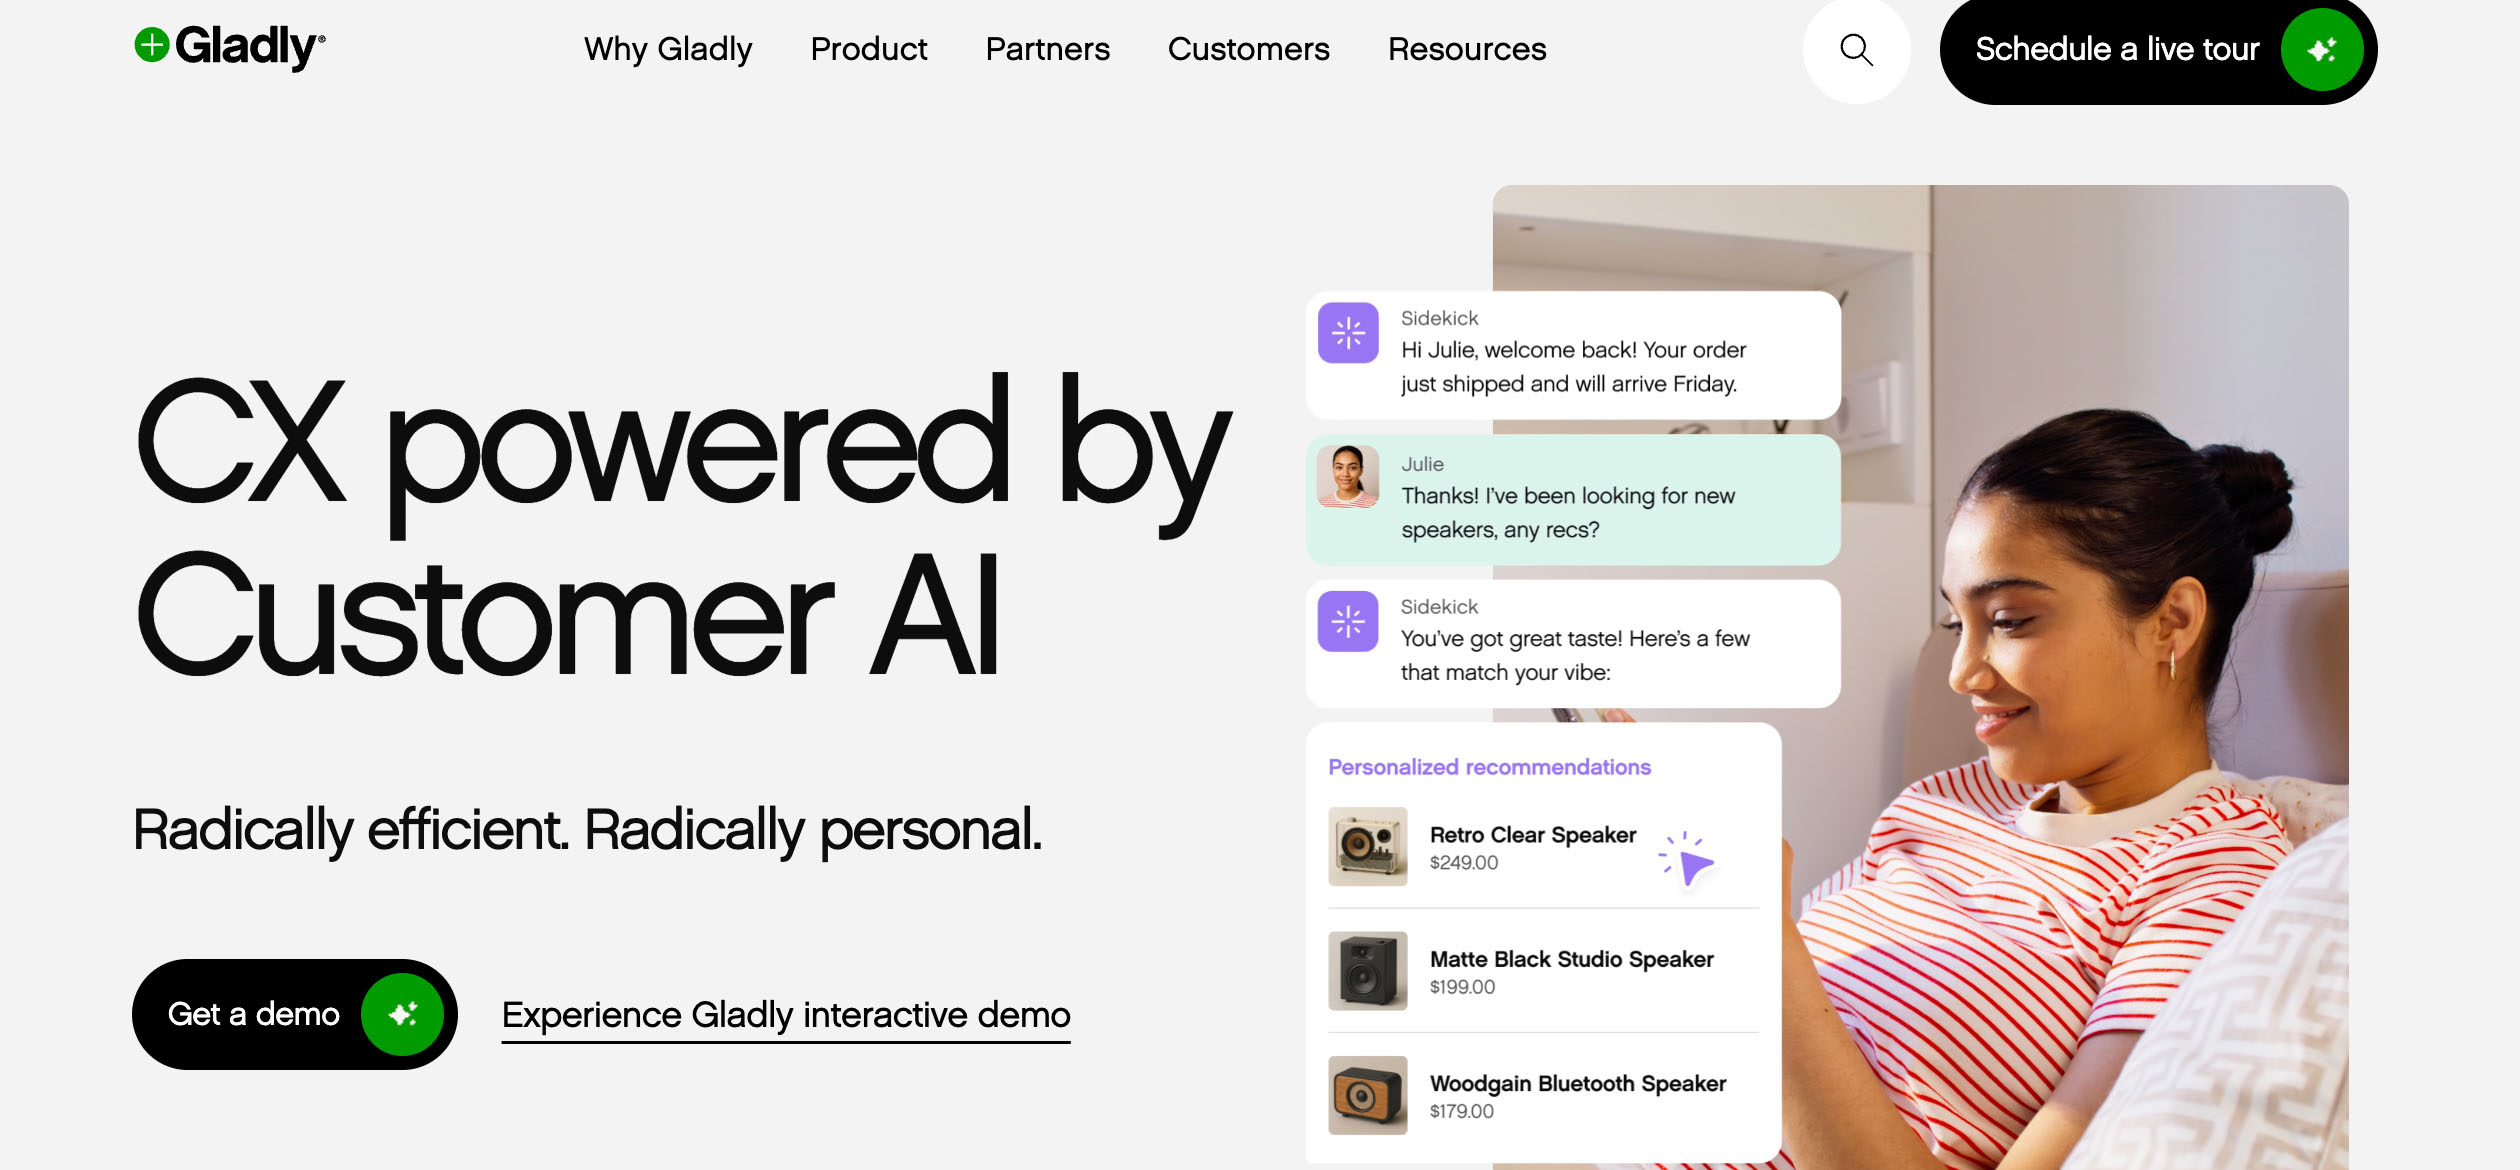
Gladly flips the script on traditional ticket-based systems by putting the customer at the center. Instead of fragmented tickets, it presents a continuous conversation history across channels like SMS, email, voice, chat, and social platforms.

The software also doubles as a contact center, combining CRM-lite features like customer profiles with call routing, Interactive Voice Response (IVR), and performance dashboards. Built-in automation is available, but human-first service stays front and center.

Pros:

  • Single customer timeline instead of siloed tickets.
  • Built-in voice support with IVR.
  • Task-based routing ensures the right agent picks up every conversation.

⚠️ Cons:

  • Limited flexibility for B2B workflows or complex backend systems.
  • Pricing isn’t public and typically skews toward enterprise.

🏷️ Starter price: Gladly does not list pricing publicly. Plans are typically quoted based on team size and feature needs. 

15. Helpjuice

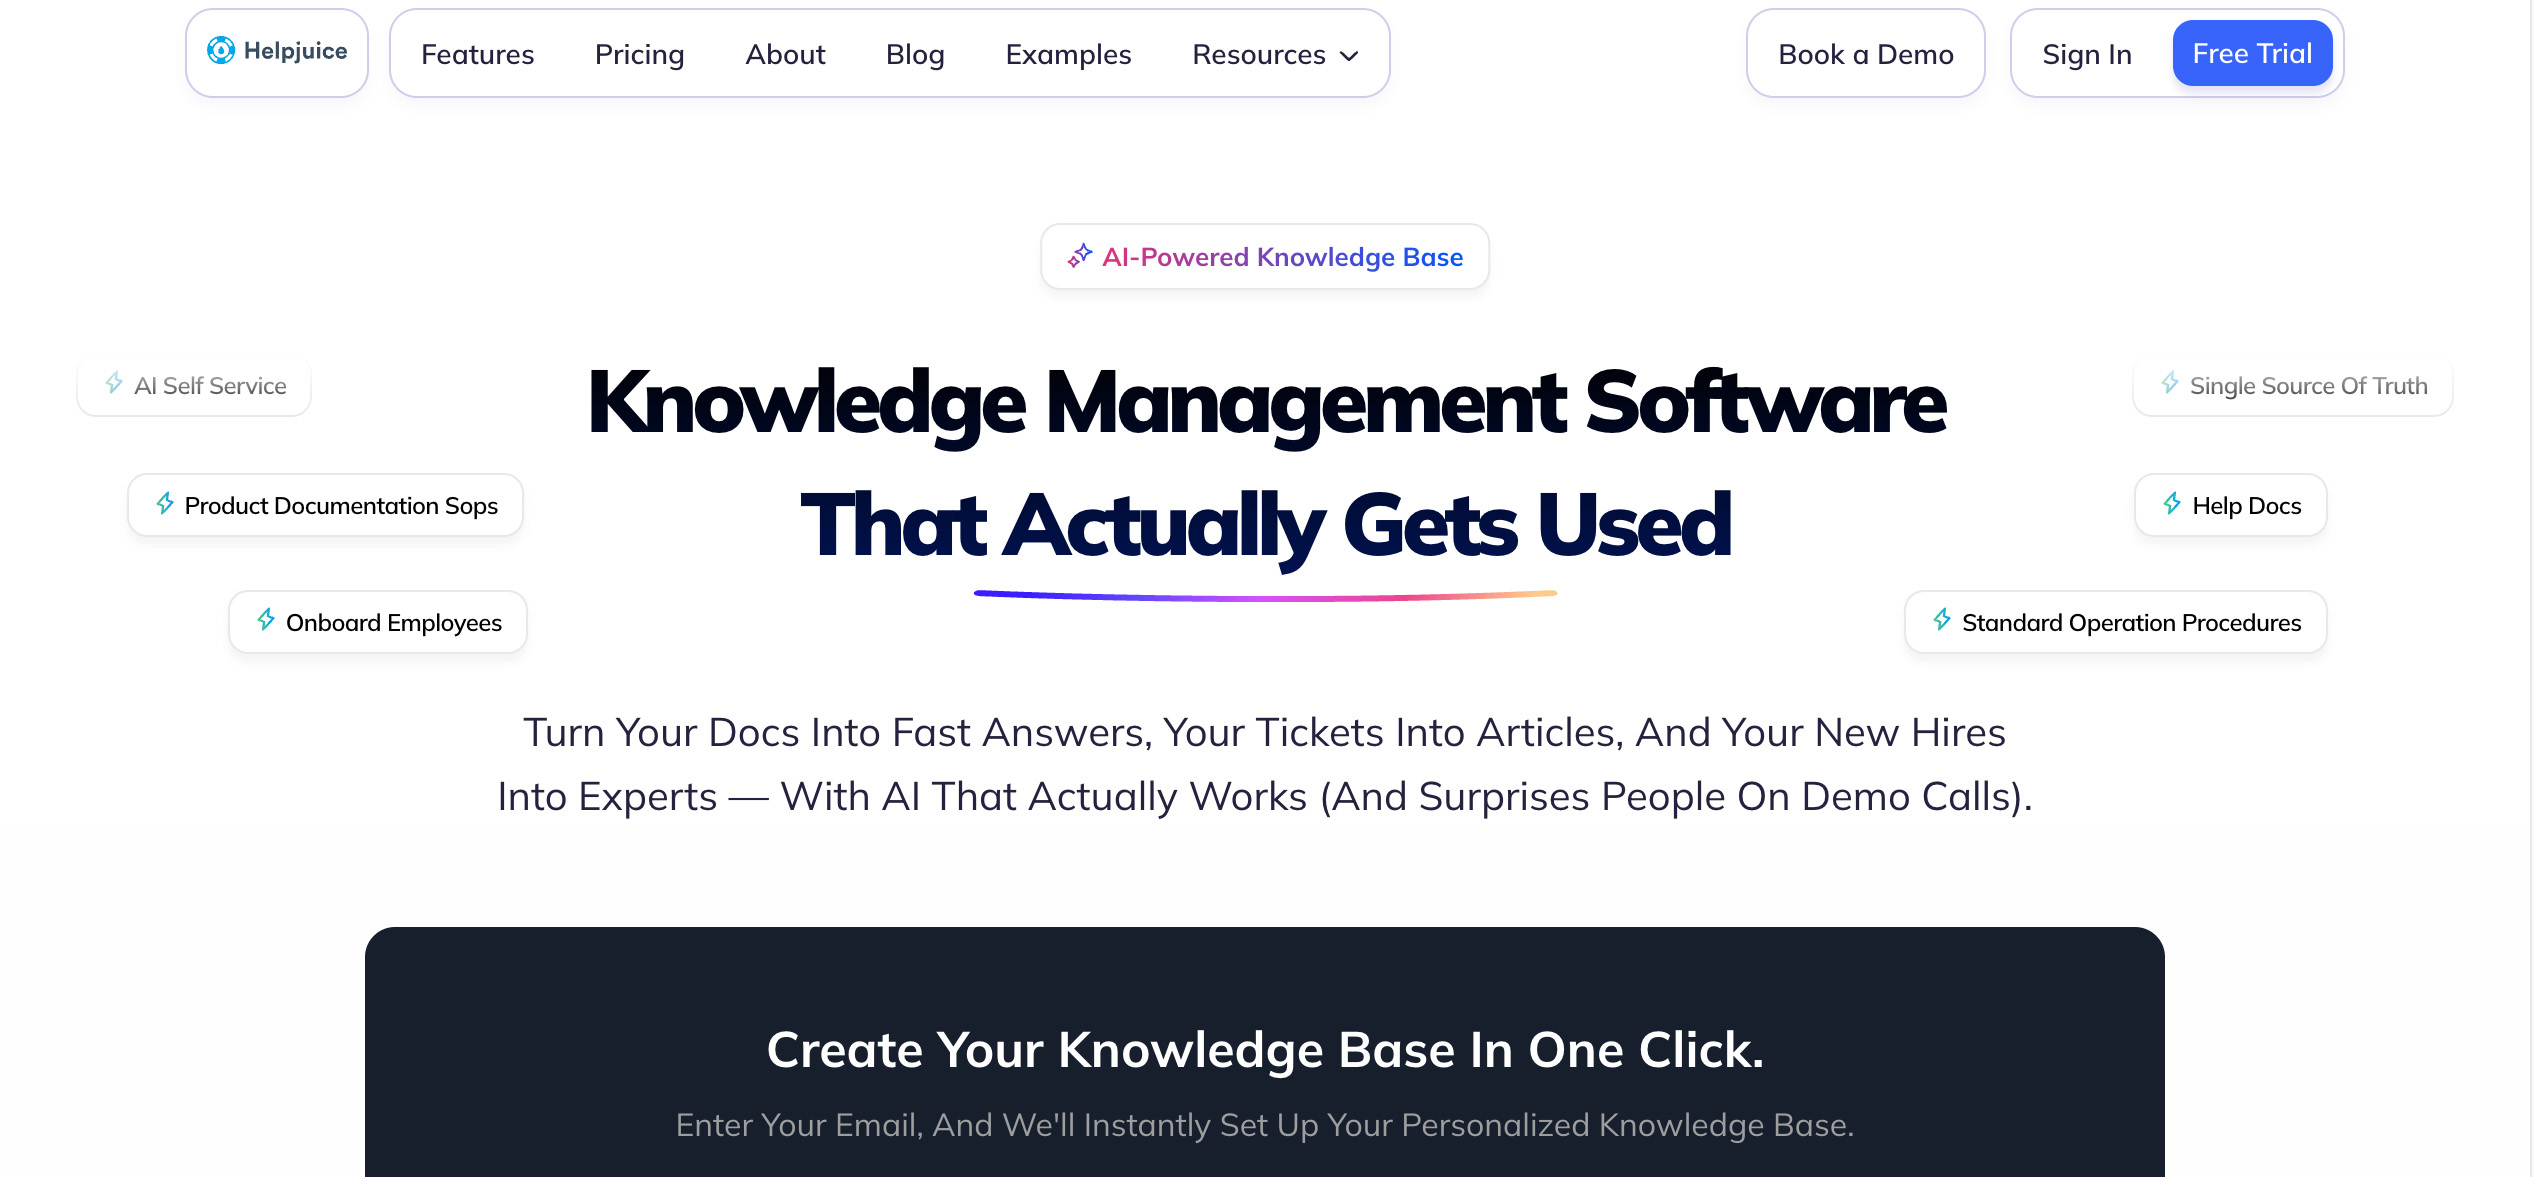
Helpjuice is a standalone knowledge base platform designed to help businesses centralize, structure, and scale internal or customer-facing documentation. Unlike other CRMs or help desks that tack on basic article features, Helpjuice focuses on making knowledge creation and search fast, flexible, and useful.

You can fully brand your knowledge base without coding, and track how each article performs across time, search terms, and user behaviour. This insight helps teams regularly improve articles based on actual usage.

Pros:

  • Detailed article analytics show who viewed what, for how long, and what they searched.
  • Version history and collaborative editing make it easy to update documentation across teams.
  • Highly customizable themes that let you match your knowledge base to your brand.

⚠️ Cons:

  • Lacks ticketing or live chat, so it must be used alongside other tools.
  • Pricing might be high for smaller teams. It’s geared toward larger groups and doesn’t bundle other support tools.

🏷️ Starter price: The starting Knowledge Base plan is $249/month for up to 30 users.

Customize workflows and watch your team thrive.

Cost reality check: What you’ll pay as you scale

Customer service portal solutions come in all shapes and sizes, and so do their pricing models. What looks affordable upfront can snowball fast as your team grows or undergoes change. Here’s what to look out for:

Per-agent vs. per-contact models

Most platforms use one of two approaches:

  • Per-agent pricing: With this model, businesses are charged for each team member who has access to the system. This is common in tools built for internal teams. It’s predictable, but this can get expensive as your support team scales. It’s best for companies with high-touch service or dedicated support reps.
  • Per-contact or usage-based pricing: In this model, businesses are billed based on how many customers they serve, the volume of tickets, or other specific actions. It works well for self-service or bot-driven teams where a few agents can support thousands of users.

Add-ons that add up

Beyond base plans, expect more charges for the following:

  • Bots or AI assistants: Handle routine customer conversations, but some take it up a notch by using natural language processing (NLP) for interactions to feel more conversational.
  • Analytics dashboards or reporting modules: Most platforms include basic reports, but advanced dashboards with custom filters, exports, or historical data may require higher tiers or add-ons.
  • Third-party integrations: Some platforms include popular integrations like CRM and project management tools by default, while others lock them behind premium plans or offer them individually.
  • High-volume API access: APIs (application programming interfaces) let developers push or pull data between your help desk/customer management software and other systems. Many platforms charge for additional volume or throttle access on lower plans.

Example monthly totals

We’re providing a general ballpark to help you crunch numbers as your team grows. These rough estimates are based on average rates of $20–$40/agent/month, drawn from the major help desk and customer management software providers listed above.

Here’s a rough estimate of what your base subscription could look like:

Team sizeMonthly cost
5 agents$100–$200
20 agents$400–$800
50 agents$1,000–$2,000

Add-ons can tack on another 20%–50%, especially if you enable advanced bots or analytics features.

WATCH NOW: Learn how a shipping container company handled a massive surge in demand by using Method CRM.

Deep dive: Method CRM vs. Zendesk

Both Method CRM and Zendesk are strong platforms, but they serve very different needs:

  • Method CRM is designed for small businesses that rely on QuickBooks. It offers deep customization, real-time two-way accounting sync, and combines CRM and customer support into one system.
  • Zendesk is built for high-volume customer support. Its strength lies in omnichannel ticketing and a large marketplace of third-party apps. However, with Zendesk Sell being phased out, the platform will no longer offer a native sales CRM. This leaves support and CRM disconnected unless you invest in third-party tools.

Here’s a side-by-side look at how these two CRM platforms compare.

FeatureMethod CRMZendesk
Ticketing + CRM in one screen 💻Unified interface that blends ticket tracking, contact history, and QuickBooks data in a single view.Separate tools for support (Zendesk Support) ; no native unified screen; sales CRM (Zendesk Sell) is being retired
QuickBooks sync 🔄Real-time two-way sync with QuickBooks Online and Desktop.No native QuickBooks integration
Third-party connectors 🔗Native integrations available; public API and Zapier access for over 3,000 third-party connections1,200+ integrations in the Zendesk Marketplace; many key features like AI, workforce management, or data privacy are available as paid add-ons
Customization 🎨Deep customization via drag-and-drop builder; supports custom fields, portals, and logic-based workflows Custom fields are available; advanced workflow customization is locked behind higher tiers
Pricing 💰Contact Management: $27; CRM Pro: $45; CRM Enterprise: $73Support Team: $19; Suite Team: $55; Suite Growth: $89; Suite Professional: $115

FAQs when evaluating Zendesk alternatives

Are there free tiers?

Some Zendesk alternatives, like Zoho Desk and Freshdesk, offer limited free plans. These are usually capped by users, tickets, or features. They’re fine for early testing or very small teams.

There are also tools like Method that take a different approach via a free trial. This gives users access to full functionality (rather than very limiting ones), making it easier to evaluate how the system fits real workflows before committing.

How difficult is the learning curve for each tool?

The learning curve for using customer management or help desk software varies. Tools built for small businesses tend to prioritize ease of use with drag-and-drop builders and clean interfaces. However, options with deeper customization and automation may take longer to set up. Look for platforms that include onboarding or guided setup.

Can I migrate historical CSAT & SLA data?

Not all platforms support full migration out of the box. Some allow basic ticket and contact imports but exclude metrics like CSAT, SLA, and audit trails. You may need to work with a support team or API to bring over detailed history.

What level of customer support is standard?

Free or entry-level plans often come with email-only or chatbot support. For faster responses or onboarding help with extensive customization, you’ll usually need to be on a higher tier. Some alternatives offer phone, live chat, or even 1-on-1 setup sessions at no extra cost, which can be a huge win for small teams without dedicated IT.

Customize workflows and watch your team thrive.

Which Zendesk alternative wins?

No business runs the same way, so the best Zendesk alternative depends on what matters most to you.

As you compare, consider:

  • How cost-effective is the tool for your current and future team size?
  • Does the customer support software cover your core needs, like customer engagement, ticketing, and reporting, without locking the essentials behind expensive upgrades?
  • Can it grow with you and optimize workflows across support, sales, or ops?
  • Will your team actually use it, or spend weeks (even months) climbing a steep learning curve?

Finally, don’t just look at features. Consider how the tool fits into your real life.

If QuickBooks is central to how you run your business, it makes sense to choose tools that connect with it natively. Method is a strong pick for full visibility into customer activity, unrivalled QuickBooks sync, and software that can be customized to your processes.

Try Method for yourself — book a demo and explore the difference.

bitrix24 alternative

Bitrix24 alternative: 6 options to consider in 2026

Explore the best Bitrix24 alternatives for CRM, project management, automation, and integrations. Compare pricing, features, and find the right all‑in‑one tool for your team.

Bitrix24 alternative: 6 options to consider in 2026 Read More »

Looking for a Bitrix24 alternative that best suits your team and business needs?

Bitrix24 offers many solutions in one platform, from CRM and project management to internal communication, but for some users, it may not be the best fit. 

As small businesses grow and their needs evolve, some find that Bitrix24’s free plan no longer aligns with their priorities. While the platform offers a broad set of tools, integrations may be limited depending on your setup, and the mobile app doesn’t always provide the speed or ease of use that fast-moving teams expect. Over time, these factors can affect the efficiency of daily workflows.

At Method CRM, we’ve been supporting QuickBooks-based businesses since 2010. Method is a top-rated customer management software, loved by business owners for its instant, two-way QuickBooks sync, no-code customizable workflows, and sales process automation. In this article, we’ll explore what to consider when evaluating a new CRM, and how Method can add value to your growing business by eliminating manual processes and giving you a solution that fits the way you work. 👩🏻‍💻📓✍🏻

Ditch the spreadsheets — automate your workflows today.

What is Bitrix24?

Bitrix24 is an all-in-one platform for small and medium-sized businesses. Its tools span:

  • CRM software ⚙️
  • Project management 🧑🏻‍💻
  • Document sharing 📄
  • Marketing automation 💡
  • Internal communication (including chats, video calls, and feeds) 📢
  • Team management 👥👥
  • Customer relationship management 🤝
  • Website builder and contact forms 💻
  • HR and time-tracking features ⏱️

It also offers task and workflow automation, integrations, and a mobile app. While Bitrix24 offers a wide range of tools and advanced features on paper, some users report that the overall user experience can feel complex, and not every tool meets the depth or flexibility their teams require in practice.

Why businesses look for a Bitrix24 alternative

Steep learning curve

Bitrix24 packs in a massive feature list (offering tools for CRM, project management, file sharing, HR, and more), but for some teams, its all-in-one approach may not be the right fit. 

For businesses that don’t require all these features, this can result in a fairly steep learning curve that can slow down onboarding for sales teams and can pose challenges for team members looking for a simpler solution for project planning and resource management.

Integration gaps with modern SaaS stacks

Some users report challenges with certain Bitrix24 integration capabilities. GetApp, an independent review platform, illustrates how connections with popular tools like Slack, Microsoft Teams, or Dropbox may not always deliver the expected interoperability. 

Bitrix24 does offer built-in collaboration features, yet some businesses find it less adaptable to their broader SaaS environment when compared to newer CRMs such as HubSpot or more flexible open-source platforms.

Free plan limitations

While Bitrix24 offers a free plan, many features are locked behind premium tiers. As your business scales, you’ll likely hit upgrade walls for things like storage, automation rules, or user permissions. These features are essential to optimize the cloud-based collaboration tools that support teamwork across project management software.

Mobile UX and support

Some users mention that Bitrix24’s mobile app can feel somewhat unwieldy when managing tasks, reviewing Gantt charts, or accessing CRM data on the go. 

Further, in terms of customer support, feedback on GetApp indicates room for improvement, with users noting delays or limited responsiveness.

Ditch the spreadsheets — automate your workflows today.

What makes a good Bitrix24 alternative?

When evaluating Bitrix24 alternatives, here are the features and criteria that matter most.

Real-time collaboration and automation 🔄

A top Bitrix24 alternative should offer real-time syncing across teams and departments. If you update a client file or sales status, everyone should see the change instantly. Bonus points if it includes powerful automation tools to cut out repetitive tasks.

Clean user interface and ease of use

A good Bitrix24 alternative should be intuitive with drag-and-drop features, custom templates, and minimal clicks to get to what you need.

Reliable integrations 🔗

If you use QuickBooks, Gmail, or Outlook, your CRM should too. Look for integrations that don’t break easily and keep your business processes streamlined.

Customization and scalability 📈

As your business grows, your tools should grow with you. A good alternative should allow for custom workflows, permissions, and data fields without needing to hire a developer.

Affordable pricing 💲

Bitrix24’s free plan is generous, but its paid tiers can get expensive fast, especially if you want automation, integrations, or storage. Look for platforms that offer transparent, scalable pricing based on your actual usage.

Best Bitrix24 alternatives in 2026

Let’s explore the top platforms that stand out as Bitrix24 alternatives. We’ll break them down by use case, pricing, integrations, and standout features.

1. Method CRM: Best for QuickBooks users

Method CRM - Alternative to NetSuite - Method Blog

If your business runs on QuickBooks and strong customer relationships, Method CRM is a perfect fit.

Why Method CRM is a great alternative

Method CRM is built for QuickBooks-based businesses, offering an instant two-way sync, workflow automation, and no-code customizations. It gives you full control over your sales pipeline, lets you automate follow-ups, and provides real-time visibility into your customer data and day-to-day operations. 

With a drag-and-drop editor, pre-built templates, and deep automation tools, Method CRM makes it easy to streamline your workflow without sacrificing flexibility.

Method’s accounting workflow syncs customer, invoice, and payment data with QuickBooks, offering seamless front-office and back-office integration.

Standout features:

Pricing:

Starts at $27 per user/month with a free trial.

Best for:

QuickBooks users and small teams looking for customization without complexity.

2. ClickUp: Best for project-heavy teams

ClickUp is a strong Bitrix24 alternative for teams that prioritize task and project management over CRM features.

Why ClickUp stands out

ClickUp’s strength lies in its flexibility. You can customize task views, build automation workflows, and integrate time tracking. While it does offer basic CRM functionality, it’s best used for managing internal projects, team goals, and cross-department workflows.

Key features:

  • Visual project boards (Gantt, kanban, timelines)
  • Task automation and templates
  • Team dashboards and goal tracking
  • Time tracking and workload planning

Pricing:

Free plan available. Paid plans start at $10 per user/month (30% off with a yearly plan).

Best for:

Marketing teams, creative agencies, and product teams.

3. Trello: Best for simplicity and visual task management

If you want something simpler and don’t need a full CRM, Trello is an easy win.

Why Trello is a good choice

Trello is a kanban-style task manager known for its ease of use. You can create boards, lists, and cards for different teams and projects. While it lacks automation and deep analytics, it’s perfect for lightweight task tracking.

Key features:

  • Visual drag-and-drop interface.
  • Trello Power-Ups for integrations like Google Drive, Slack, and more.
  • Checklists, labels, deadlines, and custom fields.

Pricing:

Free for up to 10 collaborators per workspace. Paid plans start at $5 per user/month on an annual plan ($6 if billed monthly).

Best for:

Startups, educators, and teams managing simple projects.

4. Zoho CRM: Best for growing teams with varied business needs

Zoho CRM Alternative Screenshot

Zoho offers a full suite of tools, including CRM, project management, invoicing, and marketing automation.

Why Zoho CRM works

Zoho’s ecosystem is vast. Its CRM product includes lead scoring, sales forecasting, workflows, and reporting. Zoho also integrates with a wide range of third-party tools and includes mobile access.

Key features:

  • Workflow automation and email marketing.
  • AI-driven lead scoring.
  • Project and pipeline management.
  • Team dashboards and detailed reports.

Pricing:

Free plan for 3 users. Paid plans start at $14 per user/month when billed annually.

Best for:

Scaling businesses that need both CRM and project management functionality.

5. Monday.com: Best for team collaboration and visual dashboards

Monday CRM Alternative

Monday.com is a colorful, customizable workspace that lets teams collaborate on projects, track client interactions, and manage marketing campaigns—all in one place.

Why Monday.com makes the list

It’s user-friendly and offers a pleasant visual experience. Its interface is based on customizable boards, and it works well across departments like sales, marketing, and operations.

Key features:

  • Board-based project tracking
  • Automations and notifications
  • Marketing and CRM templates
  • Strong collaboration and team commenting

Pricing:

Starts at $9 per seat/month when billed annually. Free tier available for up to 2 seats.

Best for:

Teams with a mix of CRM and project tracking needs.

6. Salesforce CRM: Best for enterprise CRM and automation

Pipedrive CRM alternative screenshot

Salesforce is the heavyweight of CRM software. It’s a great Bitrix24 alternative for larger businesses with complex customer journeys.

Why Salesforce stands out

Salesforce excels in automation, reporting, and customer lifecycle management. It also offers integrations, apps, and robust analytics. However, it comes with a higher learning curve and pricing tier, making it best for established teams.

Key features:

  • Deep customization and third-party app store.
  • Real-time customer data tracking.
  • Advanced automation tools.
  • Strong lead nurturing and follow-up tools.

Pricing:

Starts at $25 per user/month but scales based on add-ons.

Best for:

Enterprises and scaling teams with technical support in-house.

Ditch the spreadsheets — automate your workflows today.

Final verdict: Which Bitrix24 alternative is best?

Each Bitrix24 alternative brings something different to the table:

  • Choose Method CRM if you want deep QuickBooks integration, automated follow-ups, and a CRM built for service-based businesses.
  • Pick ClickUp if project tracking and team goals are your top priorities.
  • Go with Trello if you just need a simple, visual task manager.
  • Try Zoho if you’re a growing team with multiple departments and want both CRM and project tools.
  • Use Monday.com for visually driven workflows and team collaboration.
  • Opt for Salesforce if you’re an enterprise that needs robust CRM automation and customization.

Ultimately, your decision depends on your team’s size, your tech stack, and the types of tools you’ll actually use. If your priority is automation, real-time data syncing, and user-friendly custom workflows, Method CRM is the standout.

WATCH: Learn how a shipping container company doubled their revenue in 3 years with Method CRM.

Ready to upgrade from Bitrix24?

If you’re looking for a more focused experience, Method CRM provides the tools you need to grow your business. With powerful QuickBooks integration, customizable automation, and dedicated customer support, it’s a reliable alternative that’s built for real-world small businesses.

Ditch the spreadsheets — automate your workflows today.

Frequently asked questions

Is Bitrix24 a CRM or project management tool?

Bitrix24 offers a unified platform that combines CRM and project management functions.

What’s the best CRM for QuickBooks?

Method CRM is widely considered the best CRM for QuickBooks. It offers two-way syncing of invoices, payments, customer data, and estimates in real time.

Can I use Bitrix24 for customer follow-ups?

Yes, but the automation and reminder systems are limited on the free plan. For more robust follow-up tools, Method CRM or Zoho offer stronger options.

Does Method CRM offer project management features?

Yes, Method CRM includes intuitive project tracking features that are well-suited for service-based workflows. While it takes a more streamlined approach than specialized tools like ClickUp or Bitrix24, its seamless integration with contacts, estimates, and invoicing makes it a practical choice for businesses that want to manage projects and client relationships in one place.

What’s the best Bitrix24 alternative for small businesses?

If you’re looking for something simple, affordable, and powerful, Method CRM or Trello are great picks depending on your needs

Best CRM for project management

Best CRM for project management in 2026

Looking for the best CRM for project management? See how leading tools connect tasks, timelines, and sales data, plus a QuickBooks-ready option you’ll love.

Best CRM for project management in 2026 Read More »

You finally closed a deal—great! But now you’re stuck jumping between apps just to get organized. If it takes hours just to manage your contacts and assign tasks, then something’s not working the way it should.

Poor management can lead to unrealistic expectations and unmonitored project timelines, which are a few prime reasons why projects fail. In the end, it all costs time, money, and customer trust.

A CRM built for project management can help transform these inefficient processes. Project management (PM) is all about keeping your team aligned, deliverables on track, and project scope managed efficiently. When combined with customer relationship management, you get full visibility into the work—and the people it’s for.

Here at Method CRM, we’ve been supporting QuickBooks-based businesses for more than 14 years. Method is a top-rated CRM for project management, loved by business owners for its real-time, two-way QuickBooks sync, no-code customizable workflows, and end-to-end sales automation. In this article, we will break down how CRM and PM software differ, what to look for in a CRM-PM platform, a comparison of the best options out now, and how Method can be an asset to your growing business.

Method CRM lets you run your business, your way.

CRM vs. project management software: What’s the difference?

Using the wrong tool can lead to further disorganization and headaches down the line. That’s why it pays to know what CRM systems and PM software actually do before committing to a solution that works best for your business.

Here’s how they differ:

  • Customer relationship management system: A centralized hub for managing all interactions with current and potential customers. It stores, tracks, and organizes customer and lead data, while offering full visibility into your sales pipeline, call activity, and email history.
  • Project management software: A tool for managing internal workflows and keeping projects on track. Easily track project progress and see tasks, due dates, and project roles.

Can’t decide between CRM or project management software? You’ll have a better idea as to which solution best suits your needs when you break down what your team does day to day.

What does your team spend more time on?

1. Sales, lead follow-ups, and client onboarding?

If you’re sales-heavy → You’ll need CRM software that can handle contact tracking and pipeline management, while ideally also offering automation capabilities.

2. Service delivery, task deadlines, and internal coordination?

If you’re delivery-heavy → You’ll need project management tools for task assignment, timelines, dashboards, and project progress tracking.

3. Do they handle both?

If you’re a hybrid team → You’ll need to merge CRM and project management functionalities with a CRM-PM platform.

While some CRM tools can handle light project management tasks (and vice versa), if your team has needs that require incorporating both, then it’s time to consider a tool that’s as versatile as you.

5 signs you need a CRM-PM platform

If your team handles sales and delivery-heavy tasks and your current software can’t seem to keep up, you may find these signs all too familiar:

  1. Disconnected customer data and workflows: Your customer data lives in your CRM, but your team’s actual work happens somewhere else. Without unified workflows, the smallest mistakes can snowball. A CRM-PM setup helps coordinate both areas of work.
  2. Re-keying project data into finance tools: Still copying and pasting info between your tools for invoicing, credit card payments, and project summaries? An integrated platform syncs project data with your billing system so handoffs to accounting won’t get messy.
  3. No real-time dashboards for team members: Do your team members find status updates hard to see? That could cause costly delays. A CRM-PM solution offers dashboards and collaboration tools to quickly record and track who’s doing what and where things stand, so no one misses out on key information.
  4. Work silos between sales and delivery: If as soon as you close a deal, your fulfillment team scrambles to catch up on the details, it’s a sign of disconnect between teams. An effective platform can break down these silos by giving both sides access to the same information through shared workspaces.
  5. Missing timelines and unclear ownership: If deadlines continue to slip and no one knows who’s responsible, your software is likely contributing to the chaos. With a CRM-PM, ownership, due dates, and next steps are always clear. There’s less finger-pointing and more doing, plus better team collaboration across the board.

A CRM-PM platform has the power to combine customer relationship management with project management, so your team isn’t stuck juggling separate systems or stepping on each other’s toes.

Method CRM lets you run your business, your way.

Core features to look for

A CRM for project management ties both areas of your operation into one connected system. This differs quite a bit from traditional CRMs or standalone project management tools. Here are the functionalities to look for.

Task and time tracking

A CRM-PM platform should let you manage deadlines and track hours without having to switch tabs. 

Look for features like:

  • Time tracking tied to contacts or projects.
  • Task management with assignments, due dates, and dependencies.
  • Gantt charts to map project phases.
  • Kanban boards to visualize tasks in progress.

Sales pipeline meets project timeline

Sales don’t end after the handshake. Your chosen CRM-PM platform should help connect the dots between signed deals and delivery. Otherwise, projects might risk being overlooked.

Here’s what to expect:

  • A visual sales pipeline showing deal stage, probability, and next steps.
  • Automatic conversion of closed deals into projects or jobs.
  • Built-in milestones to keep work on track.
  • Linked project status updates to the customer record.

Workflow automation and notifications

Repetitive tasks eat up valuable hours, and those hours cost real money. Roughly half of the work employees do could be automated. Streamlining time-consuming work means affording employees more time to do higher-value work.

A CRM-PM platform with automation capabilities can:

  • Automatically create tasks when a deal closes.
  • Trigger email or SMS notifications when deadlines are near.
  • Send follow-ups using pre-built templates.
  • Assign project tasks based on pipeline stage.

Accounting and billing sync

Manually copying project data into your invoicing software is a recipe for errors and wasted time, resulting in poor data quality. This hurts customer relationships and skews your data, which can drag down business performance.

If you’re a QuickBooks user, finding a CRM platform that easily integrates with your current software is a valuable asset. Enter Method CRM.

Method offers a two-way, real-time sync for both QuickBooks Online and QuickBooks Desktop, keeping your customer data, estimates, invoices, and payments aligned across platforms. This level of sync isn’t something you’ll find in most tools.

Easily sync your customer, vendor, and employee info, sales and vendor transactions, time tracking, and other key job activity details between Method and QuickBooks. Permissions are separate, too, giving you control over access.

Note: You can also create custom fields and dashboards (like specific customer regions). While these won’t sync directly to QuickBooks, they still give you the flexibility to track the data your team relies on daily.

Mobile and ease of use

A solid CRM-PM platform should work wherever your team works, whether in the office, in the field, or when out and about. If the software’s too complicated, it can pose a roadblock for your employees.

Look for a tool with a user-friendly interface available on both desktop and mobile. This way, you get instant access to client notes, tasks, and project timelines. And because dashboards are fully customizable, you can tailor what each team member sees, ensuring accurate information and less back-and-forth.

Easy onboarding materials and reliable customer support are must-haves, especially if you’re switching systems or training a hybrid team. Look for platforms that offer step-by-step tutorials, a live chat, or a reliable support team.

CRM-PM platforms: Tool-by-tool comparison (2026)

A CRM-PM platform packed with features won’t matter much if it’s bloated and doesn’t fit your business needs. The best CRM and project management combo should be customizable, agile, and built with tools that are valuable to your team.

With so many tools out there, it’s easy to feel buried before you even begin.

Don’t worry; we’ve sorted through the noise. 

Here’s a side-by-side comparison of the top CRM-PM platform picks for smarter decision-making.

ToolPricing (per user/month; billed annually)Key featuresEase of use
Method CRMContact Management ($27), CRM Pro ($45), CRM Enterprise  ($73)QuickBooks two‑way real‑time sync, customizable dashboards, workflow automationIdeal for QuickBooks users, intuitive right after setup, balanced CRM+PM
SalesforceEssentials ($25), Pro ($100), Enterprise ($165), Unlimited ($330), Agentforce 1 Sales ($550)Enterprise-grade CRM software, custom automations, AppExchange extensions, AI forecasting and analyticsPowerful features but steeper learning curve; CRM-heavy
HubSpotStarter Free Plan available, Starter Customer Platform $9 per user, Professional Customer Platform $1,300 for 5 users, Enterprise Customer Platform $4,700 for 7 usersFree CRM plan, marketing automation, pipeline tracking, extensive integrationsUser‑friendly and with fast onboarding; CRM-heavy
ClickUpFree Plan available, Unlimited ($7), Business ($12)Visual project management tools, templates, task automation, basic CRM pipelines via custom lists/relationshipsFlexible but can be overwhelming at first; PM-heavy with some CRM
Monday.comBasic Plan for CRM ($12), Standard ($17), Pro ($28)Visual boards, dashboards, automation, separate modules for sales and projectsClean interface but multiple modules may feel fragmented; PM-heavy with CRM modules
ZohoStandard Plan ($14), Professional ($23), Enterprise ($40), Ultimate ($52)Integrated CRM + Projects, automation, multi-channel customer data, strong team collaborationSeamless in Zoho ecosystem; easy onboarding; balanced CRM+PM
TeamworkFree Plan available, Deliver Plan ($10.99), Grow Plan ($19.99)Project timelines, support ticketing, light CRM functionality tied to billing and client recordsGo-to for delivery and support; PM-heavy with CRM add-ons

Some quick tips for choosing the right CRM-PM platform:

  • Start with your pain points: Some platforms offer balanced features, while others lean more on either sales or project delivery, and this could be a benefit. Identifying your biggest workflow gaps helps you choose the tool that solves them.
  • Map your sales-to-delivery process: Look for platforms that let you move information from the sales pipeline straight into a project timeline without having to re-enter it.
  • Don’t overbuy: Fancy features won’t help if your team doesn’t need them. It’s better to prioritize features that your team will adopt.
  • Try before you buy: All the tools on our list offer free trials so you can try them out on your real day-to-day tasks before fully committing.

Method CRM lets you run your business, your way.

Use-case playbooks

Not every business will use a CRM-PM platform the same way. Your business might lean sales-heavy, focus more on service delivery, or handle both.

These use-case playbooks break down what to prioritize based on how your team works.

Client-services agency

Scenario: You’re struggling to balance sales calls, project timelines, and client check-ins. And because time tracking is such a hassle, it’s either forgotten or logged too late. That means you could be losing billable hours and undercharging for your work without even realizing it.

Recommended setup: Build your CRM workspace around contact records, pipelines, and onboarding tasks. Then use a kanban board to manage delivery stages likePlanning,” “In Progress,” and “Final Review,” alongside built-in time tracking tied to each task.

With this, your team logs hours where the work happens. You’ll get accurate project totals, more accurate billing, and insights into your profitable jobs.

Workflow example:

  1. The sales rep marks a deal as “Won.”
  2. The platform auto-generates a kanban board for delivery.
  3. Kickoff tasks are assigned to the account manager.
  4. Client notes and files then auto-sync to the workspace.

Where Method fits: Method’s time tracking software lets you track time by task, job, or customer from any device. Review and approve hours with notes, sync timesheets to QuickBooks Desktop and Online for payroll or invoicing, and show hours worked directly on client invoices. No double-entry needed!

Construction/field service

Scenario: You manage estimates, work orders, subcontractors, and changing timelines, often across multiple job sites. Between winning jobs and executing them, your team needs more than just a whiteboard and a spreadsheet.

Recommended setup: Look for a platform that links estimates, jobs, and project timelines. You should be able to create and assign work orders directly from a sales deal, then track project status in real-time.

Gantt and kanban views visually help you keep your crews aligned, while templates and task automations reduce admin work.

Workflow example:

  1. Your sales rep closes a new job.
  2. The work order is auto-generated.
  3. A project board with tasks is created.
  4. The foreman gets assigned and notified.
  5. Job status is fed back into the CRM.
  6. The final invoice gets triggered once marked “Complete.”

Where Method fits: Method:Field Services is built for QuickBooks users in construction and field service. Simplify scheduling, dispatching, estimating, invoicing, and route planning, all from your phone.

With Method:Field Services, you can:

  • Create and assign work orders.
  • Track job costing.
  • Manage your equipment and assets on the app.
  • Sync instantly with QuickBooks.
  • Accept online payments on-site.

SaaS or tech consultancy

Scenario: You’re selling high-touch services, involving onboarding, integrations, and strategy, while also managing recurring clients, proposals, and deadlines. Projects may last weeks or months, and success depends on handing off proper context from sales to delivery.

Recommended setup: With so many moving parts, client info often gets lost in emails and scattered tools. Use software with a sales pipeline, visual project tools, and integrated contact records. This lets you track onboarding tasks alongside customer interactions and timelines.

Add custom fields for milestones or renewal dates to stay ahead.

Workflow example:

  1. A new client signs a SaaS contract through your CRM.
  2. An onboarding board auto-generates with pre-set tasks.
  3. Tasks are assigned to the implementation lead.
  4. Notes, emails, and files sync to the board.
  5. Follow-ups and renewal reminders are auto-scheduled.

Where Method fits: Method CRM is an all-in-one CRM and proposal management solution built for QuickBooks users. It supports your full client lifecycle without changing how you work.

  • Automates proposals, invoicing, and payments.
  • Accepts ACH or credit card via Stripe, PayPal, and more.
  • Centralizes lead and contact management.

Implementation checklist

Getting started with a CRM project management solution? Here’s a quick-start checklist to keep you on track:

Ask the right CRM selection questions: Prepare a CRM selection checklist that answers questions with a big-picture view of your team’s needs.

Plan your data migration: Clean up your existing contact records, task lists, and project data before importing them to avoid clutter.

Choose templates that match your workflows: Look for pipeline, kanban, or Gantt templates that reflect how your team manages projects.

Set up dashboards and KPIs: Define what success looks like and build views that highlight these metrics.

Onboard your team: Provide training, assign roles, and set expectations. Adoption only happens if the system makes work easier, not harder.

Of course, you can customize Method CRM on your own using drag-and-drop tools—and it’s 100% code-free. We understand that one size rarely fits all, especially for small businesses with unique workflows.

With Method’s customization services, you work with expert consultants who know Method inside and out. They’ll work with you to design custom screens, build tailored apps, and shape the platform around how your team works. While you stay focused on running your business, we’ll handle the behind-the-scenes setup that makes your CRM platform truly yours.

Method CRM lets you run your business, your way.

Frequently Asked Questions

What is the difference between CRM and project management?

CRM (Customer Relationship Management) focuses on managing customer data, sales pipelines, interactions, and the full customer lifecycle for sales teams. Project management, on the other hand, focuses on task planning, timelines, deliverables, and collaboration across project teams.


Think of it this way: CRM is people-focused. Project management is delivery-focused. Many businesses need both.

What is CRM in project management?

CRM in project management means using customer information, like sales deals, contact history, and communication, to shape how work gets delivered. It connects sales data, contacts, and communication history directly to tasks, milestones, and deadlines. This improves customer experience and keeps project workflows on track.

What is the best CRM for project management?

The best CRM project management software connects sales and service in one workspace without forcing teams into silos. Platforms like Salesforce or HubSpot offer strong pipeline and outreach tools for sales-heavy teams. For project-heavy or service-delivery teams, tools like ClickUp or Teamwork offer more task management features.


Method CRM is a powerful option for hybrid teams using QuickBooks. Its customizable tools support both customer management and project planning.

Close the deal. Deliver the work. Repeat with ease.

A reliable CRM for project management tracks deals and helps your team deliver results. A CRM-PM platform gives your team one place to handle both, improving follow-through, saving time on admin work, and keeping the customer experience consistent from pitch to delivery.

Need something built around your workflows? An all-in-one tool like Method keeps everything (and everyone) in sync.

Book a free demo with the Method team and get a custom walkthrough tailored to how your business operates.

best hvac apps

5 best HVAC apps in 2026

Boost your HVAC business efficiency with the best HVAC software and apps for 2025.

5 best HVAC apps in 2026 Read More »

Running an HVAC business means handling a lot at once. From dispatching and diagnostics to invoicing and customer follow-ups, your days likely fill up fast. Having the right HVAC software can take a lot of that pressure off and help you stay focused on the work that matters most. 

There is no shortage of mobile apps out there for service businesses. However, not all of them are built with HVAC pros in mind. In this guide, we’ve hand-picked the ones that deliver useful functionality, based on what you need in the field.

These HVAC apps offer:

  • Real functionality that solves a specific need
  • Strong user reviews in the App Store and on Google Play
  • A price that makes sense for your growing HVAC business
  • Features that HVAC pros use in the field

If you’re already using QuickBooks, Method:Field Services could be the perfect fit. It connects your office and field teams, so you can manage scheduling, quoting, and payments all under one roof.

Sick of manual admin work? Save time on every job with Method.

What are HVAC apps?

HVAC apps are tools built specifically to help HVAC contractors manage their day-to-day jobs without having to rely on clipboards and spreadsheets. Regardless of whether you’re running a one-person shop or growing into a larger operation, the right mobile app can turn the usual chaotic schedules into more streamlined workflows.

For many small businesses doing field service work, these apps make it easier to manage all the aspects of HVAC work that slow you down: scheduling, diagnostics, invoicing, quoting, and customer management. 

Types of HVAC business apps for your needs

Every HVAC business runs a little differently, which is why most of the one-size-fits-all software solutions out there tend to miss the mark. Some teams just need better scheduling. Others may want a better follow-up process or more efficient invoicing.

Below are four app categories that cover the most common needs in HVAC.

HVAC invoice apps

Keeping track of who owes what shouldn’t take up your entire afternoon. Good invoicing apps speed up HVAC service billing, reduce any missed payments, and keep your service calls from falling through the cracks. The best invoicing apps can even handle follow up for you. Invoicing apps generally include:

  • Automated invoicing
  • Payment tracking without manual entry
  • QuickBooks or CRM sync that avoids duplicate entries
  • Full customer data and service history for faster quoting the next time around

Marketing and sales apps

The right marketing and sales tools help HVAC professionals get new leads, stay connected with customers, and make sure every good job turns into another one. These are especially useful for small business teams that don’t have the time for extensive marketing strategies or a full-time sales team. These apps usually have:

  • Email and SMS campaign tools
  • Sales and pipeline tracking
  • Contact segmentation to target repeat customers
  • Available CRM integration

Calculation apps

In the HVAC industry, precision matters. Opting for a calculation app can help keep your metrics accurate for every HVAC system installed. 

These apps are a staple for any HVAC crew that deals with refrigerant charges, superheat measurements, and subcooling calibration. 

Common examples of HVAC-specific calculators are: refrigerant charge, duct sizing, airflow, load calculation, and BTUs.

HVAC education apps

Even the most seasoned HVAC pros can learn something new, especially with codes, equipment, and compliance changing all the time. These apps help you prepare for certifications and stay sharp on the job site. Below are examples of popular HVAC education apps:

  • Bluon HVAC: A huge knowledge base and community forum. Available on iOS and Android.
  • EPA 608 practice app: Test preparation for the EPA section 608 certification.
  • NATE test prep: App that helps techs prepare for the NATE certification, updated for 2025 on Android and iPhone smartphones.

Although not an app, it’s also worth checking out the HVAC School for free HVACR training videos and podcast episodes—especially if you’re an apprentice or in training.

Sick of manual admin work? Save time on every job with Method.

Best HVAC apps for business

While there’s no shortage of HVAC apps out there, these five stand out. Whether you need better diagnostics, faster dispatching, or real-time on-site updates, these picks actually help you get things done.

Method: Best HVAC app for integrated CRM

If you’re tired of digging through old paperwork or switching between multiple apps just to track a job, the Method field service management app is what you need. Built for field service teams, it connects your service calls, customer info, and billing and syncs it all with QuickBooks

Features:

  • Real-time service call tracking from the office or the field
  • Quote and invoice sync with QuickBooks, no manual entries
  • Customer workflows that are made especially for HVAC professionals

QuickBooks: Best HVAC app for accounting and invoicing

QuickBooks app for HVAC


Cash flow is the lifeblood of small businesses, and QuickBooks can streamline payroll and payments for them. It handles invoicing, tracks expenses, and keeps your numbers accurate for tax time. You can also connect it to tools like Method CRM for even better tracking and visibility.

Features:

  • Automated tax tracking and financial reporting
  • Customizable templates for HVAC invoicing 
  • User-friendly time tracking available through QuickBooks Time add-on

Jobber: Best HVAC app for real-time tracking


Jobber is a field service app that gives office staff and techs a shared view of active jobs, routes, and updates through notifications and an in-app dashboard. It’s useful for dispatching, managing daily scheduling, and viewing job progress in real-time. HVAC techs can check in from the field, log updates, and access job details as needed. 

Features:

  • GPS technician tracking with live map view
  • Status updates for each service call
  • Quick job assignment using drag-and-drop scheduling

Connecteam: Best HVAC app for communication tools

Connecteam for HVAC helps your field team stay organized without having to rely on calls or endless text chains. This app handles job information, updates, and direct messages all within one HVAC industry app. HVAC technicians can access schedules, report issues, and stay in contact with the head office across multiple job sites.

Features:

  • Built-in team chat with file and image sharing for troubleshooting
  • Real-time job updates and read receipts
  • Task-specific notifications are tied to assigned work

mHelpDesk: Best HVAC app for workflow management


mHelpDesk helps connect the office and the field crew through one app that covers the workflow from contact to wrap-up. You can manage schedules, view past work, and handle billing without requiring multiple tools. 

Features:

  • Custom templates for quotes and work orders
  • Drag-and-drop dispatching
  • Live job status tracking and progress updates

Why is field service management software important for HVAC businesses?

Field service software helps cut down on admin tasks while giving you a clearer view of what’s happening outside of HQ. These apps keep things moving by:

  • Scheduling and dispatching in one place
  • Providing easy-to-use portals for customers
  • Letting techs give job updates in real time

How much do HVAC apps cost?

As with most digital tools, the cost depends mostly on the level of functionality you require. A solo technician won’t pay the same as a full office team running a CRM setup:

  • Free to $25/month – Basic tools like the HVAC buddy web app
  • $25 to $75/month – Mid-tier CRM, scheduling, and invoicing
  • $75+/month – Advanced or multi-user field service platforms with integrations and automation

How to find the right HVAC app for your business

Not sure where to start? Here’s a simple way to break it down:

  1. List out the processes that are taking up the most time.
  2. Decide if you want an all-in-one tool or a niche tool that includes mobile access and real-time updates.
  3. Check if it integrates with QuickBooks, your CRM, and existing tools.
  4. Review the support and training options.

Sick of manual admin work? Save time on every job with Method.

Key takeaways

Ultimately, the best HVAC apps are those that address the challenges you face daily. Whether it’s tracking jobs, sending invoices, or keeping your team aligned, having the right tools makes all the difference.

HVAC apps can help you:

  • Cut down on admin work and paperwork
  • Improve scheduling and visibility in the field
  • Speed up invoicing and cash flow
  • Deliver a better experience for your customers

If you’re looking to connect your team, customers, and books, try Method:Field Services. It’s a top-rated QuickBooks-compatible CRM for HVAC businesses.

Frequently asked questions

What’s the best way to learn HVAC?

Practicing theory will only take you so far, making hands-on training essential. Most HVAC pros in the U.S. start through trade school programs or union apprenticeships. Pair that with on-the-job experience under a licensed tech, and you’ll be building skills in no time

What is the highest paid HVAC job?

Commercial HVAC technicians, system designers, and HVAC project managers are among the high earners. Those with certifications in areas like refrigeration, controls, or green building systems can also earn more.

Is HVAC in demand in Canada?

Yes, the HVAC industry is seeing steady demand. The Canadian Job Bank shows good demand in Nova Scotia, Saskatchewan, Ontario, and Alberta. HVAC remains a solid path for small business growth in Canada.

Which software is best for HVAC?

    • MethodCRM: For CRM and QuickBooks integration

    • QuickBooks: For invoicing, expenses, and financial reporting

    • Jobber: For real-time tracking and field service management

    • Connecteam: For communication, team updates, and mobile chat

    • mHelpDesk: For workflow tools, from dispatching to job completion

Delete multiple transactions in QuickBooks

How to delete multiple transactions in QuickBooks Desktop and Online

Learn how to delete multiple transactions at once in QuickBooks Desktop and Online, including bulk and mass deletions.

How to delete multiple transactions in QuickBooks Desktop and Online Read More »

Intuit’s QuickBooks Desktop and Online can be invaluable accounting software for helping you keep an accurate record of all transactions—tracking invoices, bills, payments, and journal entries so you have the financial data you need to make sound business decisions.  

But managing transactions can be complex. And sometimes you need to streamline by deleting multiple transactions at once to keep your records accurate. That might happen for the following reasons: 

  • Someone entered an incorrect transaction 
  • System syncs, imports, or manual errors caused duplicate transaction entries 
  • Changes in accounting processes or compliance rules require you to remove outdated or invalid transactions  
  • You are merging accounts or closing books for a specific period  
  • You need to clear test data that was added during training or system setup 

Method is the CRM built for QuickBooks-powered businesses. If you’re wondering how to mass delete transactions in QuickBooks, let us show you so you can organize your books, keep accurate financial records, and get back to focusing on your business.

Why delete multiple transactions?

Errors and duplicates can cause big problems for your business, disrupting financial reports and complicating audits and reconciliations. 

Outdated or irrelevant data, such as test entries from training, can make your records disorganized and inaccurate, too. And policy changes or account consolidations can leave you with old transactions that don’t align with updated accounting practices.  

Here’s how bulk transaction deletion can help: 

  • Ensuring your financial reports reflect accurate data.
  • Making bank reconciliations smoother.
  • Ensuring you’re prepared for audits and regulatory requirements.
  • Cleaning up entries so you can navigate your QuickBooks account more easily.

How to delete multiple transactions in QuickBooks Online

QuickBooks Online (QBO) features tools such as Banking Center and Account Registers to help you manage transactions efficiently. While there is no direct Bulk Delete feature, Banking Center provides options like Undo and Exclude Transactions to help handle imported bank account feeds. 

QBO offers limited batch actions, such as sending or printing, for some transaction types. Batch editing is available in QBO Advanced (for items like invoices), but batch deletion requires QBO Accountant and is limited to specific transaction types.

Batch editing is available under Batch Transactions in QBO Advanced.

Deleting transactions individually

Need to delete a single transaction in QuickBooks Online? Find the desired transaction, either by viewing it through the customer profile, or using the Search bar to locate it either by type, date, or amount.

Open the transaction, click Delete in the top-right corner, and confirm the action—but double-check before confirming because deletion is permanent. If you want to include additional details, like the date you’re deleting the transaction, the reason, or your name, add that info in the Memo or Message section.

Once you’re sure, hit Delete.

Bulk deleting transactions

Removing duplicate entries all at once is called bulk deletion. While this isn’t available for all transaction types in QuickBooks Online, it is commonly used for entries like invoices, bills, or expenses. Batch deleting isn’t available for all QuickBooks users, so this may not be an option depending on your access and the type of transactions you want to delete.

Bulk deletion uses the Batch Actions function in QBO Accountant, which allows for the removal of multiple transactions from a single category—like bills, invoices, or expenses—all at once. 

If you’re dealing with multiple transactions that meet the criteria for bulk deletion, follow these steps:

  1. From the left-hand menu on your dashboard, click on Transactions.
  2. Choose the category that contains transactions you wish to delete.
  3. Apply filters to narrow down the list of transactions. Filter by date, type, status, or other criteria.
  4. Then click on the checkbox next to each transaction you want to delete. You can select multiple entries by checking the boxes next to them.
  5. Look for the Batch Actions dropdown at the top of the list and click it to reveal the available options.
  6. From the Batch Actions menu, select Delete. QuickBooks will ask for confirmation.
  7. Confirm that you want to delete the selected transactions. Remember that deletions are permanent so be really sure before confirming.

Mass deleting transactions

Mass deletion involves removing large numbers of transactions across multiple categories or types. It’s a helpful tool to clear out outdated test entries, old bank feeds, or large batches of imported data that you no longer need.

Mass deleting often involves using filters to target specific transactions; while it’s a helpful feature, it’s important to note that it’s only available under certain conditions in QuickBooks Online, and certain options, like deleting invoices and expenses simultaneously, isn’t possible without QuickBooks Online Accountant access or third-party tools.

Always start by backing up your records. Then follow these steps:

  1. From the left-hand menu, navigate to Banking (for bank feed transactions) or Transactions (for invoices, expenses, etc.).  
  2. Apply filters (e.g., transaction date range, type, status) to narrow down the transactions to delete.  
  3. Select the checkbox next to the desired transactions. Note: you can only select transactions in the same category.  
  4. Click Batch Actions at the top of the list and select Delete.  
  5. Review the selected transactions and confirm—deletions can’t be undone.

If you don’t see Delete as an option in the Batch Actions menu, you may not have appropriate access, or you may need to look at a different transaction type.

Extend the power of QuickBooks Online with Method.

How to delete multiple transactions in QuickBooks Desktop

With QuickBooks Desktop, you have two options for deleting multiple transactions: (1) manually, or (2) the Batch Delete/Void Transactions tool (BDT), which supports specific transaction types like invoices, bills, or payments.

BDT streamlines bulk deletions but you’ll need to do more setup and filtering compared to QuickBooks Online, and you’ll have to navigate registers or transaction histories. It’s currently only available for QuickBooks Desktop Accountant (2018 onwards), Enterprise, and Enterprise Accountant 18.0+ users. If you’re using QuickBooks Pro or Premier, you won’t be able to access this feature.

It’s important to note that some transactions (like payroll, sales tax, and online payments, invoices with reimbursements or billable time, and any transactions in a closed period) can’t be batch deleted. If you want to delete more than one at a time, you’ll need to do it individually.

Remember, deletions are permanent. Always back up your QuickBooks Desktop company files so you can recover your data if anything goes wrong. 

Here’s a step-by-step guide to backing up your company files:

  1. Open QuickBooks Desktop and sign in to the company file.
  2. Go to the File menu, select Back Up Company, and then Create Local Backup.
  3. Choose Local Backup and click Next.
  4. Select where to save your backup (computer or external device).
  5. Click Save it Now and select Next.
  6. Confirm the backup was completed and stored in the chosen location.

Identify transactions to delete in QuickBooks Desktop

To find the transactions you want to delete, start by looking for indicators like duplicates, incorrect amounts, or test transactions, as well as those from closed periods. 

QuickBooks Desktop’s tools for filtering and searching specific entries include:

  • Account Registers: View detailed transaction lists for specific accounts.
  • Transaction History: Access a timeline of transactions to spot old or irrelevant ones.
  • Search and Filter: Use Find or Filter functions to search by date, type, amount, or account.
  • Audit Trail: Track changes to identify modifications or errors.
  • Reports: Run reports like Transaction List by Date to find outdated entries.

Choose and delete multiple transactions

Once you’ve filtered and located duplicate transactions, errors, or outdated records, you can use the Delete Multiple Transactions tool to delete them all at once:

  1. Go to the Accountant menu and select Delete Multiple Transactions.
  2. Choose the account from which to delete transactions.
  3. Apply filters to narrow down the transactions you want to remove.
  4. Select the transactions by checking the boxes next to them.
  5. Click Delete.

Confirm deletion

We can’t stress it enough: Deleting transactions is permanent. Take your time and confirm your choices to avoid accidental data loss. 

That all-important confirmation step allows you to review your selections before you finalize the deletion so you only remove the transactions you want to delete.

Here are some tools for confirming deletion of multiple transactions:

  • Review Screen: Verify selected transactions before deletion.
  • Confirmation Dialogs: QuickBooks prompts a final confirmation before proceeding.
  • Transaction Summary: Check details such as date, amount, and type before deleting.
  • Reconfirm Deletion: QuickBooks shows a summary of batch deletions for final verification.

Verify deleted transactions

Once you’ve deleted your transactions, verify that they were correctly removed: 

  • Check carefully to make sure deleted transactions no longer appear.
  • Generate a Transaction List or Balance Sheet.
  • Use the Find function to check if deleted entries still show up.
  • Confirm deleted transactions aren’t affecting your reconciliations.
  • Review the log to confirm transactions have been properly deleted.

Reconcile your accounts regularly

Make sure you regularly reconcile your accounts to ensure your financial data is accurate, there are no discrepancies or errors, and your records are up to date.

To reconcile your bank accounts:

  1. In the banking menu, click on Banking and select Reconcile.
  2. Choose the account to reconcile.
  3. Input the statement date and ending balance.
  4. Compare QuickBooks transactions with your bank statement.
  5. Review discrepancies, including deleted transactions.
  6. Click Reconcile Now when all transactions are matched.

Extend the power of QuickBooks Online with Method.

What to consider before deleting multiple transactions

Be careful before you delete multiple transactions. Think about the impact on your financial records and remember you will only be able to recover deleted data if you have a backup. 

Only delete transactions if it’s truly necessary, whether due to errors, duplicate transactions, or outdated entries.

If you’re not sure how deleting transactions will affect reports, bank reconciliations, and potential audits, consult your accountant or review your bookkeeping records in detail first.

Audit trail concerns

An audit trail will log all changes, including transaction deletions. But without specific details on why or how entries were removed, you can be left with gaps in your transaction history.

To maintain a clear audit trail:

  • Consult your accountant before deleting any transaction.
  • Document all deletions, explaining why they were made.
  • Back up your QuickBooks file before deleting anything.
  • Delete transactions in batches to track changes easily.
  • Regularly review the audit trail to address discrepancies.

Impact on financial reports

Your financial reports—balance sheets and profit and loss statements—can also be affected if you delete multiple transactions. Removing invoices or payments may affect income, accounts receivable, or cash flow, for example, and that can result in inaccurate financial data.

Tips for minimizing report discrepancies:

  • Review key reports before deletion to establish a baseline.
  • Re-run reports after you delete transactions and compare results for discrepancies.
  • Reconcile bank and credit accounts.
  • Document deleted transactions and their impact.
  • Consult an accountant.

There’s no ‘Undo’ option in QuickBooks. So it’s not just difficult and time-intensive to try to recover transactions after you’ve deleted them—it may even be impossible.

Here are some best practices for protecting your data if you’re planning to delete multiple transactions:

  • Back up everything—locally and to the cloud.
  • Export key reports.
  • Save a copy of your company file.
  • Check your backup to make sure it actually worked.

When it comes to backing up your data, it’s strongly recommended (and sometimes required) to run QuickBooks in Single-User Mode. Then, use the BDT option and choose Back Up and Delete or Back Up and Void.

Bank transactions and reconciliations

Deleting transactions like payments, deposits, and invoices can cause discrepancies that affect your bank register and financial statements. Make sure you do a bank reconciliation so your records match your statements.

To handle reconciliations after deleting multiple transactions:

  1. Review your bank statement.
  2. Access the reconciliation screen in QuickBooks.
  3. Compare transactions, ensuring deleted entries are removed.
  4. Adjust for discrepancies if necessary.
  5. Reconcile the account to match your bank statement.
  6. Double-check for errors before finalizing.

Extend the power of QuickBooks Online with Method.

Key takeaways

  • Bulk and mass deletions in QuickBooks Online help remove multiple transactions efficiently, but differ in scope and method.
  • QuickBooks Desktop has limited bulk delete features and requires manual steps or the Delete Multiple Transactions tool.
  • Deletions are permanent. Always back up your company file before removing transactions to avoid data loss.
  • Audit trails and financial reports can be disrupted by deletions so consult an accountant if you’re unsure.
  • Reconcile accounts after deleting transactions to ensure your books match your bank records.

Frequently asked questions about deleting multiple transactions in QuickBooks

How often should I back up my data in QuickBooks Desktop?

That depends on your business size and activity level. Consider backing up at least weekly if yours is a small business with few transactions and at least daily for larger businesses with frequent transactions—or more often if you handle sensitive data.

Automated cloud backups can be a user-friendly way to simplify this process.

Can I recover deleted transactions in QuickBooks Desktop?

No, QuickBooks does not offer a built-in Undo feature for deleted transactions, so the transaction may be permanently lost. If you’ve created a backup, you can usually use it as a workaround to recover deleted transactions—but that restores the entire file, not just the specific transactions.

Can I bulk edit transactions in QuickBooks Online?

Yes, but there are limits. You can use the Batch Actions feature to edit multiple transactions at once in areas like invoices, expenses, or payments. Select multiple transactions from a list and make changes, such as updating amounts or categories.

However, bulk editing is not available for all transaction types, and some changes, such as adding new entries or deleting transactions, must still be done individually. It also requires certain access, so it may not be available for all users. Learn more about how Method can help you with your QuickBooks integration.

How to add another company in Quickbooks

How to add another company in QuickBooks Online

Need to add a second company in QuickBooks Online? This step-by-step guide makes setup easy—plus smart tips for managing multiple businesses smoothly.

How to add another company in QuickBooks Online Read More »

Managing multiple companies can be a juggling act, but QuickBooks Online makes it easier by letting you keep everything organized in one place—well, almost. While QuickBooks Online (QBO) doesn’t allow you to manage multiple businesses under a single subscription, you can set up separate companies with their own subscriptions. This way, you can seamlessly switch between businesses and ensure your finances are always in tip-top shape.

For businesses juggling multiple workflows or client accounts, tools like Method CRM can help bring added structure and flexibility alongside your QuickBooks setup.

This article will walk you through why setting up multiple company files in QuickBooks Online might be a game-changer for your business, and you’ll learn step by step how to add another company to QuickBooks. Whether you’re a serial entrepreneur, an accountant managing multiple clients, or a small business owner opening a second company, this guide will make the process smooth and stress-free. Let’s dive in!

Push QuickBooks Online further than ever with Method.

Before you begin

Before you begin setting up another company in QuickBooks Online, make sure you have the following ready:

  • Existing QuickBooks account details: Your current QuickBooks Online credentials (email address and password) to create and manage multiple companies under the same login.
  • Company information: This section includes essential details about the new company, including its legal name, address, tax information, and industry type.
  • Email address for notifications: A valid email address to receive updates, invoices, and account-related communications.
  • Budget for subscription: Each company requires its own QuickBooks Online subscription, so ensure you’re ready for the additional cost.
  • Clear financial structure: Decide how you’ll organize financial transactions to avoid company overlap or confusion.
  • Internet connection: A stable internet connection to access QuickBooks Online and complete the setup process.

Steps to add a new company to QuickBooks Online

Now that those prerequisites are in place, let’s roll up our sleeves and walk through the process of adding a new company to your QBO account. Each step is needed to ensure your new company is set up properly. 

Step 1: Access the QuickBooks Online pricing page

Start by selecting a subscription plan that fits your business needs.

  • Go to the QuickBooks Pricing Page.
  • Review the available plans, paying attention to:
    • Number of users
    • Included features (e.g., invoicing, payroll, inventory)
    • Monthly or annual pricing
  • Don’t worry if you’re unsure which to choose — you can always change your plan later.
  • Click “Buy Now” to start a paid subscription or “Start Free Trial” under your chosen plan.

Access the QuickBooks Online pricing page if you’re already logged in

To navigate to the pricing page from your QuickBooks Online dashboard:

  1. Locate the Gear Icon in the top-right corner of the screen.
  2. Select “Subscriptions & Billing” in the dropdown menu. 
  3. In the subscription management section, locate and click the link to Plans & Pricing.

Note: These options may not appear for all users. In that case, you can log out to view the QuickBooks pricing page. 

Step 2: Sign in to your existing QBO account

QuickBooks links all your companies under a single Intuit login, so there’s no need to create a new account. The next step is to log in to your existing Intuit account using the login credentials tied to your current QuickBooks Online account.

If you’re already signed in:

  • QuickBooks may prompt you to confirm your existing account.
  • Double-check it’s the correct one before continuing.

If you’re not signed in:

  • Look for the “Adding a company to an existing account?” section.
  • Click Sign in and enter your Intuit account credentials.
  • Complete two-factor authentication if prompted.

Once you sign in, you’ll be redirected to your existing QuickBooks dashboard, where you can manage your businesses or add a new one. 

Step 3: Follow the on-screen setup prompts

QuickBooks will walk you through setting up your new company file, such as:

  • Business name
  • Contact information 
  • Time in business
  • Business description
  • Tax information 

These inputs help QuickBooks customize features and recommendations.

Step 4: Select business features

After entering your basic info, you’ll choose which features best suit your business needs.

Common options include:

  • Sending and tracking invoices
  • Organizing and categorizing expenses
  • Tracking sales tax
  • Managing inventory (if you sell products)
  • Time tracking (for employees or hourly work)

Pick only what’s relevant for this new account now and remember that you can always turn features on or off later. 

Step 5: Specify Your Role

Telling QuickBooks your role helps tailor the setup experience. So it’s important to choose the option that best describes you from these three available titles:

  • Business owner
  • Employee or manager
  • Accountant or Bookkeeper

If you’re setting this up for a client, selecting “Accountant or Bookkeeper” gives access to tools designed for financial professionals.

Step 6: Complete Initial Setup

Once all inputs are provided, QuickBooks will create your new company file. Now’s the time to complete the initial company setup. 

  • Setup usually takes a few moments.
  • You’ll be redirected to your new company’s Dashboard or Home Page.
  • Take a few minutes to explore:
    • Customize your chart of accounts
    • Import data from spreadsheets or other software
    • Invite team members or your accountant to collaborate

Think of this dashboard as your command centre for managing the company’s finances.

Push QuickBooks Online further than ever with Method.

A deeper look at setting up new company details

Once you’ve created your new company in QBO, you’ll need to spend some time inputting the company details. The following steps will help ensure that your company is set up correctly.

  1. Enter the company name as it should appear on invoices, reports, and other communications.
  2. Add the company address, including street, city, state, ZIP code, and country.
  3. Specify the legal name if it differs from the company name (for tax and official purposes).
  4. Choose the type of business entity (e.g., sole proprietorship, partnership, corporation, or LLC).
  5. Pick an industry that closely matches your company’s operations (e.g., retail, construction, professional services).
  6. Specify the currency in which your business operates. This is particularly important if you deal with international clients or vendors.
  7. Define the start and end dates of your company’s fiscal year or accounting period.
  8. Select features like inventory tracking, multicurrency, or project tracking based on your business requirements.
  9. Enter your business’s tax identification number (TIN, EIN, or VAT number, depending on your country).
  10. Configure your tax settings if you plan to track sales tax in QuickBooks.
  11. Link your bank accounts or choose to do it later. 
  12. If others will be managing finances or reviewing reports, invite them as users with appropriate access levels.
  13. Double-check all information for accuracy before finalizing the setup.
  14. Click Save or Continue to proceed to the new company’s dashboard.

Important considerations when adding another company

Adding another company to QuickBooks Online can be a strategic move, but it comes with important considerations. First, evaluate the financial implications. Each company requires a separate QuickBooks Online subscription, so ensure your budget can accommodate the additional expense. Ensure the features of your selected plan align with the new company’s needs to avoid paying for tools you won’t use. 

Next, think about resource allocation. Managing multiple companies means dedicating more time and effort to bookkeeping, reporting, and compliance. Ensure you have the personnel or tools, like automated integrations, to handle the increased workload. 

Lastly, maintain clear boundaries between the finances of different companies to avoid legal or tax complications. Proper planning and an organized approach can help you manage multiple companies effectively and avoid potential pitfalls.

Users

When managing multiple companies in QuickBooks Online, set up and monitor user permissions to ensure that the right people have access to the right data. QuickBooks allows you to assign different roles and permissions to users from each company linked to your account. 

To manage permissions, click the Gear Icon at the top right corner and select Manage Users. Here, you can invite new users, assign roles such as admin, accountant, or standard user, and define their level of access. 

Be mindful of the sensitive nature of financial data, and review permissions regularly to ensure that only authorized users have access to critical information, especially if you’re managing several businesses with different teams or responsibilities.

Online banking

Setting up online banking for a new company in QuickBooks Online is an essential step for fine-tuning your financial processes, but it can be a bit complex. To set it up, go to the Banking menu and select Add Account. From there, you’ll be prompted to search for your bank and log in with your bank’s credentials. QuickBooks will then automatically download your transactions, making reconciliation easier. 

This process can be complicated depending on: 

  • Your bank’s integration with QuickBooks.
  • The types of accounts you want to link (checking, savings, credit cards, etc.).
  • How your bank categorizes transactions

If your business has multiple accounts, map each account correctly to avoid mismatches in your financial records. 

If you’re handling foreign transactions or multiple currencies, make sure your bank feeds are set up to handle these scenarios accurately. Bank feeds can occasionally have syncing issues or delayed updates, so monitor and troubleshoot them regularly to ensure your records are up-to-date and accurate.

Lists

Managing and differentiating lists such as customers, suppliers, and inventory across multiple companies in QuickBooks Online requires careful organization to keep each company’s data separate and accurate. 

For customers and suppliers, you can create distinct lists for each company to track transactions, payments, and contact details independently. To manage customer and supplier lists within each company’s account to avoid overlap between businesses, navigate to the Sales or Expenses menus. 

For inventory management, QuickBooks Online allows you to set up inventory items specific to each company. If you manage inventory across multiple companies, ensure that you maintain separate product lists for each business to prevent confusion when tracking stock levels or generating reports. By staying organized and keeping each company’s lists isolated, you’ll be able to manage operations, reduce errors, and generate accurate reports for each business.

Managing multiple companies

Efficiently managing more than one company within QuickBooks Online requires strategic planning and organization to avoid confusion and ensure smooth operations. First, maintain clear distinctions between companies by customizing naming conventions for accounts, customers, and inventory items. This helps prevent overlap and ensures you can quickly identify which company you’re working with. 

Leverage QuickBooks Online’s reporting tools to create customized financial reports for each company, helping you stay on top of key metrics without mixing data. Then, consider using automation for tasks like bank reconciliations and invoicing to save time and reduce errors. 

If you’re managing multiple companies within the same industry, you can standardize processes across businesses, making it easier to implement best practices and share resources. Finally, regularly audit your data and reconcile accounts to catch discrepancies early, ensuring that financial records for each company remain accurate and compliant. 

Switching between companies

  1. Go to the QuickBooks Online login page and enter your credentials to access your account.
  2. Locate and click on the Gear Icon in the upper-right corner of your dashboard.
  3. From the dropdown menu, choose the Switch Company option to see a list of all the companies linked to your account.
  4. Click on the name of the company you wish to switch to, and you’ll be taken to that company’s dashboard.
  5. Repeat these steps to switch back and forth between companies as needed. 

Consolidated reporting

Generating consolidated reports for multiple companies in QuickBooks Online requires a bit of creativity. QuickBooks does not provide a direct feature for creating consolidated reports across different company files. But, you can still generate consolidated financial data by exporting individual reports from each company. 

  1. Generate your desired report (such as a profit and loss statement or balance sheet) for each company by navigating to the Reports menu within each company’s account. 
  2. Once the reports are generated, export them as PDF or Excel files. 
  3. After exporting, you can manually combine the data in a spreadsheet program like Microsoft Excel or Google Sheets, where you can sum up the totals, create consolidated views, and perform further analysis across all companies. 

Alternatively, third-party reporting tools or apps that integrate with QuickBooks Online can often pull data from multiple companies and automatically generate consolidated reports, saving you time and effort. Be sure to keep track of each company’s accounting periods to ensure consistency when combining reports.

Push QuickBooks Online further than ever with Method.

What happens to existing users when I add a new company?

When you add a new company in QuickBooks Online, existing users associated with your current company will not automatically have access to the new company. Each company in QuickBooks Online operates under its own subscription, so adding a new company does not grant users access to it by default. 

To allow existing users to access the new company, you will need to manually invite them and assign appropriate permissions. Navigate to the Gear Icon, select Manage Users, and then add the user to the new company with the necessary role and permissions (e.g., admin, accountant, or standard user). 

You control which companies each user can access, allowing you to maintain separate access for different teams or individuals based on the company they work with. If users are already managing other companies, their access to those companies will remain unchanged unless modified. This ensures that each user’s access is tailored to their specific responsibilities across your businesses.

What if I accidentally added the wrong company?

If you accidentally add the wrong company, you can take the following steps: 

  1. First, confirm that the wrong company was added. Check the company details and ensure it’s not the one you intended to set up.
  2. Log in to QuickBooks Online and click the Gear Icon in the top-right corner of the dashboard.
  3. From the dropdown menu, select Subscriptions & Billing.
  4. Find the option to Cancel Subscription for the incorrect company. 
  5. Follow the prompts to cancel the subscription and close the company account.
  6. Return to the dashboard and follow the process to add the correct company, ensuring you select the correct plan and input accurate company details.
  7. If users were assigned to the wrong company, you may need to reassign them to the new company. You can do this from the Manage Users section of the Gear Icon.
  8. Ensure the subscription for the newly added company is active and set up correctly to avoid any billing issues.

Note: Once you cancel the subscription, the data will be retained in read-only mode for up to one year.

Do I need a separate subscription for each company?

Yes, you will need a separate subscription for each company you add to QuickBooks Online. QuickBooks Online treats each company as a distinct entity, meaning each requires its own subscription plan to access the software. 

While you can manage multiple companies under the same login, each company’s data, subscription, and billing are handled individually. This is important to note, especially if you plan to track finances or set up custom reports for multiple companies. You’ll also need to pay for each company’s subscription-based on the selected plan (Simple Start, Essentials, Plus, etc.), which can add up if you’re managing several businesses. 

Stay organized across companies with Method and QuickBooks

Managing multiple QuickBooks accounts doesn’t have to mean juggling spreadsheets or losing track of client details. Method CRM helps bring everything into one streamlined system with customizable workflows, shared contact databases, and automation that cuts down on manual work. It’s a smart solution for anyone handling more than one business or client file in QuickBooks Online.

Push QuickBooks Online further than ever with Method.

Key takeaways

Now that you’ve learned how to add another company in QuickBooks Online, here are a few things to remember while managing multiple companies:

  • You need an existing QuickBooks Online account to add another company to QuickBooks.
  • An additional company requires a separate subscription. 
  • Every additional company has its distinct data files requiring additional management resources.
  • You may need additional personnel or automated tools to manage multiple companies effectively.
  • User permissions can help you control access to each company. Different access levels can be assigned to team members based on their roles and responsibilities.

Frequently asked questions

Can I switch between companies easily in QuickBooks?

Yes, you can easily switch between companies using QuickBooks Online. Once logged into your QuickBooks Online account, click on the Gear Icon in the upper-right corner of the dashboard and select Switch Company from the dropdown menu. This will display a list of all companies linked to your account. Simply click on the company you want to access, and you’ll be redirected to that company’s dashboard.

Will my existing company’s data be shared with the new company?

No, your existing company’s data will not be shared with the new company in QuickBooks Online. Each company is treated as a separate entity with its own unique set of financial data, reports, customers, vendors, and other records. QuickBooks Online ensures data integrity and separation between companies, so each company’s financial information and business details are isolated from others.

Is there a limit to how many companies I can add to my QuickBooks Online account?

There is no specific cap on the number of companies you can add to a single QuickBooks Online account, but each company requires its own separate subscription. While you can manage multiple companies under one login, each business needs a distinct QuickBooks Online plan, and you’ll be billed for each subscription accordingly.

Enter adjusting journal entries QuickBooks

How to enter adjusting journal entries in Quickbooks

Learn how to enter adjusting journal entries in QuickBooks Online and Desktop to keep your financial records accurate, compliant, and audit-ready.

How to enter adjusting journal entries in Quickbooks Read More »

Adjusting journal entries play a big role in maintaining the accuracy and reliability of your financial records. These entries are used to correct errors, update accounts for accruals, or reflect changes in accounting estimates. 

Whether you use QuickBooks Online or QuickBooks Desktop, learning how to enter these adjustments correctly will help you keep your financial statements in check and stay compliant.

If you manage your bookkeeping through QuickBooks and want more flexibility in how you track and organize your data, tools like Method CRM can complement your workflow with deeper customization and automation.

In this guide, we’ll take you through the step-by-step process of entering adjusting journal entries in QuickBooks, and why this process should be a key part of your bookkeeping.

Push QuickBooks Online further than ever with Method.

What is an adjusting journal entry in QuickBooks?

An adjusting journal entry is a manual accounting entry made to correct or adjust balances in your accounts. Companies use journal entries at the end of an accounting period to correct an error, record an accrual or depreciation, or make year-end adjustments.

Adjusting journal entries can impact financial statements in three ways:

  • Ensure revenue and expenses are matched in the correct period (matching principle).
  • Adjust account balances to reflect accurate assets, liabilities, and equity.
  • Prepare financial records for tax filing and compliance with accounting standards.

Who can create adjusting journal entries in QuickBooks Online?

Any user with the necessary permissions can create adjusting journal entries in QuickBooks Online. These include:

  • Accountants: Professionals with Accountant or Admin-level access.
  • Admins: Business owners or managers with full administrative rights.
  • Accountant users: External accountants added through the QuickBooks ProAdvisor program.

Controlled access is essential for protecting financial accuracy and preventing errors. Only trusted, qualified users—like accountants or experienced admins—should have permission to make these changes, as they directly impact your books and audit trail.

Adjusting journal entries in QuickBooks

This tutorial walks you through how to create adjusting entries in Intuit QuickBooks Online Accountant.

Step 1: Sign in to QuickBooks Online Accountant

Log in to QuickBooks Online Accountant. This platform gives you access to advanced features, like the ability to create adjusting journal entries.

Remember, it’s important to have secure login credentials:

  • Always use a strong, unique password.
  • Enable two-factor authentication (2FA).
  • Avoid sharing your credentials with others.

Step 2: Advance to the ‘Go to QuickBooks’ dropdown

Navigate through the interface to find the necessary dropdown menu.

  • Click on the gear icon at the top-right corner of the dashboard.
  • Look for the “Accountant Tools” section.
  • Select “Journal Entries” from the available options.

Step 3: Select the client’s company

From the list of accounts, select the client’s company you want to work on. QuickBooks Online Accountant allows you to manage multiple companies, so ensure you access the correct one.

Step 4: Choose ‘+New’

Once inside the client’s company file, click the “+New” button in the left-hand menu.

The “+New” menu provides options for creating various types of transactions, such as invoices, expenses, and general journal entries. To proceed with adjusting, select “Journal Entry” from the list.

Step 5: Choose ‘Journal Entry’

To create a new adjusting journal entry:

  • From the “+New” menu, scroll down to the “Other” section.
  • Click “Journal Entry” to open the journal entry window.

Step 6: Choose the checkbox ‘Is Adjusting Journal Entry?’

When the journal entry window appears, look for the checkbox labelled “Is Adjusting Journal Entry?”. Marking this box indicates that the entry is an adjustment, which is essential for proper categorization in reports and audits.

Adjusting journal entries are flagged differently from regular journal entries to ensure they’re identified as corrections or period-end adjustments, which is important for compliance and transparency.

Step 7: Follow the series of steps to record the journal entry

  1. Select accounts to adjust: Use the dropdown menu to choose the appropriate accounts for the adjustment (e.g., revenue, expenses, or liabilities).
  2. Enter debit and credit amounts: Ensure the debit and credit amounts are balanced for accurate bookkeeping.
  3. Add a memo: Briefly explain the adjustment to maintain a clear audit trail.
  4. Specify the date: Choose the correct date for the adjustment, making sure it falls within the appropriate reporting period.
  5. Attach supporting documents: If necessary, upload files such as receipts or invoices for reference.

Step 8: Choose ‘Save and Close’

After entering all the details, finalize the journal entry by saving it.

  • Click “Save and Close” to record the adjustment and return to the main dashboard.
  • Alternatively, click “Save and New” to create another entry if needed.

Remember to double-check all fields for errors before saving, and review the general ledger to confirm the changes have been correctly applied.

With these steps, you’ll be able to efficiently process adjusting journal entries in QuickBooks Online Accountant so your financial records are accurate and ready for reporting. 

Push QuickBooks Online further than ever with Method.

How to make adjusting journal entries in QuickBooks Desktop

Follow these steps to create an adjusting journal entry in QuickBooks Desktop:

Step 1: Navigate to the ‘Company’ menu

Open QuickBooks Desktop and navigate to the top bar menu. Click on “Company” to access accounting-related functions. This is where you’ll be able to create adjusting journal entries.

Step 2: Choose ‘Make General Journal Entry’

  • In the Company menu, click “Make General Journal Entry.”
  • This will open a new window to create your journal entry.
  • Make sure you have the necessary details ready before proceeding. 

Step 3: Select the correct date

Enter the adjustment date carefully so that the entry aligns with the appropriate reporting period. Backdating or misdating can impact closing balances and financial accuracy.

Step 4: Enter the details of the adjusting entry

  1. In the Account column, select the account(s) to debit and credit.
  2. Enter the appropriate debit and credit amounts (they must balance).
  3. Add a memo to describe the reason for the adjustment.
  4. If applicable, assign a customer, vendor, or class to the entry.
  5. Repeat for each line item needed in the adjustment.

Step 4: Mark the entry as an adjusting journal entry

  • Check the box labelled “Is Adjusting Journal Entry?” to flag the transaction as an adjustment.

Step 5: Save and review the entry

  • Click “Save & Close” to save the journal entry.
  • Review the entry for accuracy in the Journal Entry List or Reports section.
  • Double-check that debits equal credits and all information is correctly categorized.

How to make adjusting journal entries in QuickBooks Online

QuickBooks Online (QBO) simplifies the process of creating adjusting journal entries with an intuitive interface.

Step 1: Access the adjusting journal entry feature

Log in to QuickBooks Online. Click the “+ New” button in the left-hand menu, then select “Journal Entry” from the dropdown menu. To mark it as an adjusting entry, check the “Is Adjusting Journal Entry” box at the top of the form.

Step 2: Choose the correct date

Enter the adjustment date so that the entry aligns with the appropriate reporting period. 

Step 3: Select the accounts to adjust

  1. Use the dropdown menu to choose the accounts being adjusted.
  2. Specify the debit and credit amounts for each account.
  3. In the next line, choose the offsetting account.
  4. Enter the equal and opposite amount (credit if the first was debit, and vice versa).

Step 4: Save and review the entry

Once you’ve entered all the necessary details for the adjusting journal entry, click “Save & Close” to finalize the adjustment and record it in QuickBooks. 

After saving, review the affected accounts in your general ledger to ensure the changes have been applied correctly and the entry aligns with your financial records. 

Why are adjusting journal entries important in QuickBooks?

Adjusting entries helps businesses make informed decisions, remain compliant with accounting standards, and prepare reliable financial statements by keeping their books accurate and up to date.

These entries are typically made at the end of an accounting period to correct errors, account for accruals or deferrals, and reconcile discrepancies.

How adjusting journal entries contributes to financial management:

  • Accurately reflect the value of assets, liabilities, and equity for proper balance sheet reporting.
  • Adjust balances for accruals, prepaid expenses, or depreciation to align with Generally Accepted Accounting Principles (GAAP) or International Financial Reporting Standards (IFRS).
  • Provide a clear and accurate foundation for preparing tax returns and ensuring compliance with regulatory requirements.
  • Maintain a transparent audit trail, reducing risks during financial reviews or external audits.

Push QuickBooks Online further than ever with Method.

Key takeaways

  • Adjusting journal entries keep records accurate and compliant.
  • QuickBooks tools make creating adjusting journal entries easy in both Desktop and Online.
  • Debits must equal credits to stay balanced.
  • Use clear descriptions and correct dates for audit readiness.
  • Limit access to adjustments to protect data integrity.

Get the most out of QuickBooks with Method

If you want to streamline workflows, reduce manual data entry, and have better visibility into customer and financial data, all while using QuickBooks, you need Method. Fully integrated with QuickBooks, Method allows you to customize how you track transactions, automate repetitive tasks, and manage client or customer interactions — all while keeping your accounting data in sync. Method is the perfect solution for businesses that want to scale their operations while using QuickBooks.

Frequently asked questions

Should you adjust a journal entry in a prior period?

Adjusting a journal entry in a prior period can impact previously reported financial statements and tax filings. Always consult an accountant before making changes to prior periods to avoid compliance issues.

Can you change journal entries from prior years?

QuickBooks allows you to change journal entries from prior years, but these adjustments should be made cautiously. Changes may require re-filing taxes or providing explanations during audits.

Can I edit or delete a journal entry in QuickBooks Online?

Yes, you can edit or delete journal entries in QuickBooks Online. However, to preserve an audit trail, ensure you maintain proper documentation of the changes.

Reclassify transactions in QuickBooks

How to reclassify transactions in QuickBooks

Learn how to reclassify transactions in QuickBooks Online and Desktop using the Reclassify Transactions tool. Save time and improve reporting accuracy.

How to reclassify transactions in QuickBooks Read More »

What do you do if you need to re-categorize or reclassify a transaction in QuickBooks, due to a mistake or a reporting change, for instance? How do you move a transaction into a new class without disrupting your financial records or business data?

The most important thing to know is that there’s a tool in QuickBooks Online Accountant and QuickBooks Online Advanced, as well as QuickBooks Desktop Accountant and Enterprise—called Reclassify Transactions—that lets you adjust categories and correct classification errors. If you’re using an unsupported version, you can still manually reclassify transactions one by one. Let us walk you through how these features work.

Method is the top CRM built for QuickBooks-powered businesses, offering robust workflow automation and real-time, two-way sync. We have worked with thousands of small businesses like yours, and we have put together this tutorial for reclassifying transactions in QuickBooks Online and Desktop so you can save time and keep your financial records accurate and organized. 

QuickBooks can’t do everything, so let Method CRM help!

What is reclassifying transactions in QuickBooks?

Wondering what it means to reclassify a transaction in QuickBooks? Put simply, it involves modifying the account, GST (if applicable), location, or class associated with that transaction. 

Imagine, for instance, that you are entering transactions related to your expense account and you want to update the class they belong to from “Office Supplies” to “Marketing.” Or, maybe you accidentally assigned an expense to the wrong account. You can reclassify those transactions so they are recorded accurately in the appropriate accounts.

Accurate reclassification supports better reporting and compliance, which keep your accounting—and your business—running smoothly.

Why would you need to reclassify transactions in QuickBooks?

Here are some common reasons why you might need to reclassify transactions in QuickBooks: 

  • A transaction was assigned to the wrong account or category.
  • An account structure has changed and you need to make sure all your transactions match the updated chart of accounts.
  • You need to make adjustments to maintain accuracy in your tax reporting.
  • You need to maintain consistent categories for clear and reliable financial statements.
  • You are preparing for an audit and need to make sure all entries are accurate and traceable in your financial records.

Regardless of the type of transaction, it’s vital to reclassify them correctly, or you may end up with inaccurate financial statements. That, in turn, affects your ability to make sound business decisions—and can also create big problems when you file taxes or get audited, including significant extra work during financial reviews or reconciliations. 

Even worse, inaccurate financial records can lead to a lack of trust among your stakeholders, and a serious negative impact on your business.

It is important to note, however, that only certain transaction types, like expenses, bills, checks, and journal entries, can be reclassified.

How to reclassify transactions in QuickBooks Desktop

For QuickBooks Desktop Accountant users, there are powerful features to help you reclassify transactions efficiently and accurately. They include a Reclassify Transactions tool, which makes it simple to batch reclassify, or reclassify multiple transactions at once, as well as the option to manually reclassify transactions. 

These features help you save time and reduce errors so you can keep your financial records organized and accurate. 

Using the Reclassify Transactions tool in QuickBooks Desktop

Using QuickBooks Desktop Accountant’s Reclassify Transactions tool, you can update multiple transactions quickly and efficiently. 

Follow these steps to use the Reclassify Transactions tool in QuickBooks Desktop Accountant:

  1. Open QuickBooks Desktop and log in as an administrator.
  2. Go to the “Accountant” menu and select “Client Data Review”, then “Reclassify Transactions.”
  3. In the “Accounts” section, select the “View” dropdown to choose an account type.
  4. In the “Transactions” section, select the “Name” dropdown to choose a name.
  5. Go to the “Show transactions” dropdown to choose the transactions you want to review.
  6. Select the transaction you want to reclassify.
  7. Select the “Account to” checkbox or the “Class to” checkbox to choose a new account or class.
  8. Click “Reclassify” to update the transaction.

Here are our top tips for making sure you’re using Reclassify Transactions effectively:

  • Use filters to find transactions, narrowing them down by date range or account type.
  • Double-check the new category or account before applying changes.
  • Always back up your company file before making bulk updates.

Manually reclassifying transactions in QuickBooks Desktop

Sometimes you’ll find that the Reclassification Tool in QuickBooks Desktop Accountant isn’t suitable for the changes you’re looking to make—for example, if you are only changing a small number of transactions or want to do them one at a time. 

In that case, QuickBooks Desktop Accountant offers the option of manually reclassifying transactions. 

Here are the steps to take to manually reclassify transactions in QuickBooks Desktop: 

  1. Open QuickBooks Desktop and navigate to the “Chart of Accounts.”
  2. Select the account containing the transaction you want to modify.
  3. Locate the transaction, right-click on it, and choose “Edit.”
  4. Update the account (also known as category in some versions) and click “Save & Close.”

We have some best practices to help you with manual reclassification:

  • Working on one transaction at a time helps to minimize errors.
  • Adding detailed notes or memos to explain the reason for the change serves as a reminder if you, your accountant, or anyone else needs to review the reclassification.
  • Keeping a record of all adjustments is essential for audit purposes.

QuickBooks can’t do everything, so let Method CRM help!

Steps to reclassify transactions in QuickBooks Online (QBO)

QuickBooks Online Accountant and QuickBooks Online Advanced also have a Reclassify Transactions tool to simplify the task of modifying transactions that works a little differently from the reclassification feature in QuickBooks Desktop. 

Let us walk you through the steps for reclassifying transactions in QuickBooks Online.

Step 1: Access the Reclassify Transactions tool in QBO

  1. Open your client’s company in QuickBooks Online Accountant or QuickBooks Online Advanced.
  2. Go to “Accountant Tools”  (in QuickBooks Online Accountant) or “Settings” (in QuickBooks Online Advanced) and click “Reclassify Transactions”.

Step 2: Select the transactions you want to reclassify

  1. Filter the transactions by selecting the type, class, location, GST, customer/supplier name, or modify filter. Note: To reclassify by class, you must enable class tracking your client’s settings.
  2. Use the checkboxes to select the specific transactions that need reclassification.

Step 3: Move the transactions

  1. Using the dropdown menu, select the new account, GST rate, class, or location to which the transactions should be assigned.

This step is critical because ensuring your transactions are appropriately classified will help you maintain accurate bookkeeping and reliable financial records. Accurate transaction categorization ensures that your financial reports—such as profit and loss statements and balance sheets—provide an accurate picture of your small business’ income and expenses. 

Step 4: Review and confirm changes

  1. Double-check all selected transactions and their new classifications.
  2. Click “Apply” to finalize the reclassification.

When you are reclassifying transactions, check and double-check all changes. The last thing you want is to make a mistake that affects the accuracy of your financial records. 

Review any changes carefully to maintain the integrity of your bookkeeping and make sure reports and statements can be relied on for business decision-making and compliance.

Key takeaways

  • Reclassifying transactions means updating the account, GST (if applicable), location, or class assigned to a transaction to ensure accurate financial records.
  • Using the Reclassify Transactions tool in QuickBooks Desktop Accountant and Enterprise versions; QuickBooks Online Accountant; and QuickBooks Online Advanced allows you to efficiently correct errors and align entries with your chart of accounts. This function is especially useful when reclassifying multiple transactions.
  • Manual reclassification is helpful for reclassifying individual transactions, especially when batch reclassifying isn’t suitable for the changes needed.
  • Correct reclassification improves reporting accuracy, supports tax compliance, and helps your small business prepare for audits.
  • Incorrect categorization can lead to inaccurate financial statements and issues during audits or tax filing.

Frequently asked questions about reclassifying transactions in Intuit QuickBooks

What are reclassification entries in QuickBooks?

When you make an adjustment to correct a transaction’s category in QuickBooks, that is called a “reclassification entry.” Reclassification entries ensure that your transactions are recorded in the right account, location, or class so your financial statements remain accurate.

What kind of accounts can be reclassified?

The types of accounts that make up reclassification entries in QuickBooks typically involve expenses, income, or assets. The purpose is to move transactions to the correct account to improve the accuracy of reporting and compliance. There are some kinds of transactions that can’t be reclassified, such as those that use accounts payable or accounts receivable, like invoices and bills. QuickBooks also doesn’t allow you to change the class or account of any transactions linked to other transactions.

What is a journal entry in QuickBooks?

A journal entry is a manual accounting record used to adjust balances or move amounts between accounts. The journal entry is an accounting tool that is often used in QuickBooks for reclassification when transactions cannot be adjusted directly.

QuickBooks can’t do everything, so let Method CRM help!

How Method CRM can help

Reclassifying transactions plays a key role in keeping your financial records accurate. Whether you’re working in QuickBooks Desktop or Online, following the proper steps ensures your data stays organized, reduces the risk of errors, and helps maintain clear, dependable financial reports.

To make financial management even easier, consider integrating with Method CRM. Our seamless connection with Intuit QuickBooks keeps your transaction data accurate and current, giving you full control over your business finances.

Multi-Entity Playbook

The Multi-Entity Playbook: A Smarter Way to Scale on QuickBooks

Managing a multi-entity business doesn’t have to be complicated. With Method CRM, you can streamline operations, connect key pieces, and bring clarity to every part of your business.

The Multi-Entity Playbook: A Smarter Way to Scale on QuickBooks Read More »

Your business is growing…but so are the cracks.

You’ve expanded to new locations, launched new service lines, maybe even acquired other companies. But what used to be a well-oiled operation is starting to break down.

Sales teams are quoting different prices for the same product. Reports don’t reconcile because every location names items differently. Customer records are trapped in disconnected CRMs. And no one—not finance, not operations, not leadership—can see the full picture of what’s actually happening across the business.

What’s going wrong?

You might think it’s just an accounting problem. But what you’re really seeing is the breakdown that happens when systems, processes, and data are fragmented across multiple entities. There’s no single source of truth, no standardized way of working, and no visibility into what any other team is doing.

Multi-entity accounting isn’t just about balancing the books. It’s about running a connected business: one where teams share data, follow the same playbook, and scale without reinventing the wheel at every location.

That kind of alignment sounds simple, but as businesses grow—adding new locations, divisions, or acquisitions—it gets surprisingly complex. In this article, we’ll explore the hidden challenges of managing multiple entities and how forward-thinking companies are solving them without jumping headfirst into ERP-level complexity.

At Method, we’ve helped thousands of QuickBooks-based businesses navigate this exact transition. From franchises to multi-division operations, we’ve seen firsthand how disjointed systems, siloed data, and inconsistent workflows can hold teams back. That’s why we built one of the only CRMs that truly supports multi-entity QuickBooks environments—and why we’re sharing what we’ve learned along the way. 

What is multi-entity accounting, and why does it get so messy?

Multi-entity accounting means managing separate financials for each legal entity within a business, while still needing a clear, consolidated view of how the overall company is performing.

It sounds straightforward on paper. But in practice, it gets complicated fast.

Businesses often split into multiple entities for good reasons. For example: 

  • A franchise brand might have dozens of independently operated locations, each with its own books. 
  • A manufacturer might separate its service division from its product sales. 
  • A growing company might acquire others and keep each one running under its original legal structure.

Multi-entity setups allow you to take advantage of tax benefits, limit liability, and scale. But they can also create serious operational and financial headaches.

Typically, each entity runs its own QuickBooks file. That means financial data is scattered across systems. Reporting becomes a manual, error-prone process. There’s no reliable way to answer basic questions like: 

  • How much did we sell last quarter, across all locations? 
  • Which products are underperforming across the business?
  • Are certain locations overspending compared to others?

This might seem like a problem for the finance team. They’re certainly the ones stuck stitching reports together, reconciling data by hand, and chasing down inconsistencies. But the impact runs much deeper.

Without a shared system or set of standards, each location builds its own way of working. Pricing and quoting are inconsistent. Quality checks get skipped. One team uses a CRM—another relies on spreadsheets. There’s no way to enforce processes or ensure teams are following the same playbook.

As a result, leaders lack visibility across the business. Teams waste time duplicating work. Access controls are scattered, with some users seeing too much, others not enough. And customers feel the misalignment, too—getting quoted different prices at different locations, experiencing delays from lost service requests, or having to repeat the same information to multiple teams.

Ultimately, multi-entity accounting isn’t just a back-office function. It’s the foundation for a connected, scalable business. And when it’s fragmented, everything else starts to crack.

Method CRM lets you run your business, your way.

The fork in the road: What happens when QuickBooks alone isn’t enough?

As businesses add new locations, spin off divisions, or acquire other companies, their accounting needs become exponentially more complex. What worked fine with one QuickBooks file starts to break down when there are five, ten, or fifty.

At this point, most business owners find themselves at a crossroads.

Multi Entity Options

Option 1: Keep the same system and muddle through.

Some try to keep things patched together with multiple QuickBooks files, spreadsheets, and manual processes. They build complex folder structures to track invoices. They export reports from each entity, then spend hours reconciling them in Excel. They rely on one person at HQ who “knows how it all fits together.”

But this approach doesn’t scale. Mistakes creep in. Reports don’t match. Sales and service teams can’t share data across locations. There’s no real-time insight into how the business is performing, only a backward-looking, manual snapshot.

Option 2: Go big and upgrade to an ERP.

Others consider moving to a full enterprise resource planning (ERP) system like NetSuite or Oracle. These systems offer deep functionality and consolidated reporting, but at a cost. Implementation can take months. Licensing fees run high. Customization is complex. And for many mid-sized businesses, ERPs feel like overkill: too rigid, too expensive, and too far removed from how they actually work.

Option 3: Try Intuit’s middle ground.

To address this scaling gap, Intuit has introduced some advanced tools for growing businesses.

To address the needs of growing businesses, Intuit introduced QuickBooks Advanced in 2018,  designed for mid-sized companies that have outgrown the basic version. It offers enhanced features like custom reporting and workflow automation, however, it still treats each entity independently. Without a shared data layer or a seamless way to ensure consistency across different locations, many users opted to continue using QuickBooks Desktop, preferring its familiarity. 

More recently, Intuit Enterprise Suite (IES) was launched as the latest product aimed at multi-entity businesses. IES is Intuit’s most comprehensive business platform to date. Designed for growing companies with increasing operational complexity, it brings together accounting, payroll, HR, cash flow, and even marketing in one connected environment. 

Key features include multi-entity financial management, AI-powered forecasting and budgeting, dimensional chart of accounts, and customizable user permissions. Teams can consolidate financials across entities, automate revenue recognition and fixed asset accounting, and generate rich reports using up to 20 customizable dimensions.

For many companies outgrowing the standard QuickBooks, IES provides a powerful step forward—especially in streamlining back-office processes and giving leadership better financial visibility. But while it adds breadth, there are still limitations in depth, especially when it comes to managing customer relationships and operational workflows.

IES does not include a built-in CRM or advanced workflow engine. It’s not designed to standardize sales and service processes across entities, nor does it offer deep customization for things like quoting, dispatching, or lead management. For businesses that want connected operations across divisions, or a full view of the customer journey, IES solves the accounting side, but often leaves a gap operationally.

The challenge of scaling multiple entities goes beyond accounting

Let’s say a business owner successfully implements a system like IES and starts getting consolidated financial reports. They quickly run into the next problem: the rest of the business is still disconnected.

The sales team is working from one CRM, the service team from another. Each franchise or division has its own way of quoting, invoicing, and managing follow-ups. Customer records are scattered.

 IES solves part of the growth problem, but key pain points remain unsolved:

  • Sales teams still work in separate CRMs
  • Franchises or divisions follow different workflows
  • Customer records don’t carry across locations
  • Pricing, quoting, and service processes vary from one entity to the next

Financial data is only half the story. The other half is CRM + operations.

Your CRM is where customer relationships actually live. It tracks every quote, service request, phone call, and follow-up across sales and service. Without a shared CRM across entities, teams operate in silos. No one sees the full customer journey. Data gets duplicated, missed, or lost. And the result is confusion for both your team and your customers.

To scale successfully, businesses need more than consolidated numbers. They need connected workflows. Shared customer data. Aligned sales and service teams. Standardized processes—across every entity, division, or location.

Imagine this: one division sells the product, another services it. But they each use their own systems, with no shared view of the customer. So the service team walks in blind, and the customer experience suffers. Internally, your teams are stuck piecing together fragmented data, duplicating effort, and making decisions with half the story.

That’s where connecting your accounting system with your CRM and workflows changes the game.

Method CRM lets you run your business, your way.

The connector between financials and operations: Method

Method helps businesses stay with QuickBooks while gaining the operational structure they need to scale. It connects your financials with your front-line processes, so you can unify customer data, standardize workflows, and bring every entity under one roof.

Rather than replacing QuickBooks, Method extends it, filling the operational gaps that accounting software alone can’t: 

  • With deep, bidirectional integration with QuickBooks, financial data stays in sync across invoices, payments, and estimates—no double entry required. Method works with QuickBooks Desktop, Online, and IES.
  • For multi-entity businesses, Method provides consolidated visibility at the head office level while allowing individual franchises, locations, or divisions to maintain autonomy and flexibility.
  • Method’s customization capabilities make it easy to standardize where it counts, like reporting, quoting, or payment processing, while still adapting to the specific needs of each location or team.

As we discussed earlier, most growing businesses feel forced to choose between cost, complexity, and control. But Method unlocks a new option: keep the tools you already trust, and layer in operational visibility, CRM functionality, and scalable workflows: 

Multi Entity Options Method Can Help

Thousands of QuickBooks-based businesses use Method to align their financials and operations, reduce manual work, and create more consistent customer experiences as they grow. It’s the most practical way to extend what’s already working—without overhauling your entire tech stack.

How Mobility City unified 50+ franchises and scaled with confidence

Mobility City is a national franchise that sells, rents, and repairs mobility equipment through over 50 locally owned locations. On the surface, it looked like a thriving business. But behind the scenes, its rapid growth was exposing serious cracks.

Each franchise operated like its own small business. Some ran on QuickBooks, others still relied on paper. There were no shared processes, no unified data, and no way for headquarters to answer even basic questions like: What’s selling best across the system? Item names varied, reporting was fragmented, and buying power was nonexistent because purchasing data was scattered. As VP of Franchise Operations Craig Kreakie put it, “We needed one system to bring it all together.”

That’s where Method came in.

Mobility City partnered with Method to build a customized multi-entity CRM that integrated with QuickBooks and standardized operations—without sacrificing the flexibility of the franchise model. Working closely with Method’s team, Craig and his team mapped every process, including sales, service, rentals, and repairs. Then, together, Method and the Mobility City team designed workflows that every franchise could follow. The result was a unified system that worked across 50+ locations.


The transformation was remarkable:

  • 95% franchise adoption in under a year: Mobility City rolled out Method across nearly all locations, turning scattered operations into a cohesive, scalable system.
  • System-wide visibility and benchmarking: HQ can now monitor sales, service, and compliance in real time, comparing performance across franchises and regions.
  • Operational consistency: Technicians from Texas to New York follow the same digital work orders, ensuring a consistent customer experience and faster billing.
  • Centralized data for supplier leverage: With full visibility into purchasing, Mobility City negotiates better supplier pricing—operating like a national brand, not 50 small shops.
  • Streamlined onboarding: Standardized workflows and built-in training have shortened ramp-up time for new hires and new franchisees.

Craig summed it up best: “Technology alone doesn’t fix bad processes. You have to fix the process, then use the tech. Method gave us both.”

Mobility City’s story shows what’s possible when businesses move beyond fragmented systems. By connecting financials with operations, they didn’t just clean up their books—they built a foundation for scalable, sustainable growth.

The new standard for scaling multi-entity businesses

Managing multiple entities doesn’t have to mean juggling disconnected tools, duplicating work, or drowning in manual reporting.

More and more growing businesses are adopting a smarter approach: keep QuickBooks for accounting, and layer on systems that connect customer data, standardize operations, and bring the business together.

It’s a shift from thinking in silos—location by location, division by division—to running the business as a whole. The companies that scale successfully are the ones that don’t just consolidate their books. They consolidate their operations, their workflows, and their customer experience.

That doesn’t require a full ERP. It doesn’t mean you have to reinvent the entire way you do business. You just have to choose tools that work together, support the way your business is structured, and give your teams the visibility they need, without the complexity they don’t.

With the right platforms and tools, growth becomes less reactive and more intentional. You can scale with systems that support the pace of your business, not slow it down.

Method CRM lets you run your business, your way.

Bottom line: Growth is complicated, but your systems don’t have to be.

If you’re running a multi-entity business, the complexity is real, but it doesn’t have to be inevitable. With the right approach, you can keep using the tools you trust, connect the pieces that matter, and bring every part of your business into focus.

Whether you’re managing five locations or fifty, you deserve systems that work with you, not against you. If you’re ready to simplify your multi-entity operations, try Method today.

crm best practices

CRM best practices for small businesses (2026 guide)

The essential CRM best practice guide for small businesses. Learn how to set up your CRM, integrate it with QuickBooks, train your team, and customize it to fit your processes.

CRM best practices for small businesses (2026 guide) Read More »

Let’s be honest. There are lots of “CRM best practices” and implementation guides out there on the internet, and most just rehash the same standard set of tips. 

We’re going to try to make this one a bit different by zeroing in on best practices and implementation techniques for small businesses using QuickBooks as part of their core operations. These insights are backed by Method’s deep expertise and long history providing CRM software to small businesses around the world. 

What we’ll cover: 

  • What are “CRM best practices”?
  • 8 CRM best practices for small businesses that run on QuickBooks
  • Put these CRM best practices into action

What are“CRM best practices”?

Getting a customer relationship management (CRM) system is only half the battle. The other half is making sure it actually works for your business needs. That’s where these CRM best practices come in. 

Think of CRM best practices as your game plan. They’re the steps that help turn your new CRM system into an invaluable business tool that helps you close deals, serve customers faster, and keep your team on the same page. 

We’re talking about fundamentals like: 

  • Setting clear goals,
  • Centralizing your customer data,
  • Automating repetitive tasks, 
  • And (this one’s big) getting your team to actually use the system. 

If you’re still juggling spreadsheets and QuickBooks to track customers and sales, you’re not alone—40% of sales reps still rely on Excel to store and track customer data. But that fragmented data can lead to human error, double data entry, and lost revenue. According to QuickBooks, this “spreadsheet chaos” is one of the biggest reasons growing businesses make the leap to CRM.

A CRM platform can provide significant ROI and improve customer retention and satisfaction. But here’s the kicker—many CRM projects flop without a solid plan.

CRM best practices are your insurance policy. They help you avoid costly missteps and actually see the ROI you were promised. And if you’re using Method CRM, you’re already a step ahead in helping your business reach its full potential. That’s because we built it to match the way you already work, especially if that work starts in QuickBooks.

Online payments, automated leads, and customer management?

8 CRM best practices for small businesses that run on Quickbooks

Now that we’ve unpacked what CRM best practices actually mean, let’s dive into specific examples and how to implement them. Below are eight practical and proven best practices—designed specifically for small businesses using QuickBooks—that’ll help you get real value out of your CRM.

1. Set clear goals and requirements for your CRM

Before you jump into software selection, take a step back. What exactly do you want your CRM to do? What are your business needs? If you don’t answer that question first, your CRM will likely become an expensive to-do list that no one uses.

A lot of CRM projects fail—and that failure is usually avoidable with proper goal planning. That’s a lot of wasted time and budget.

To avoid CRM failure, start with the basics. What problems are you trying to solve? 

Maybe your sales team is dropping leads, or maybe you’re duplicating work between QuickBooks and spreadsheets. From there, define what success looks like. That could be reducing manual data entry by 50%, sending quotes twice as fast, or increasing repeat business.

This step doesn’t have to be complicated—you just need to be specific about what you’re trying to achieve. The best CRM solutions can help during this stage. Method, for example, offers comprehensive deployment and configuration services, alongside ongoing customer support to help you set and meet your CRM goals. 

When you have a goalpost, you’re no longer hoping a CRM works. You’re making sure it does.

Need help deciding on a CRM? Read our guide comparing Method CRM vs. Salesforce.

2. Pick the right CRM system

Some CRMs look impressive on paper but fall short once your team members start using them. Often, this comes down to a mismatch between your specific needs and who the CRM was built for. Small businesses likely don’t need enterprise-level features like complex revenue forecasting, ERP integrations, or custom APIs. When a system is overloaded with features you won’t use, it becomes cumbersome, adding confusion instead of clarity.

For teams currently relying on QuickBooks and spreadsheets, the priorities are entirely different. You need straightforward tools that simplify your business processes—like contact information tracking and segmentation, web-to-lead capture, and two-way QuickBooks sync to eliminate duplicate data entry. 

If your CRM doesn’t fit how you already work—or includes a surplus of unnecessary and complex features—it creates friction. You’ll likely end up spending hours training staff, troubleshooting integrations, and wrestling with a system that was never designed for your business. 

The right CRM should feel intuitive and connect naturally with the tools you already rely on. For many small businesses, that makes two-way QuickBooks integration essential—which is exactly why Method puts it at the heart of its platform.

Stand out features as a small business to look for include: 

  • Real-time, two-way QuickBooks sync, accessible via a customer portal, so customer info, invoices, and payments stay in sync automatically. 
  • User-friendly interface. Your team should be able to learn it fast, without needing a manual.
  • Customizable fields and screens. Tailor it to match how your business already works.
  • Built-in automation to handle repetitive tasks like follow-ups, invoice creation, or sales and marketing automation.
  • Customer information and sales tracking. Keep tabs on every lead, quote, and deal in one place.
  • Quick setup and onboarding help. Not just software, but a team to walk you through it. 
  • Mobile access so field teams or on-the-go staff can update info from anywhere.
  • Role-based permissions. Make sure employees only see what they need to.
  • Contact and activity history. See every interaction tied to a customer experience, all in one place.

The takeaway? Pick a CRM tool with features and capabilities that align with your business, and one that your team will actually enjoy using, not dread logging into.

3. Make a CRM implementation plan and phase the rollout

Too many CRM projects fail to achieve their original goals because they try to do everything all at once. One day, your team is using spreadsheets. Next, they’re expected to master a whole new system. That’s a recipe for confusion.

Here’s a better way. Break the rollout into phases. Start small. Get one team or feature up and running—like contact management or your sales pipeline—before adding more.

This phased approach works. Tackle one piece at a time to reduce risk and gather feedback. CRM failures happen when companies rush or skip steps. Give yourself a three to six month window and plan each step intentionally.

With Method CRM, you don’t have to figure this out alone. Our professional services team can work with you to map the rollout, and will offer ongoing support if needed.

Sample CRM rollout schedule: 

Month 1: Prep and Planning
• Set CRM goals and requirements
• Clean and consolidate customer data
• Set up your CRM databaseIdentify an internal “CRM champion” and pilot users

Month 2: Data integration and training
• Import contacts and sync with QuickBooks
• Train pilot team on lead tracking and activity logging
• Set up custom fields, screens, and dashboards
• Configure your CRM analytics

Month 3: Initial launch and testing
• Launch sales process and pipeline tracking and basic reports
• Introduce automated follow-ups and reminders
• Hold team Q&A and gather early feedback

Month 4–5: Full-scale rollout and refinement
• Roll out invoicing, estimates, and payment tracking
• Expand access to rest of team with role-based permissions
• Refine workflows and add automation

Month 6: Performance review and optimization
• Analyze usage data and performance
• Adjust CRM features or training as neededCelebrate wins and document best practices

Online payments, automated leads, and customer management?

4. Clean up your data and centralize it

You can’t expect a CRM to work if you feed it bad data. Scattered contact lists, outdated info, and five different versions of the same customer? That’s a mess that will only get worse in the long run.

Before you go live, it’s worth taking time to clean house. 

Ask yourself: 

  • Where does your customer data live right now? Spreadsheets, inboxes, sticky notes? 
  • Are there duplicates? 
  • Are there conflicting entries? 
  • Do you have outdated records? 

Cleaning up your data upfront creates one master list your whole team can trust. When everyone’s looking at the same contact record—with the right phone number, address, and purchase history—things run smoother. This kind of centralization eliminates the “spreadsheet chaos” that causes costly mistakes and wasted time.

In fact, companies that improve their CRM data quality also see a boost in customer retention—not to mention significant productivity gains. All it takes is tidying up those old rows before you hit “import”.

Keep reading: Learn how to import transactions into QuickBooks from Excel.

5. Automate routine tasks to save time

Nobody starts a business to spend their day sending follow-up emails or logging every sales call manually. But for a lot of small teams, that’s exactly what eats up hours each week.

A good CRM should take that grunt work off your plate. Think functionality like: automatic email reminders, instant task creation when a lead goes cold, or invoices that build themselves the moment a deal closes. This can even extend to automations for email marketing campaigns and account-based outreach programs.

With Method CRM, this kind of automation is built in. You can trigger actions based on customer interactions, customer behavior, deal stage, or even time passed. 

For example: If a quote is accepted, Method can automatically email a thank-you message and create an invoice in QuickBooks. Or, if a job moves from pending to approved, it can assign a task to your ops manager to review next steps.

Automation saves reps hours every week—time they can use on customers instead. Method’s team will even help you set up those workflows, so they work exactly how your business runs.

You don’t need fancy tech skills to get this going. Just ask yourself: “What are we doing on repeat that we can automate?” Then, let Method handle the reminders while you focus on what matters most.

6. Appoint a CRM champion to drive adoption

If your team is defaulting to old habits—like spreadsheets, sticky notes, or forgotten follow-ups—there’s one proven way to turn things around: designate a CRM champion inside your business.

A great CRM champion is someone who’s confident using the system and enthusiastic about its value. They’re someone your team can turn to for quick tips, troubleshooting help, and encouragement when learning a new workflow.

Here’s what a CRM champion can do for you:

  • Onboard new users with practical, real-world guidance. 
  • Answer everyday questions about how to log a lead, send an estimate, or schedule a follow-up.
  • Lead by example. Champions use CRMs themselves, and show how it saves time and reduces admin work.
  • Spot adoption blockers early, and work with your team to address them before they become habits.

How do you choose the right person? Look for someone who’s comfortable with the platform, respected by peers, and has a good handle on your sales or customer process. This could be a manager, admin lead, or even a power user who just “gets it.”

Of course, even your champion needs a support system. That’s where Method CRM comes in. Our onboarding process includes guided setup with real humans—often over video calls—to walk your team through the parts of the CRM that matter most. And long after go-live, our customer success team is just a message away if you need us.

Finally, don’t treat adoption as a one-and-done event. Keep momentum going with quick Q&A sessions, cheat sheets, and lunch-and-learns to progressively upskill your entire team. When your team sees the CRM as a tool that works for them—not something imposed on them—they’re far more likely to use it. And that all starts with having a champion to lead the way.

7. Track performance to continuously improve

Getting your CRM set up is just the beginning. To see a real return on investment, you need to regularly evaluate how it’s performing—not just as a tool, but as a driver of business outcomes.

Start with the big questions:

  • What’s working? 
  • What’s not? 
  • Are your goals being met?

To answer those, you need clear metrics tied to your CRM strategy. If your goal was to improve lead follow-up, reduce billing errors, or shorten your sales cycle, your CRM should help you measure progress against those targets.

But don’t stop at outcomes. Track how your team is actually using the system:

  • Are reps consistently logging calls and notes?
  • Are customer profiles complete and up-to-date?
  • Are deals moving smoothly through your pipeline?
  • Is there a measurable impact on lead conversion or customer retention?

This is where ROI starts to become clearer. To assess your return, compare your CRM pricing and associated costs—licensing, onboarding, staff training—against the financial gains it’s helping unlock. 

That could include:

  • More closed deals due to faster, more consistent follow-up
  • Time saved by eliminating manual tasks
  • Fewer errors thanks to automated data syncing with QuickBooks or Xero
  • Higher customer satisfaction and repeat business
  • Positive impact to revenue and profitability after CRM implementation 

To make this real, set benchmarks and track against them. For example, if your team was closing 1 in 10 new leads before you implement CRM, can you get that to 1 in 7? If it used to take five days to send a quote, can you cut that down to one?

Working through these calculations help make the impact of your CRM clear, which in turn helps with adoption and confidence in the system—something that’s an ongoing problem across many businesses.

In fact, CRM adoption is fairly high across industries at about 64% but overall satisfaction with these platforms is still low overall—largely due to a lack of clarity around their impact and, as a consequence, low internal usage. This highlights the need to continuously track sentiment and outcomes related to your CRM to ensure that the tool is actually driving results.

Think of it like checking your mirrors while driving. A quick look tells you if it’s time to speed up, slow down, or change lanes. The better your visibility, the smoother the ride.

Online payments, automated leads, and customer management?

Put these CRM best practices into action

A CRM only delivers value when it’s planned, personalized, and actually used. Start small. Set clear goals, clean your data, and pick a system that fits how you already work. 

Roll it out in phases, train your team with real-world tasks, and use automation to lighten the load. Then check your progress, refine, and repeat. With the right habits in place, your CRM becomes more than just software—it becomes the engine that drives your business forward. 

And with Method, you’ve got a partner to help you do it right from day one. Discover how Method CRM can help you consolidate data management, streamline workflows, and get real-time insights into every aspect of your business. Learn more here.