Staying on top of invoicing is crucial for the financial health of any small business. The right invoicing software helps you:
- Simplify billing.
- Get paid faster.
- Establish a professional brand.
In this blog, you’ll explore the best invoice software options for small businesses in 2025. By the end, you’ll be equipped with everything you need to make the best choice for your unique operations.
Let’s get started!
Why small business invoice software is essential
With limited resources and endless responsibilities, it’s easy for invoicing to fall through the cracks. But this leads to cash flow issues and strained relationships with clients or vendors.
This is where small business invoice software comes into play. It offers an efficient solution to an otherwise time-consuming and error-prone process.
By automating invoicing tasks, these software tools save valuable time and ensure:
- Accuracy.
- Consistency.
- Timely payments.
Establish a professional brand and credibility with your customers
Customizable invoice templates with your logo and branding elements project a polished, trustworthy image to clients. This attention to detail builds credibility and helps retain customers long-term.
Get paid sooner with online payments
Invoice software that integrates with online payment gateways lets customers pay invoices immediately via credit card or ACH transfer. This convenience reduces delays and speeds up your cash flow.
Automate recurring billing and deposit payments
For businesses that bill on a recurring schedule, e-invoicing software eliminates manual effort each cycle. Some tools also offer automatic payment reminders and the ability to save payment details for faster processing. As a result, your team has more time to focus on value-added tasks.
Best invoice software for small businesses
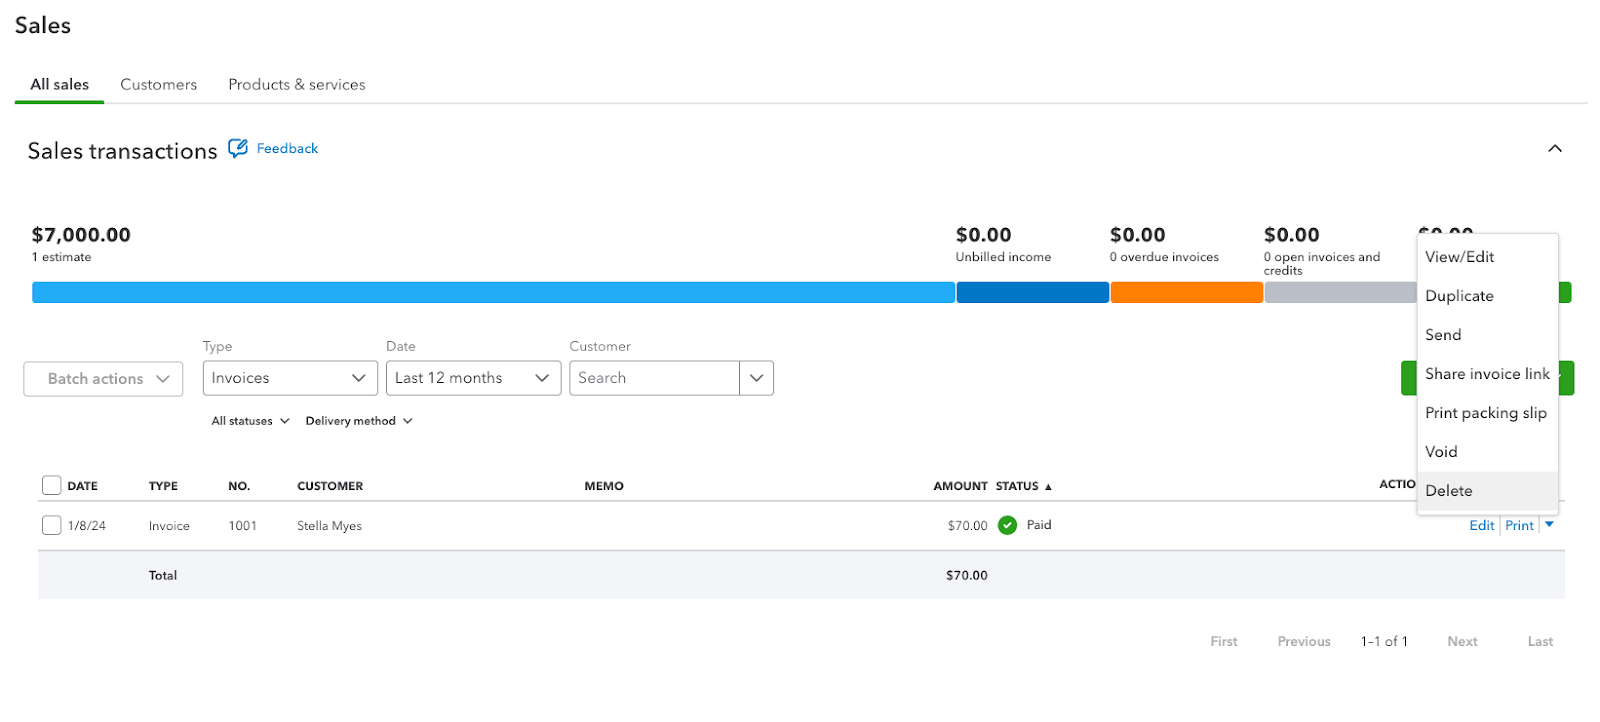
Method CRM
Method is a powerful cloud-based CRM solution built for small businesses. In one intuitive platform, you can:
- Automate invoices.
- Manage your sales pipeline.
- Track customer interactions — and more!
If you use QuickBooks or Xero accounting software, Method is an absolute must to perfect your invoices and improve your bottom line.
Features
- Contact and sales pipeline management.
- Customizable invoice templates.
- Online customer portals with payments via Stripe/PayPal.
- Recurring invoicing.
- Mobile app for invoicing on the go.
Pros
- Extensive customization with help from experts.
- Automated customer workflows, such as lead collection via web-to-lead forms.
- Affordable pricing for small businesses.
- Excellent customer support.
Cons
- Only available in English.
- Best for QuickBooks or Xero users.
- Mobile app has some limitations.
Cost
Method offers three pricing plans:
- Contact Management: $25 per user per month.
- CRM Pro: $44 per user per month.
- CRM Enterprise: $74 per user per month.
Method also offers a 14-day free trial — no credit card required.
Invoicely
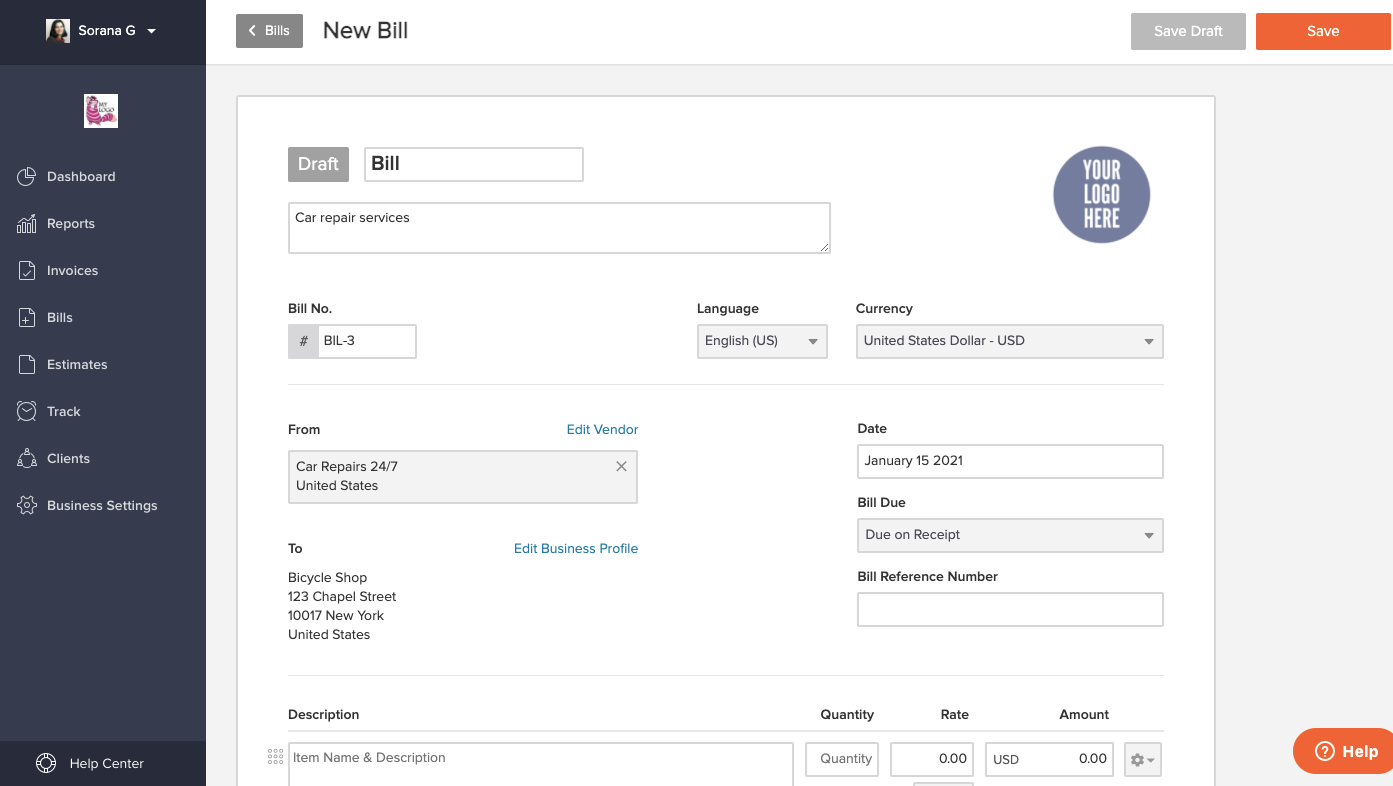
Image credit: Invoicely
Invoicely is a user-friendly invoicing and billing solution designed for small businesses and freelancers. With it, you can create professional invoices in seconds and get paid faster.
Features
- Branded, professional invoice templates.
- Online payments and payment reminders.
- Recurring invoicing and auto-billing.
- Time tracking and expense management.
- Mobile app for iOS and Android.
Pros
- Clean, modern user interface.
- Robust feature set for the price.
- Unlimited invoices at all plan levels.
Cons
- Limited integrations with other business tools.
- Customer support could be improved.
Cost
Invoicely offers three monthly pricing packages, which include the:
- Basic plan: $9.99 per month.
- Professional plan: $19.99 per month.
- Enterprise plan: $29.99 per month.
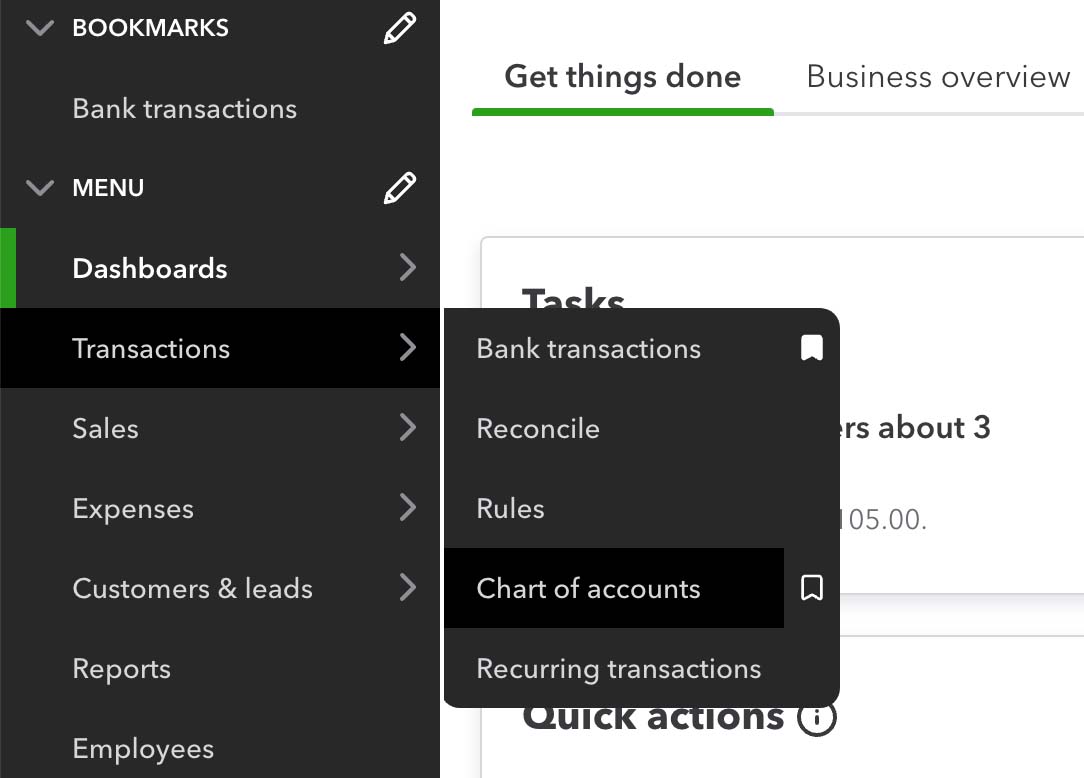
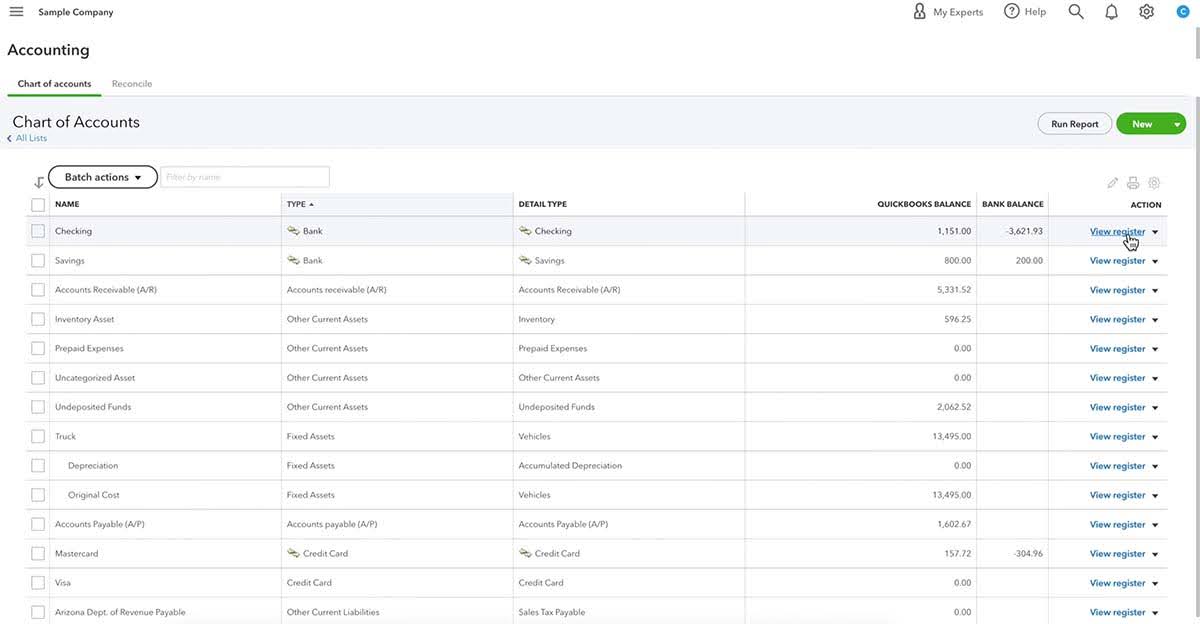
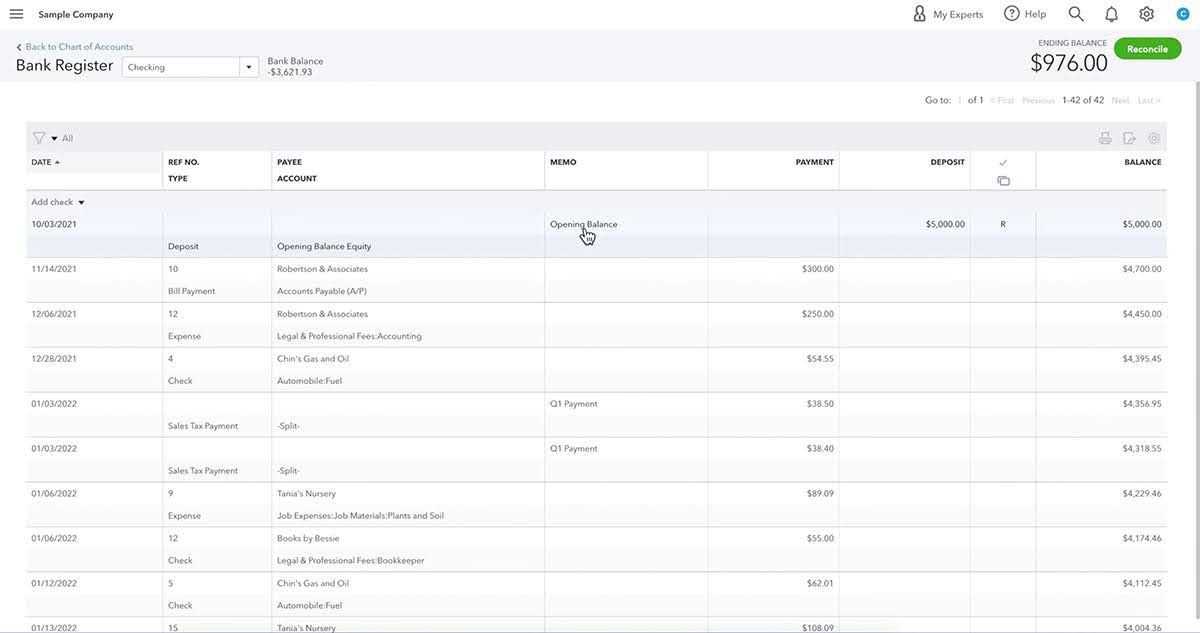
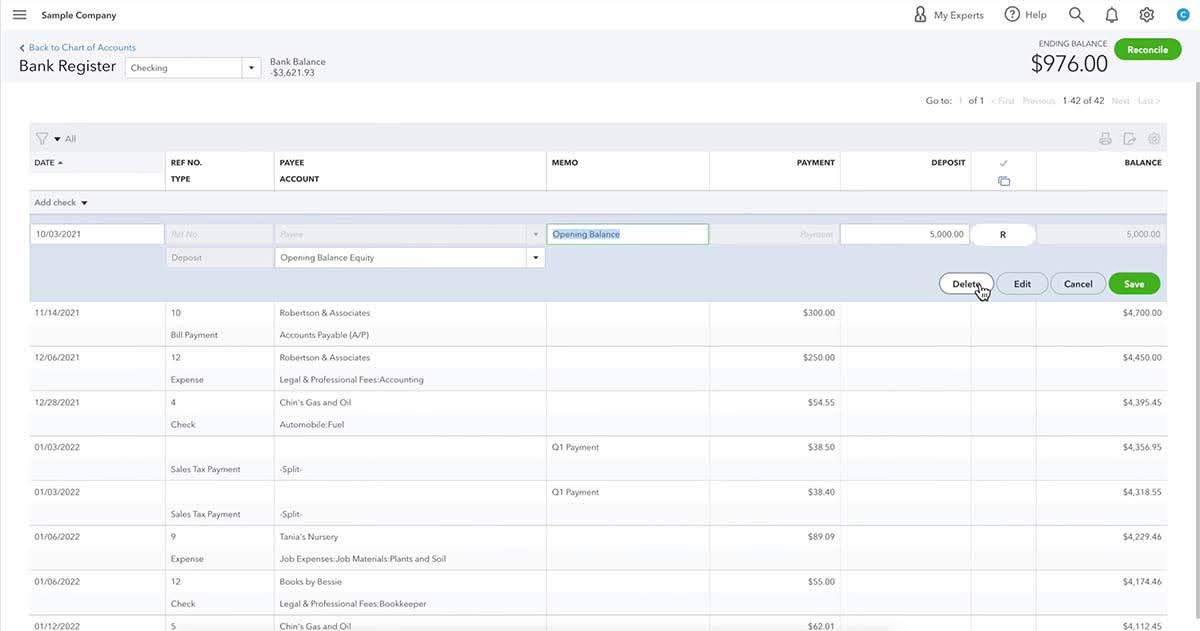
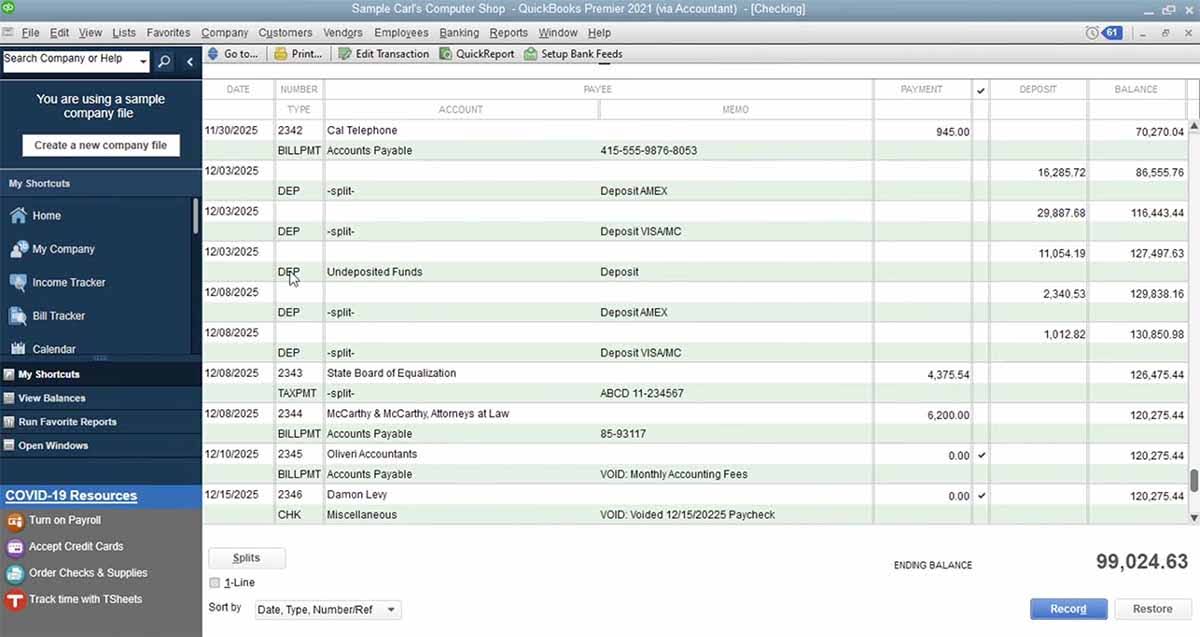
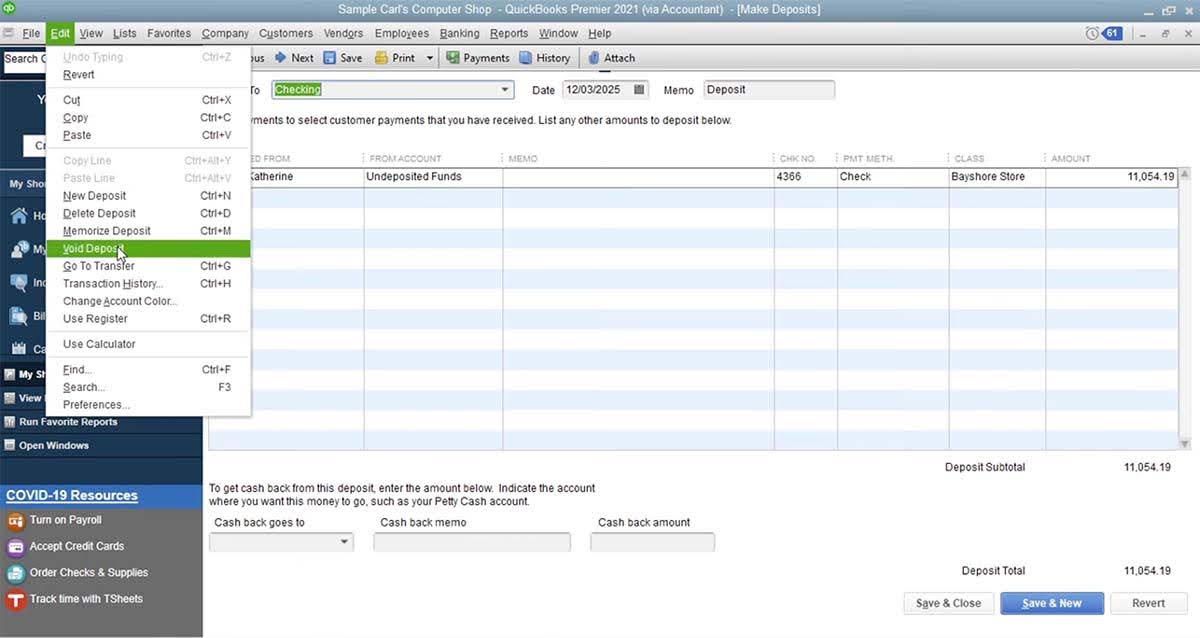
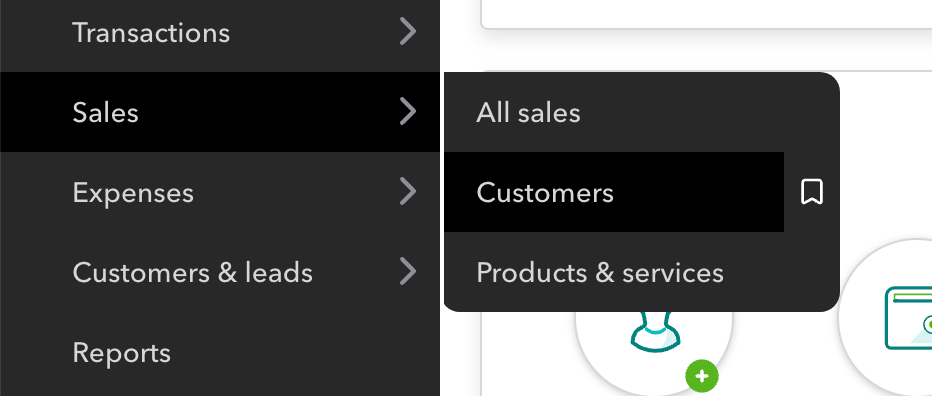
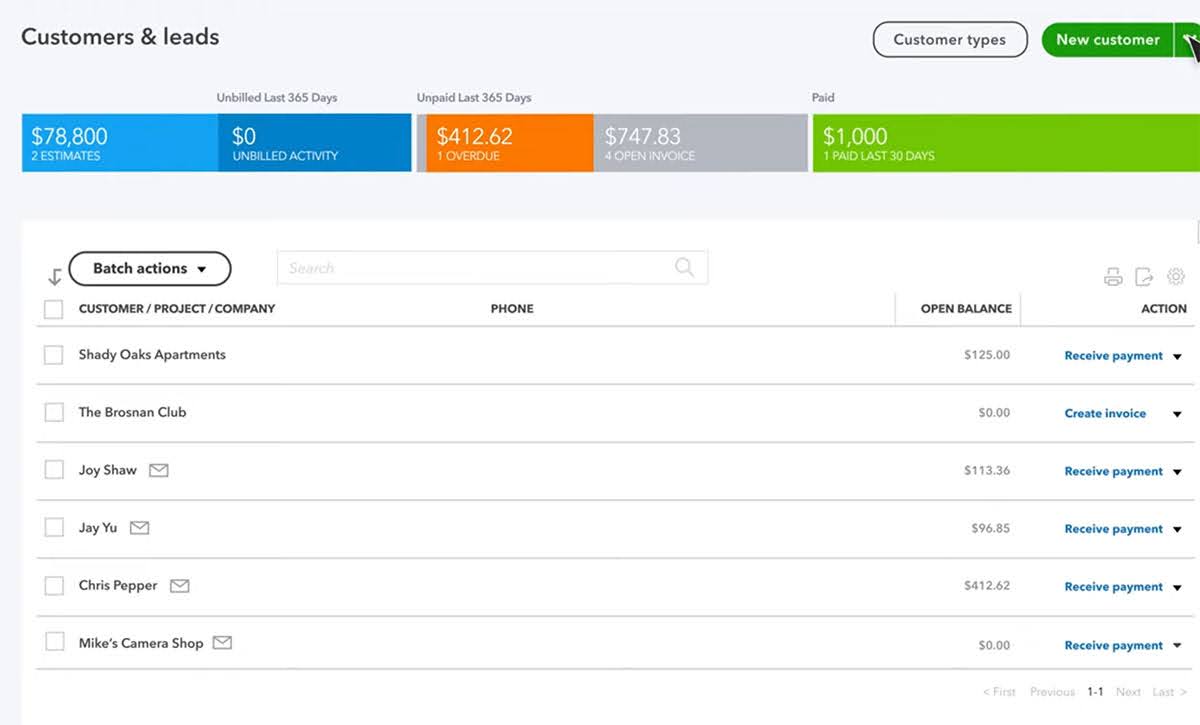
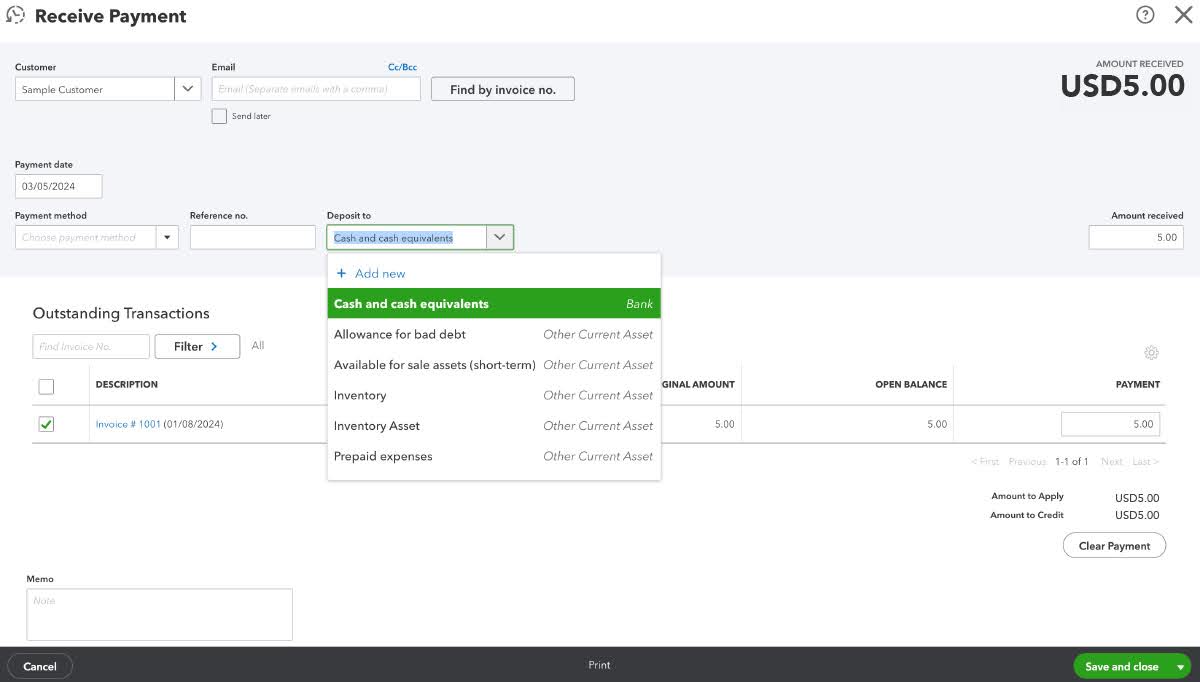
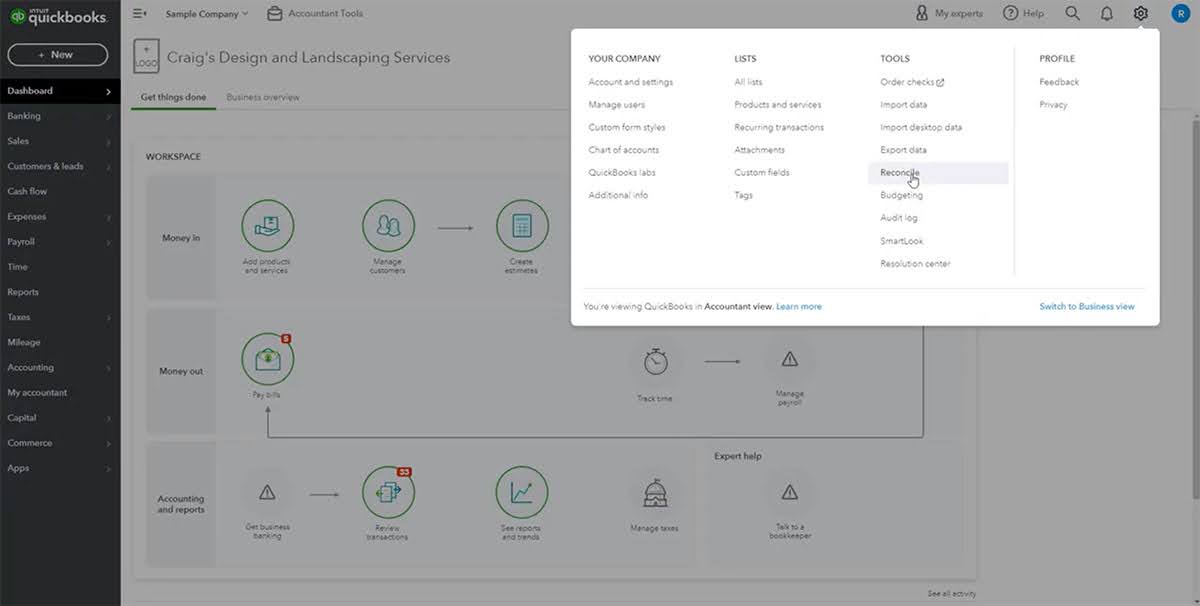
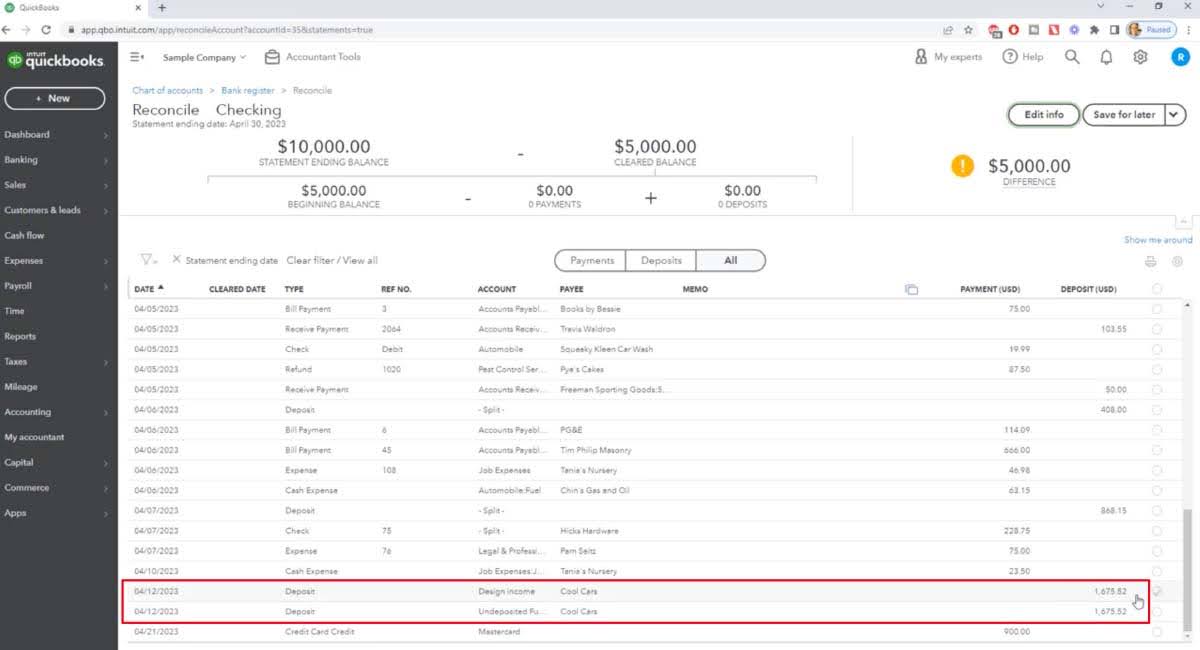
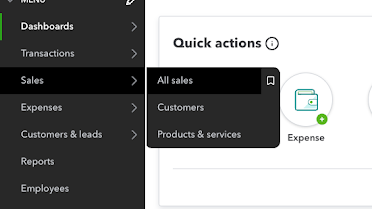
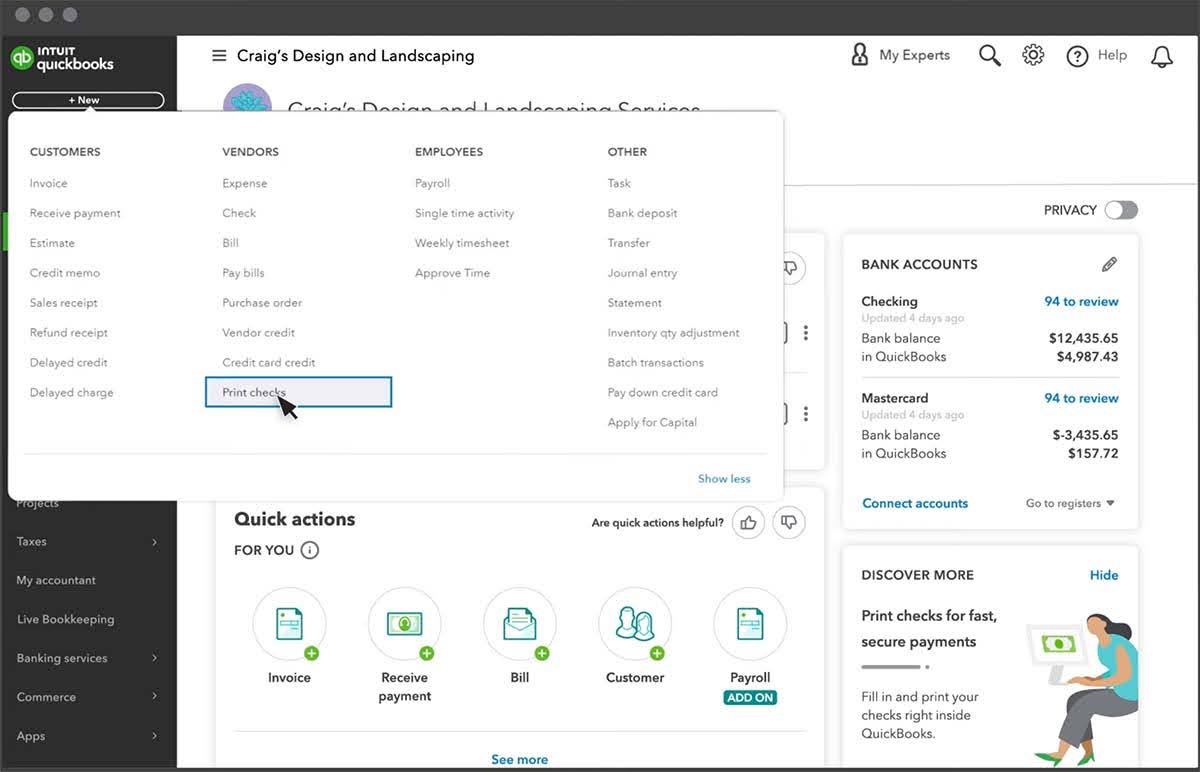
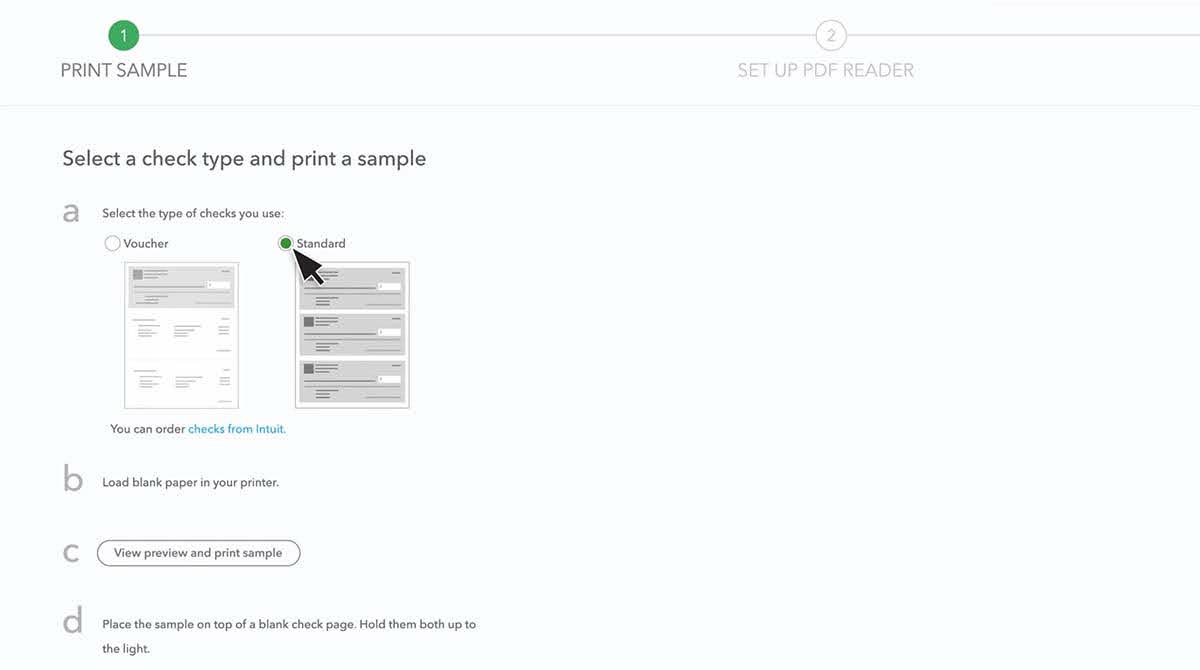
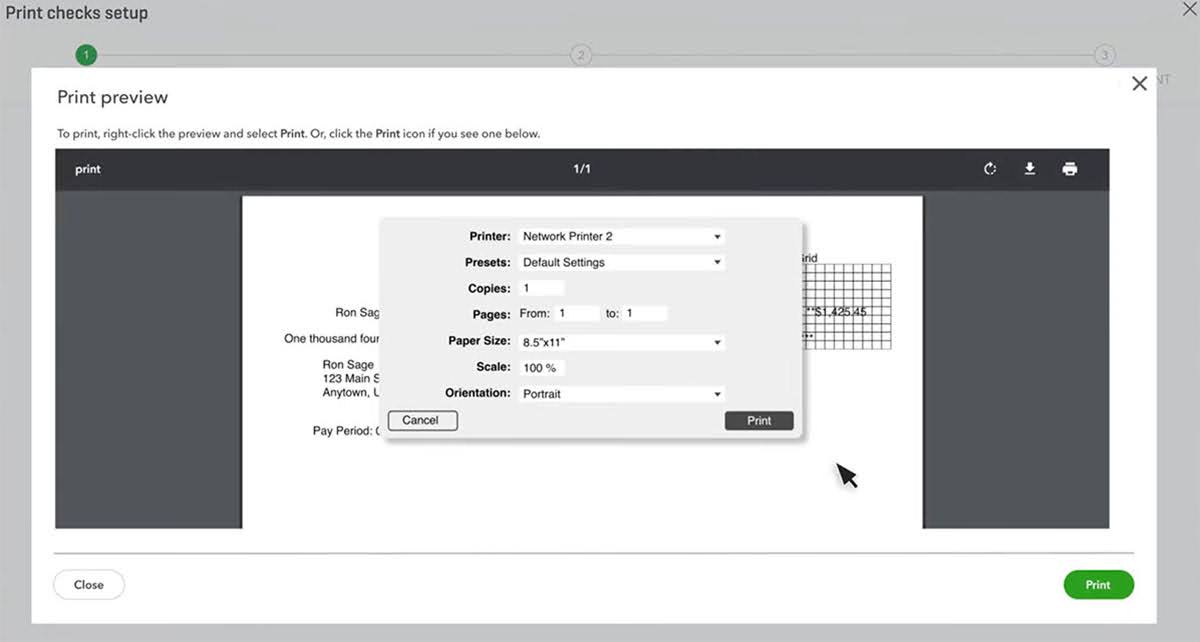
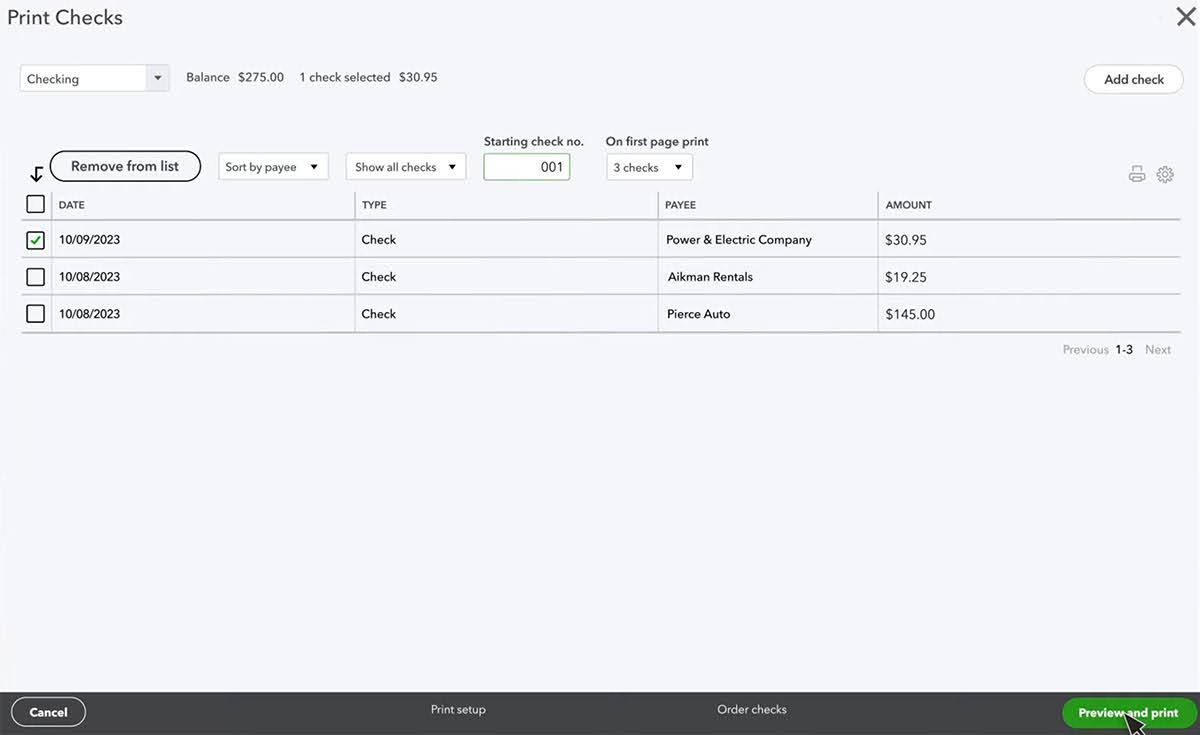
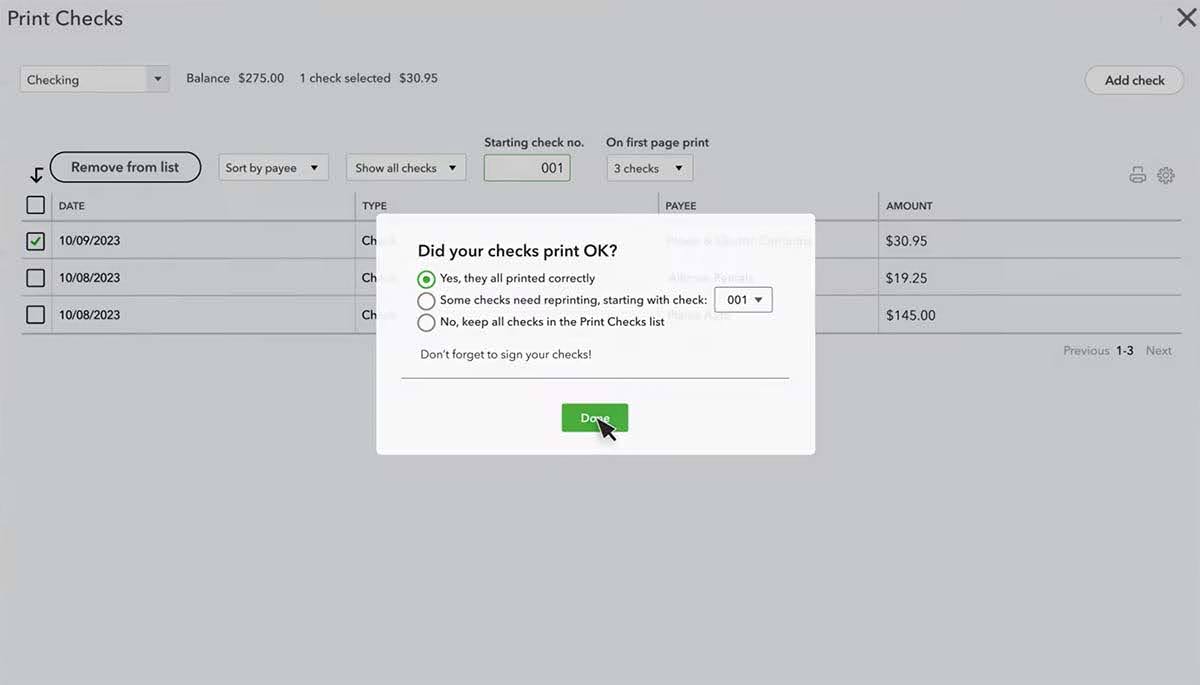
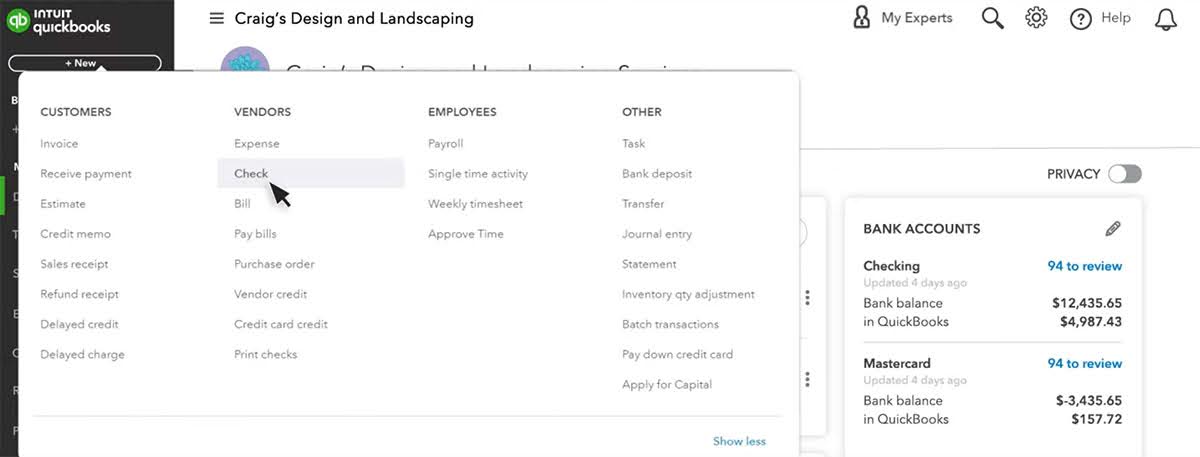
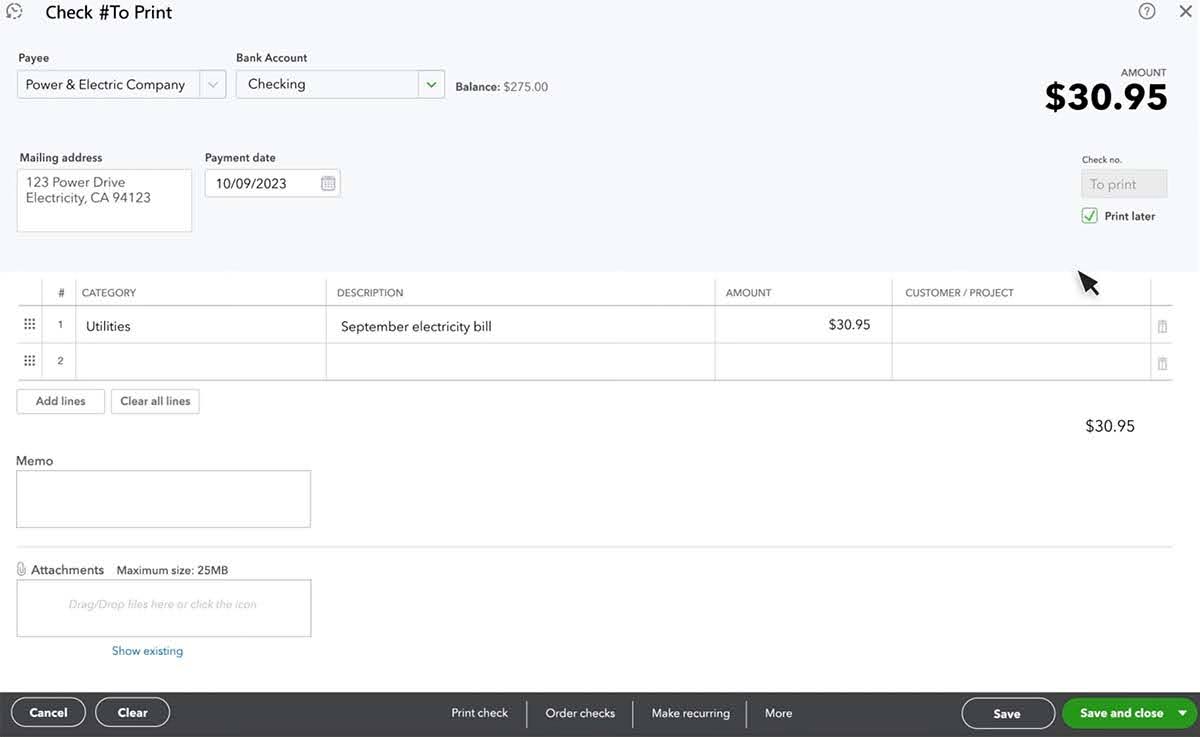
QuickBooks Online
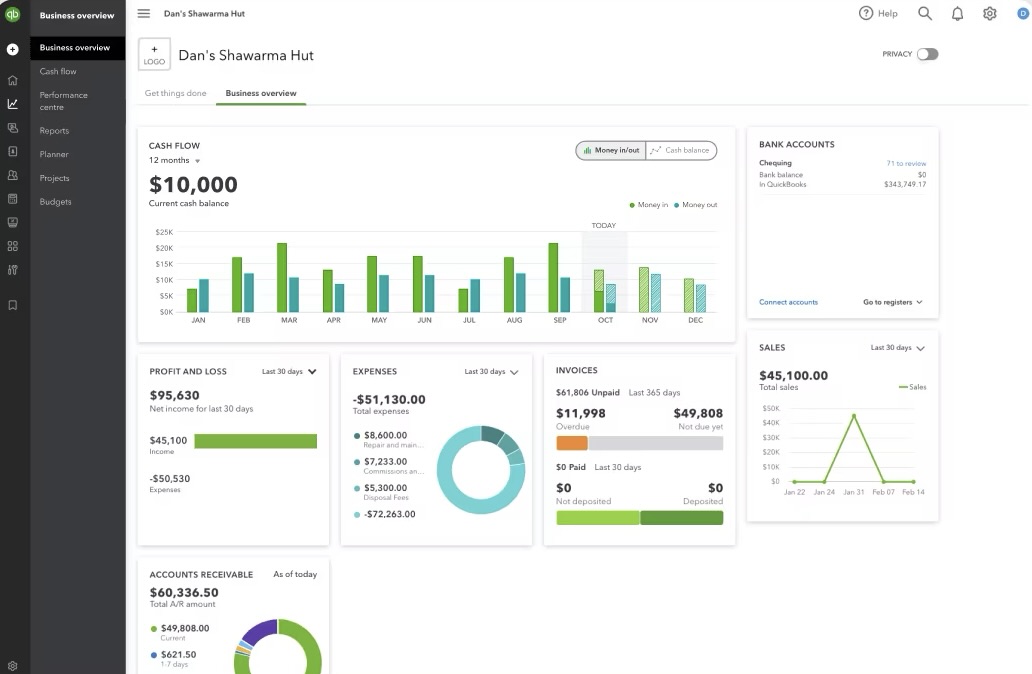
Image credit: QuickBooks
QuickBooks Online is the leading cloud-based accounting software for small businesses. It lets you easily manage invoices, expenses, payroll, and more from anywhere. Plus, gain insights with real-time reports and seamless integration with popular business apps.
Features
- Comprehensive accounting and invoicing.
- Recurring invoice scheduling.
- Online payment acceptance.
- Robust reporting and analytics.
Pros
- Industry-leading accounting software.
- Integrates with many business apps.
- Powerful mobile functionality.
Cons
- Higher learning curve for non-accountants.
- Relatively expensive for basic invoicing needs.
Cost
QuickBooks Online offers four pricing options:
- Simple Start: $30 per month.
- Essentials: $60 per month.
- Plus: $90 per month.
- Advanced: $200 per month.
If you want to try QuickBooks, sign up here for 30% off your first 12 months. You can also take advantage of its 30-day free trial.
Xero
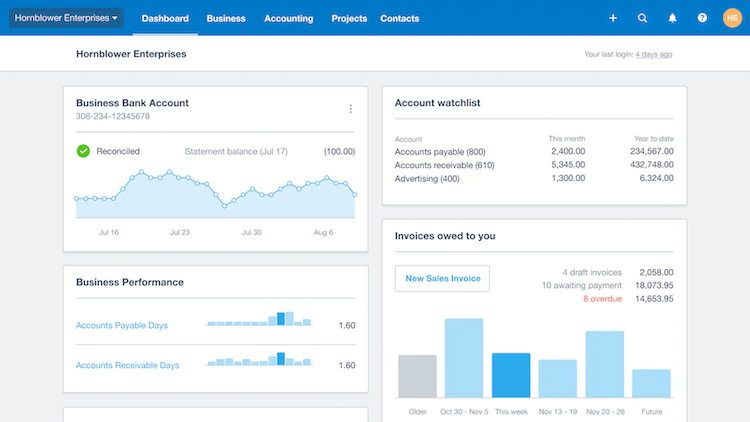
Image credit: Xero
Like QuickBooks, Xero is a powerful online accounting software built for small businesses. With Xero’s comprehensive features, you can stay on top of:
- Invoicing.
- Bank reconciliation.
- Inventory.
Features
- Customizable invoice templates.
- Online invoicing and payment processing.
- Automatic late payment reminders.
- Expense tracking and management.
- Reporting tools.
Pros
- User-friendly interface.
- Multi-currency support.
- Mobile app for on-the-go invoicing.
Cons
- Occasional performance issues.
- Steep learning curve for advanced features.
Cost
Xero offers three pricing plans:
- Early: $15 per month.
- Growing: $42 per month.
- Established: $78 per month.
You can also try the software free for 30 days.
FreshBooks
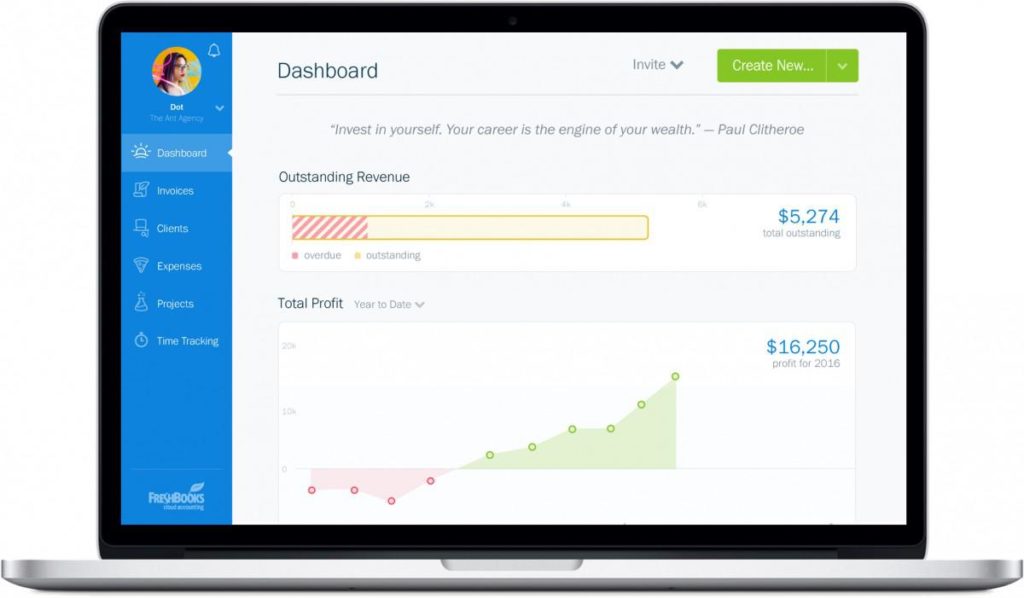
Image credit: FreshBooks
FreshBooks is a cloud-based invoicing and accounting solution made for small businesses and self-employed professionals. Send professional invoices, track expenses, manage projects, and get paid faster with online payments and automated late payment reminders.
Features
- Intuitive invoicing and time tracking.
- Automated late payment reminders.
- Online payment acceptance.
- Project management tools.
- Customizable reports and dashboards.
Pros
- Excellent customer support.
- Easy-to-use mobile app.
- Recurring invoicing and subscription management.
- Seamless integration with popular apps.
Cons
- Limited customization options for invoices.
- No inventory management features.
Cost
FreshBooks offers four pricing plans:
- Lite: $15 per month.
- Plus: $30 per month.
- Premium: $55 per month.
- Select: Custom pricing.
Zoho
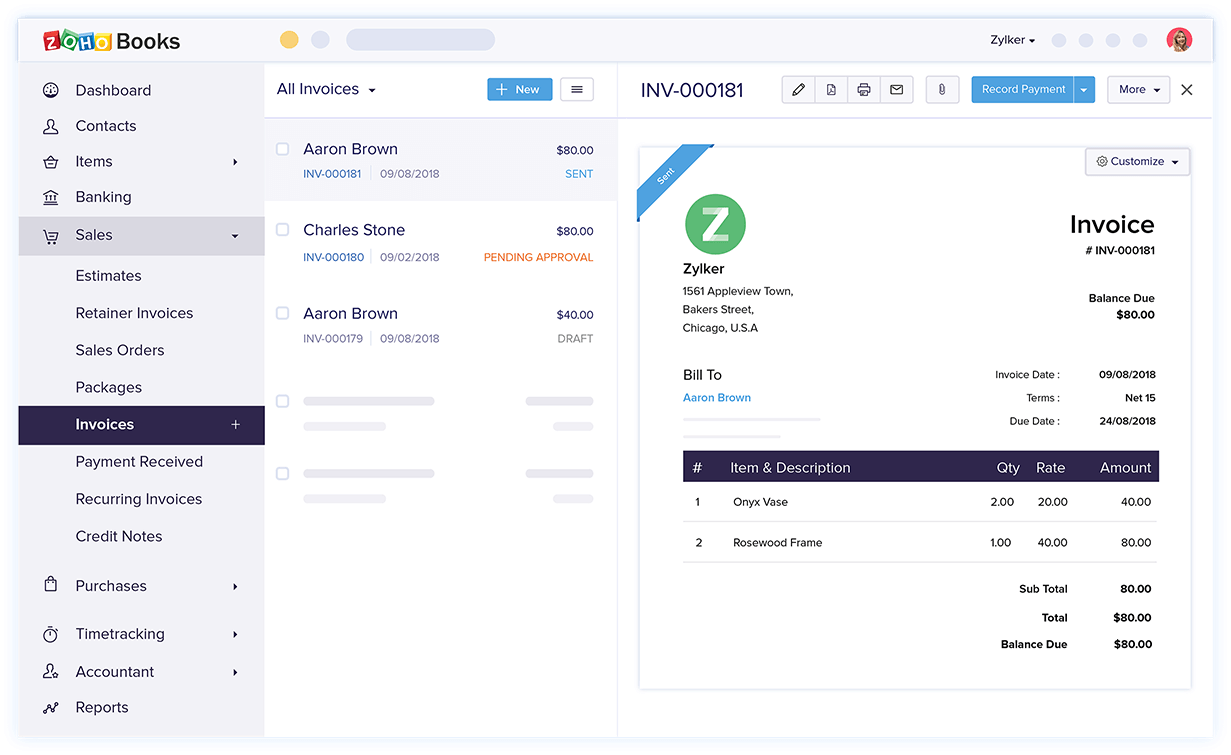
Image credit: SoftwareConnect
Zoho offers a comprehensive suite of online productivity tools and business applications for enterprises of all sizes. From CRM and accounting software to workplace collaboration apps, Zoho provides cloud-based solutions to run your entire business.
Features
- Comprehensive invoicing and billing.
- Time tracking and expense management.
- Client portal for self-service.
- Inventory management and purchase orders.
- Customizable reports and dashboards.
Pros
- Robust feature set.
- Seamless integration with other Zoho apps.
- Excellent customer support.
Cons
- User interface can be overwhelming.
- Limited mobile app functionality.
Cost
Zoho Invoice offers four pricing plans:
- Free.
- Basic: $9 per month.
- Standard: $19 per month.
- Professional: $29 per month.
What is the best billing software for a small business?
Ultimately, the best invoice software for your small business depends on your specific needs and budget. QuickBooks and Xero are both excellent choices for businesses that require robust accounting features and reporting capabilities. FreshBooks is ideal for service-based businesses that prioritize ease of use and time tracking.
Wrap up: Best invoice software for small business
Simplifying your invoicing process saves you time and effort, which lets you focus on growing your business. The best invoice software for your small business depends on your:
- Needs.
- Business goals.
- Budget.
If you go with QuickBooks or Xero, you’ll want to consider Method CRM to create an all-in-one system that gives you back control of your operations.
Best invoicing software for small business FAQs
What is the easiest invoice app to use?
Method CRM is one of the easiest invoice apps to use, thanks to its intuitive interface and user-friendly design. It’s a great choice for small businesses that want a straightforward invoicing solution without a steep learning curve.
What are some benefits of billing software?
Billing software offers several benefits for small businesses, including:
- Streamlined invoicing process.
- Improved cash flow management.
- Automated late payment reminders.
- Professional-looking invoices.
- Detailed reporting and analytics.
- Time-saving features like recurring invoices and online payments.
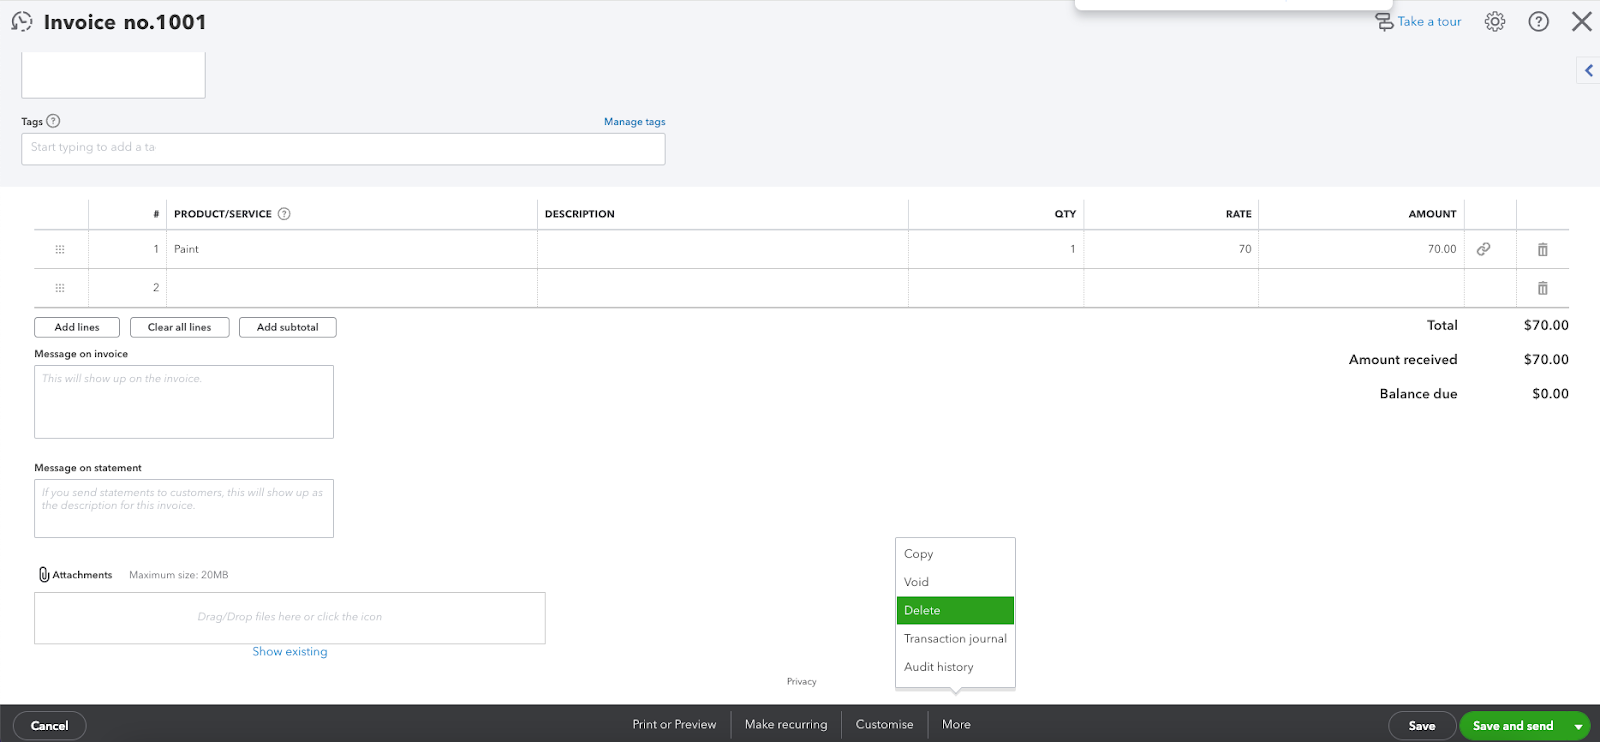
How do I send an invoice to someone?
With most invoice software, you can send invoices to clients via email or through a client portal. Simply create a new invoice, enter the client’s information and invoice details, and choose the delivery method. Some software also lets you accept online payments directly from the invoice.
Ready to get paid on time, every time? Try Method free for 14 days.
Image credit: Kindel Media via Pexels