Whether you’re printing checks as part of your company payroll or to pay bills, knowing how to print checks in QuickBooks Online is an important part of handling your daily business functions. For many, this task is complicated and time-consuming — but it doesn’t have to be.
Fortunately, QuickBooks Online simplifies this process with its built-in check printing features. By printing checks directly from QuickBooks Online, you can complete the payment process faster and keep your finances updated at the same time.
In this guide, you’ll learn:
- How to set up your printer settings for checks.
- How to set up the print check features in QuickBooks.
- How to print checks in QuickBooks Online.
- How to solve common check printing errors.
- How to modify or edit your checks in QuickBooks.
Let’s jump in!
Getting started to print checks in QuickBooks Online
Before you learn how to print checks in QuickBooks Online, you’ll want to check that your printer:
- Has the correct paper stock for checks. If you load paper that is too thick or slippery, it can cause printing issues.
- Is compatible with check printing.
Paper that is customized for checks includes security features (watermark, security fonts). This ensures that information is aligned properly to validate your checks.
You can still print checks on a regular office paper type. So, if you don’t have any specialized check paper available, normal printer paper still works in a pinch. Most home and office printers are able to print checks, so you should be fine if your printer is set up to print letter-size (8.5”x11”) paper.
Setting up and using Intuit QuickBooks Online for check printing lets you print directly from your business accounts. This is a great way to keep your financial records organized and avoid manual data entry.
Configure your print settings for printing checks
As the final step before you address how to print checks in QuickBooks Online, you’ll need to configure your computer print setup. Chances are, you already have an office printer set up.
To check your printer preferences on a Microsoft Windows computer:
- Select your computer’s “Control panel” menu, navigate to “Hardware and sound,” and click on “Devices and printers.”
- Right-click on your printer and choose “Printing preferences.”
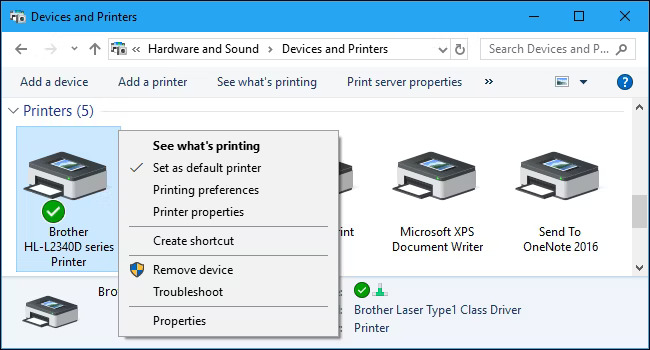
Image credit: How-To Geek
- Depending on your printer system, you’ll have different options to choose from. However, every printer has standard options you’ll want to configure as follows:
- Paper: Letter size.
- Orientation: Portrait.
- Scale: 100%.
- Fit to page: Off.
You may need to make further adjustments depending on how your check test print comes out.
How to print checks in QuickBooks Online
Follow along with this simple, step-by-step guide to learn how to print checks in QuickBooks Online.
Step 1: Set up QuickBooks to print checks
If you’re printing checks for the very first time, access your print checks setup by following these steps:
- From the main menu, select “+ New” and then choose “Print checks.”
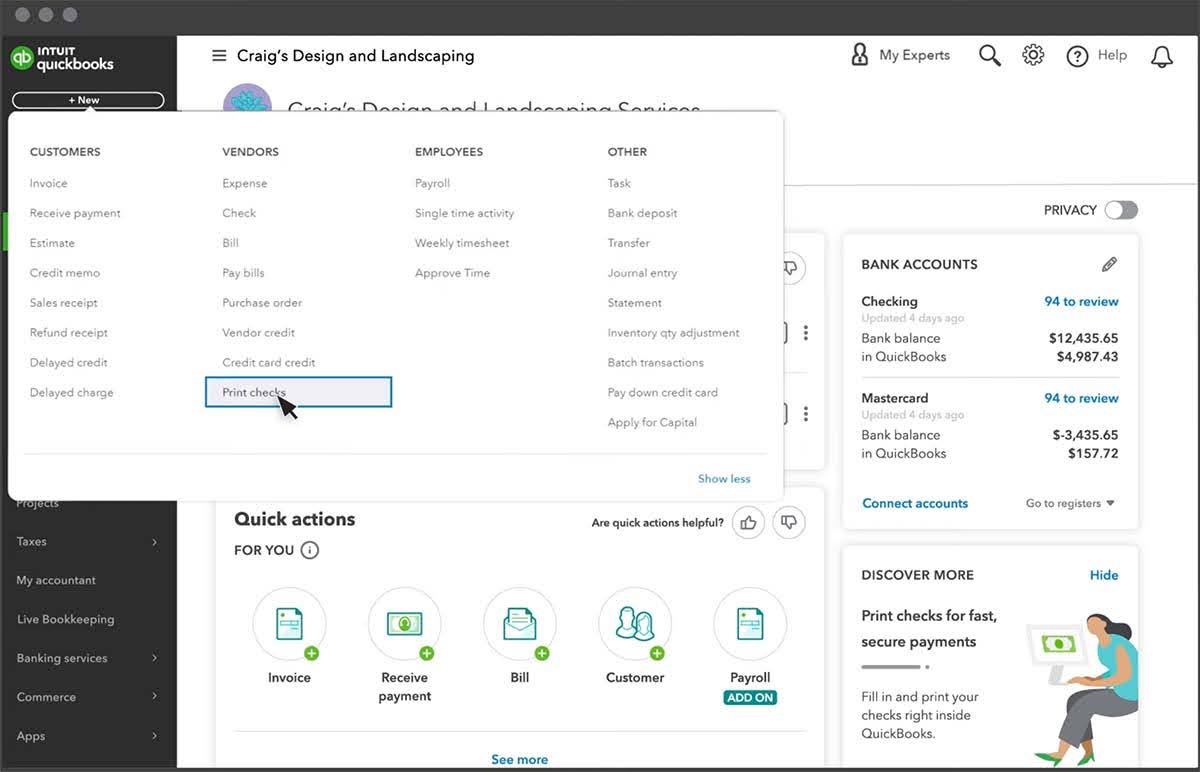
Image credit: Intuit QuickBooks
- In the preview option, choose the check format (standard or voucher) you want to print. If you’re printing paychecks, choose voucher checks, as this option is designed with fields for pay stubs. If you need to execute a sequence of checks, check the “Standard” box.
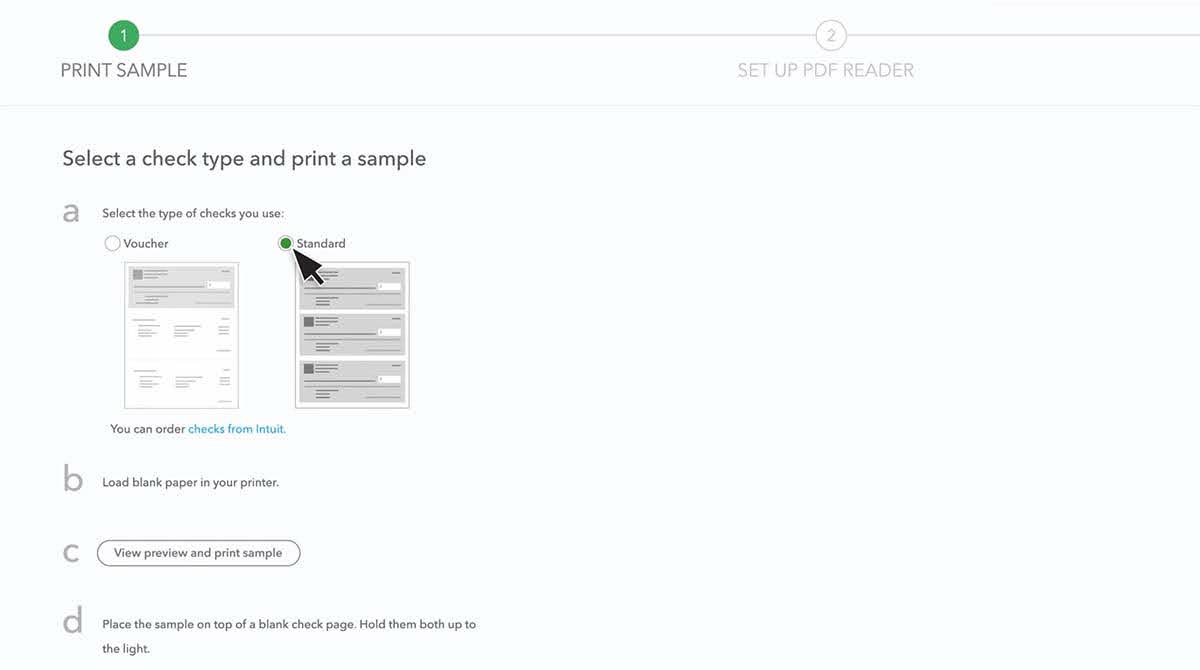
Image credit: Intuit QuickBooks
Step 2: Add checks to the print queue
- After choosing your check type, click “View preview and print sample.”
- Your test check is previewed in the new window. Click “Print.”
- Ensure the printer settings (single/multiple checks, tray selection) are correct and that your preview is confirmed before clicking “Print” again.
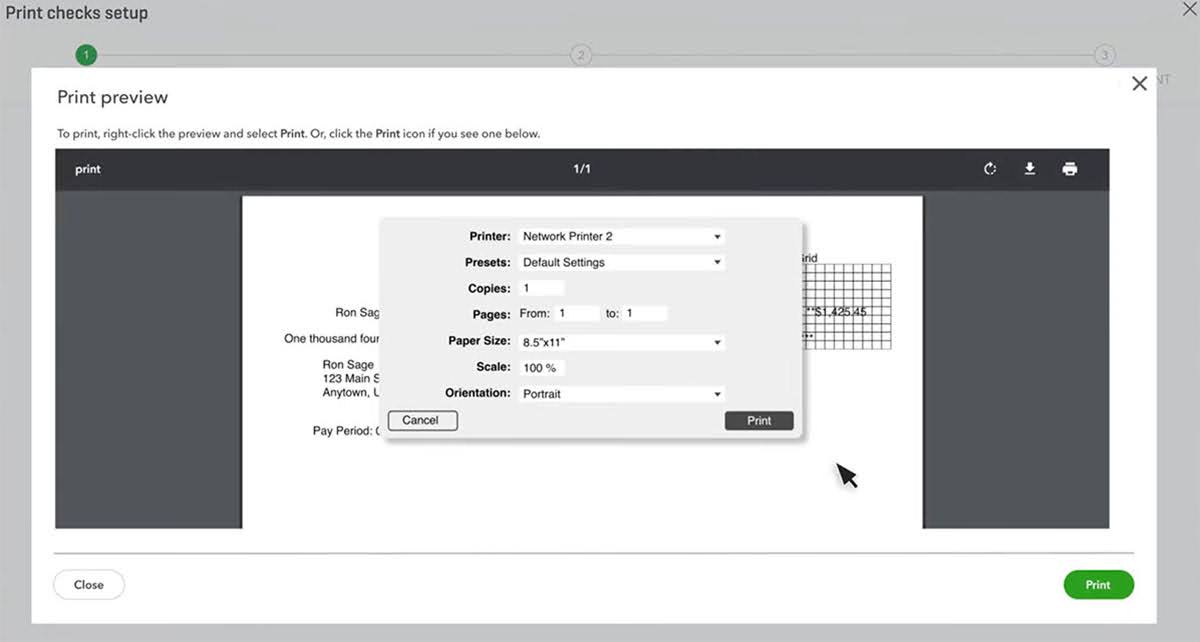
Image credit: Intuit QuickBooks
- Once the sample check is printed, align it over your pre-printed check stock to make sure the print quality is adjusted properly and that your alignment settings are correct. If you need to adjust the print settings because it’s misaligned, click “No, continue setup.”
- Once it is checked over and your sample check is executed correctly, click “Yes, I’m finished.”
- QuickBooks will list all checks you’ve marked to “Print later.” Click each checkbox individually to select only the checks you want to print right now.
Step 3: Printing your checks
- Make sure your printer is loaded with the paper stock you want to print your checks on.
- Under the “Starting check no.” field, enter the check number of the first check you want to print. Then, click “Preview and print” and “Print” in the next two pop-up windows.
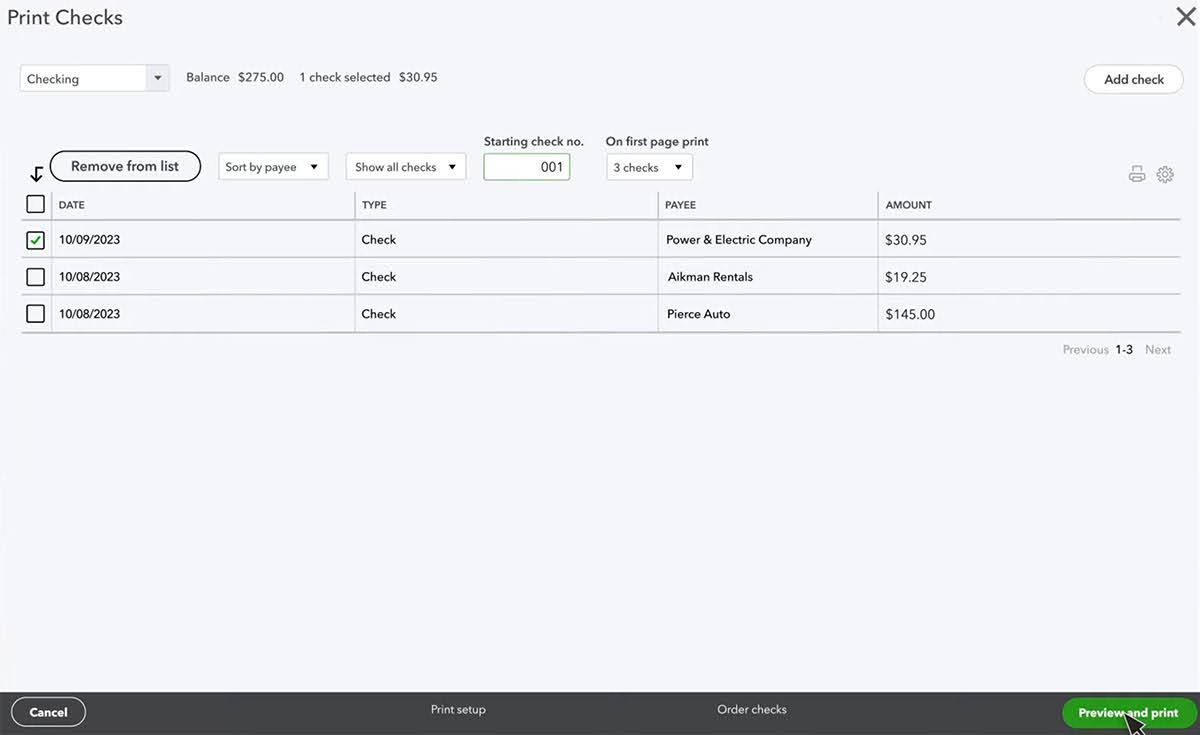
Image credit: Intuit QuickBooks
- Your print status is authorized to begin printing your checks. When it’s finished, look over everything to see if any checks were printed misaligned. If there were, you can re-print them from the next QuickBooks window. Make sure “Some checks need reprinting, starting with check:” is selected, and enter the number of the check where the errors began. If all your checks are printed correctly, click “Done.”
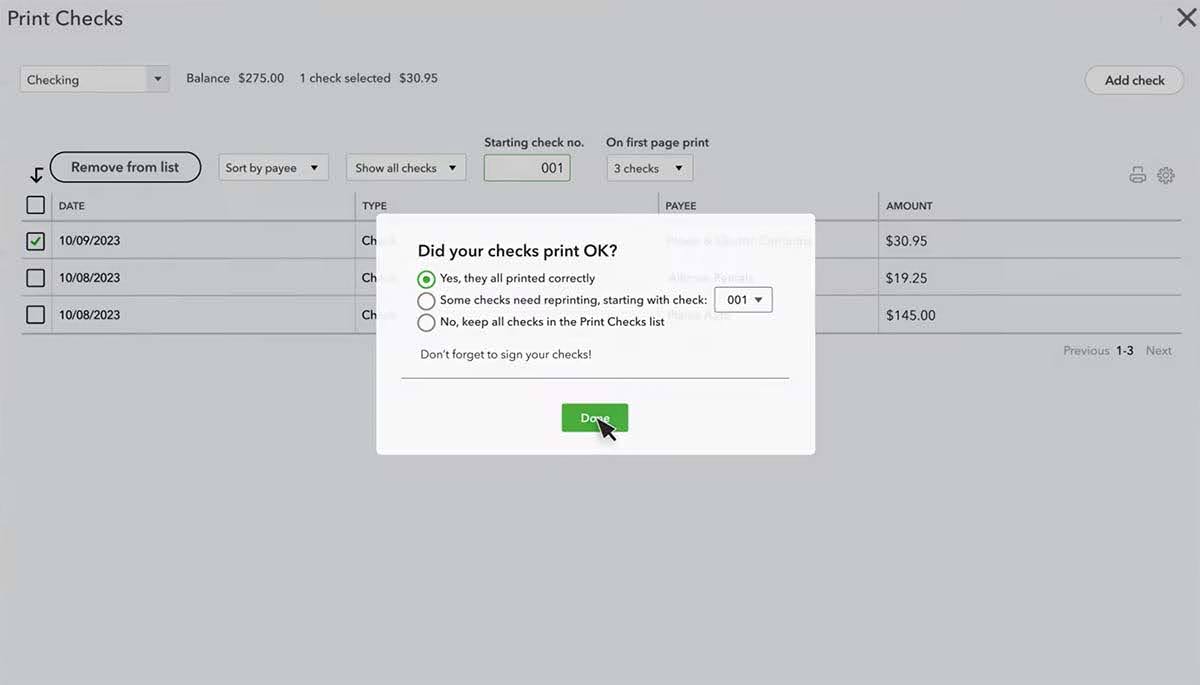
Image credit: Intuit QuickBooks
That’s all there is to it! You now know how to print checks in QuickBooks Online.
Accurately printing checks from QuickBooks is key to your financial management. It doesn’t just save you time and money — making sure each check is recorded correctly builds confidence in your:
- Community.
- Vendors.
- Employees.
Common issues and solutions
It doesn’t end with knowing how to print checks in QuickBooks Online. Preventing, diagnosing, and solving common problems is just as important. Here are a few issues you might encounter and tips to work through them.
Incorrect printer alignment
If your checks are printing misaligned, such as the signature line (if pre-printed) not printing in the right place, you may need to do several test prints to find the correct setting. No two printers are exactly the same, so settings that work with one printer may not work with yours.
Check that your print window:
- Does not have “Fit to page” checked, as this option resizes your printed checks.
- Has the print scale set at 100%.
- Is set to portrait mode and not landscape mode.
- Has letter (8.5”x11”) size paper selected.
To avoid issues, also ensure user permissions are set and that your wifi setting is validated.
Ink quality
You may notice streaky or patchy printing on your checks. If this happens, it’s almost certainly a problem with the printer itself. Check that your printer’s:
- Software version is up to date. You may need to download a patch or update.
- Rollers don’t have ink on them. If so, you will need to clean them.
- Print speed is not set too fast. Some printer type settings have paper move through the printer more slowly.
Hint: Should other pages print with the same issue, you may need to bring your printer in for repairs or see that it is accessed and recalibrated by a service technician.
Also, note that if glossy or extra-thick stock paper is chosen for your checks, you may encounter issues. Your printer may not be designed to print on this type of paper, which causes streaky printing and/or alignment issues.
Create or modify your checks
It’s easy to create checks and modify them in QuickBooks Online. We’ll show you step by step how to do both.
Creating a new check
To create a check, follow these steps:
- Select the “+ New” icon and then “Check.”
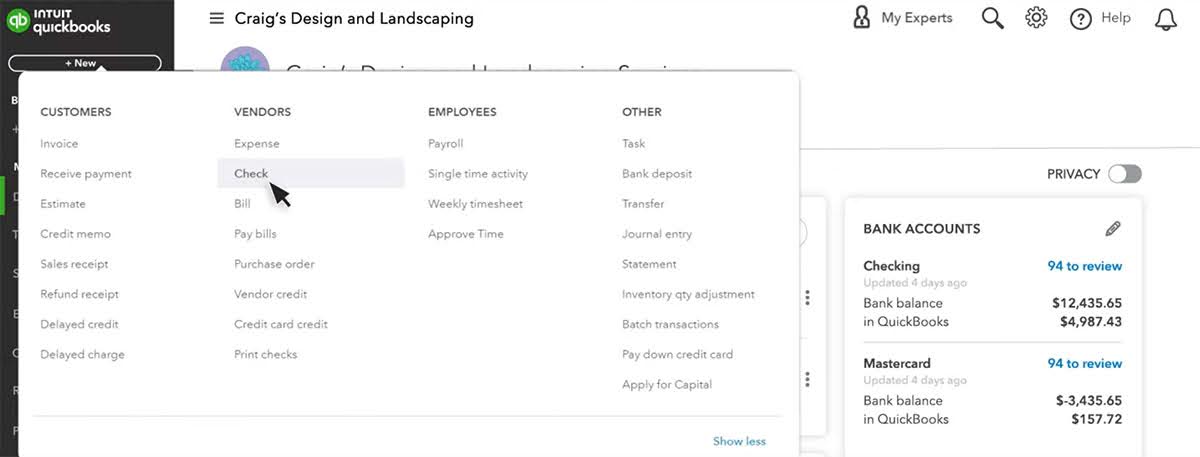
Image credit: Intuit QuickBooks
- Enter the payee name and details.
- Input the amount.
- If you plan on printing the check through QuickBooks at a later time, check the box for “Print later.” Otherwise, enter the check number.
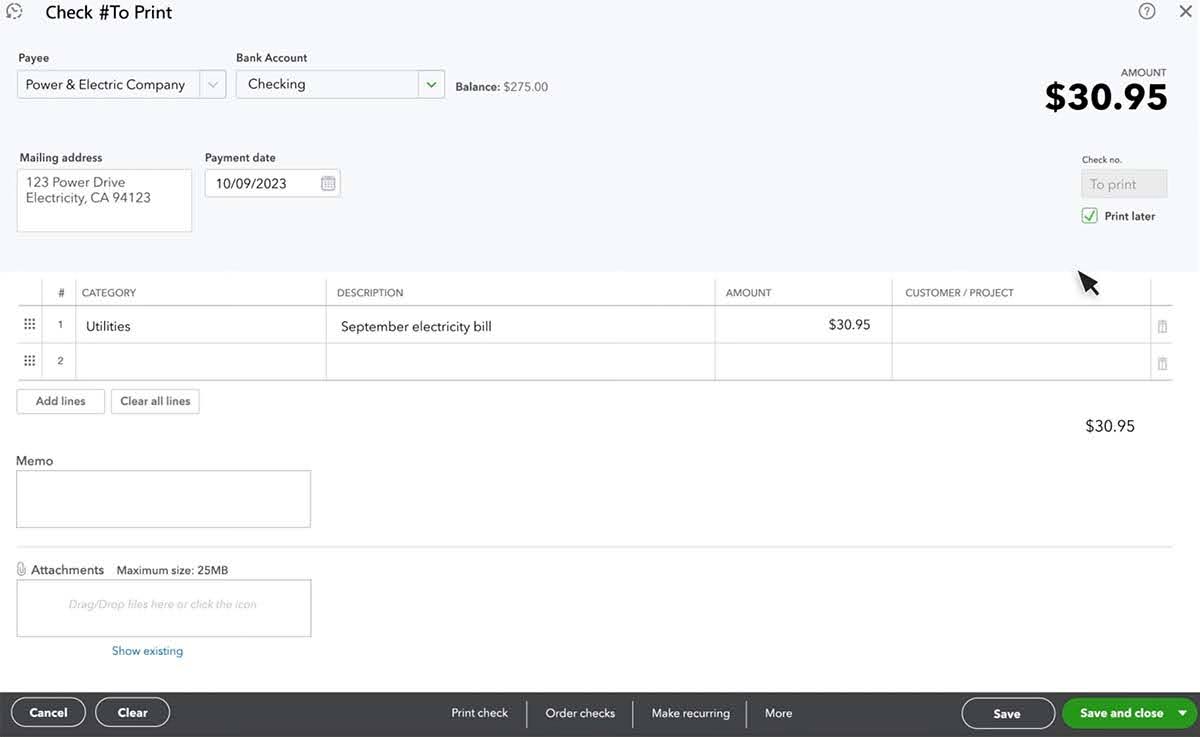
Image credit: Intuit QuickBooks
- Click “Save and close” when you’re finished.
Before saving, double-check the details to make sure all products, items, and any necessary bank account information are accurate. Make a note in the memo box if you need to include additional information.
Modifying an existing check
If you made an error entering the check details the first time, or you need to go back in to add new information, you can modify an existing check. Here’s how.
Step 1: Navigate to the check input screen
From the main menu, select “Expenses” and then “Checks.”
Step 2: Edit the check
Make any edits to the:
- Payee name.
- Amount.
- Date.
Verify your details before continuing.
Step 3: Click “Print Check” or “Save and Close”
You can select “Print check” to print the check immediately in QuickBooks, or “Save and close” to save the check in QuickBooks without printing.
If you want to print the check later, select the “Print later” box and your check will enter a print queue for you to batch print checks later.
How to QuickBooks users can better manage lead to cash cycle
One of the best features of QuickBooks is its ability to integrate with third-party software. You can easily extend QuickBooks’ power with Method — a CRM and process automation platform that syncs with QuickBooks Online and QuickBooks Desktop in real time.
With powerful features to shorten your lead-to-cash process, Method adds marketing tools and detailed reports that simplify your pipeline. Add customization options (logo, font size) to your invoice templates and securely integrate with your checking account to process payments online.
The best part? Method’s seamless, two-way sync with your accounting software ensures that each transaction record is processed smoothly and appears in your QuickBooks and Method accounts instantly.
Method lets you save time and improve convenience for both your customers and team members to give you more time to address tasks that need your attention. Use its collection of resources to set up your customized solution. These include free:
- Tutorial videos.
- Help center articles.
- 24/7 customer support.
Learn how you can extend the power of your QuickBooks account in the video section above!
Key takeaways
Understanding how to print checks in QuickBooks Online gives you the advantage of keeping your banking information and financial records together. You stay organized and avoid manual processes by having QuickBooks update your information automatically.
When knowing how to print checks in QuickBooks Online, remember that:
- Your printer settings need to be configured to avoid alignment errors and printing mistakes.
- Voucher checks are better for pay stubs, while standard checks are good for multiple checks.
- You can order your checks by date or payee to organize them for printing.
To optimize your payment processes even further and extend the limits of QuickBooks, consider integrating with third-party software like Method.
How to print checks in QuickBooks Online FAQs
Can you print checks out of QuickBooks Online?
Yes, QuickBooks Online supports check printing. One of the benefits of knowing how to print checks in QuickBooks Online is that you can keep your financial records organized and updated at the same time.
Avoid manually entering your checks one by one. QuickBooks Online categorizes your check register when you reconcile your accounts.
Do you need a special printer to print checks from QuickBooks?
You don’t need a special printer to print checks from QuickBooks, but you should check your compatibility and settings. The majority of home and office printers can print checks on regular letter-size paper.
How do you reprint checks and sales forms in QuickBooks Online?
To reprint checks in QuickBooks Online:
- Select “Expenses” which is navigated from the main menu and then click the “Expenses” tab.
- Find the check that you want to print or use the filter to locate it easier.
- Click “Print check” at the bottom of the screen.
To reprint sales forms in QuickBooks Online:
- Click on “Sales” from the main menu and select the “All sales” tab.
- Locate the invoice or sales form that is saved in the list. You can use the filter to find it easier.
- Select the sales form and click “More actions” to pull up a drop-down menu.
- Click “Print.”
Learn how to expand the power of your QuickBooks Online account with a free demo of Method!