
Smart, data-driven decisions are the foundation of business success. This begins with how you manage and use your financial data.
You’ve probably got your accounting data neatly organized in a CSV or Excel file, but what’s next?
Enter the QuickBooks Import Excel and CSV toolkit. It lets you easily import data directly into QuickBooks to get it ready for analysis.
Keep reading to learn how you can use the QuickBooks Import Excel and CSV toolkit for your business.
CSV vs. Excel: What are they?
Before diving into the QuickBooks Import Excel and CSV toolkit, let’s go over the basics of CSV vs. Excel.
CSV
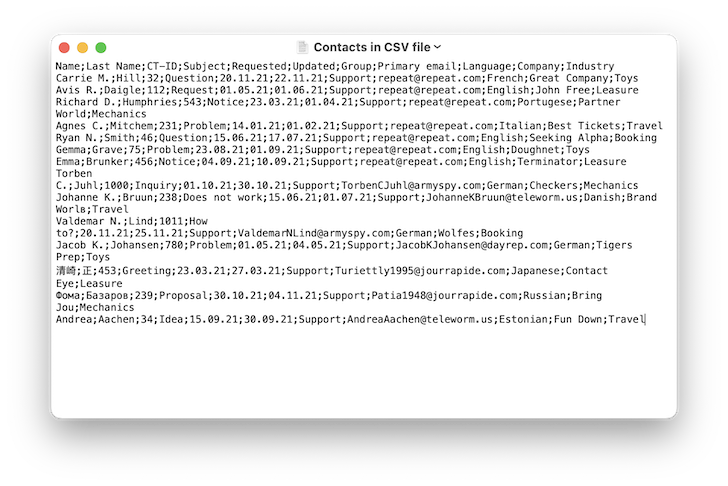
Image credit: Loader
A CSV, or a comma-separated values file, is a simple text file that stores data in a tabular format. Each piece of information is separated by a comma, and the file ends with a .csv extension.
You can open CSV files with programs like Microsoft Excel, Google Sheets, and Notepad.
Note that CSV files have limitations. They:
- Contain only a single sheet per file.
- Don’t save cell, column, or row formatting.
- Can’t store formulas.
Excel
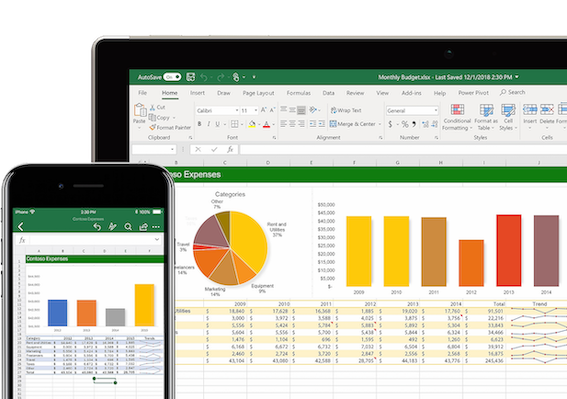
Image credit: Microsoft
Developed by Microsoft, Excel is a spreadsheet application that lets users manage data, including:
- Numbers.
- Formulas.
- Text.
- Charts.
Excel organizes data in a grid of columns and rows. It has two associated file types: .xls and .xlsx. It’s a great platform to help you organize detailed data and perform complex analyses.
In a nutshell, CSV files store simple text data, while Excel spreadsheets are more structured for in-depth analysis.
Now you’re ready to learn more about the QuickBooks Import Excel and CSV toolkit.
What is the QuickBooks Import Excel and CSV toolkit?
The QuickBooks Import Excel and CSV toolkit makes importing data into QuickBooks easy and efficient.
It offers several resources to minimize human errors during the import process:
- Import from Excel and CSV manual: A step-by-step guide with best practices and tips.
- CSV examples folder: Four sample CSV files, each for a specific list type.
- XLS example folder: A sample spreadsheet with four tabs, one for each list menu.
- Allowed fields: A guide for advanced import fields.
This toolkit is especially useful, as it helps you:
- Handle large data.
- Conduct bulk imports.
- Manage finances better.
- Reduce your risk of errors.
But how exactly do you import data using the toolkit?
How to use the QuickBooks Import Excel and CSV toolkit
Using the QuickBooks Import Excel and CSV toolkit is straightforward. Here’s a step-by-step guide:
Note that the toolkit contains Windows-based software, like .exe files, which macOS doesn’t natively support. Mac users can directly import Excel and CSV files into QuickBooks through its interface.
Download and install the toolkit
- Open QuickBooks and locate the download window for the toolkit.
- On your Windows Desktop, click “Save.”
- Double-click “QuickBooks_Import_Excel_and_CSV.exe” on your desktop.
- In the “WinZip Self-Extractor” window, click “Browse.”
- Choose the folder where you want to install the toolkit and click “OK.”
- Click “Unzip” to extract the files, then “Close” to exit the extractor.
- Open the QuickBooks Import Excel and CSV toolkit folder.
Now you’re ready to import data into your accounting software!
How to import a CSV file into QuickBooks
Here’s how to use the QuickBooks Import Excel and CSV toolkit for CSV import:
- Click “Banking” on the left-side menu of the toolkit.
- Choose “Update drop-down menu” or “Upload Transactions Manually.”
- Click on “File Upload” in the file menu.
- Browse and select the CSV folder.
- Click “Next.”
- Choose the QuickBooks account.
- Map the specific import fields for an accurate data transfer.
- Click “Next.”
- Select the CSV files to import.
- Confirm with “Yes,” then “Finish.”
How to import an Excel file into QuickBooks
Importing Excel files into QuickBooks is similar to importing CSV formats:
- Click “Banking” on the left-side menu of the toolkit.
- Choose “Update drop-down menu” or “Upload Transactions Manually.”
- Click on “File Upload” in the file menu.
- Browse and select the Excel folder.
- Click “Next.”
- Choose the QuickBooks account.
- Map the specific import fields.
- Click “Next.”
- Select the Excel files to import.
- Confirm with “Yes,” then “Finish.”
Are there size limits or formatting requirements?
When you import Excel to QuickBooks, size limits and formatting requirements are key factors to consider.
QuickBooks lets you import up to 1,000 rows at once. If your Excel file has more than this, you’ll need to split it into smaller files.
From our firsthand examination, it’s best to match your file precisely with QuickBooks’ data fields. This ensures you use the correct sheet and proper column and row headers. To accurately import data and avoid errors, follow this order when you map fields:
- Customers.
- Vendors.
- Products and services.
- Invoices.
Pro Tip: These practices are also helpful if you need to export data from QuickBooks to Excel.
What lists can you import into QuickBooks?
When using the toolkit, it’s useful to know what exactly you can import into QuickBooks. Here are the key list types:
- Customer lists: Keep track of customer names, contacts, and addresses.
- Vendor lists: Detail your vendors’ names, addresses, and contact information.
- Employee lists: Input employee details for QuickBooks Payroll.
- Item lists: Catalog products or services with descriptions, pricing, and stock.
Beyond lists, you can also import other data types into QuickBooks:
- Chart of accounts: Organize your business accounts, including names and types.
- Transactions: Manage invoices, bills, checks, and sales receipts.
- Bank transactions: Record banking and credit card transactions for reconciliation.
- Journal entries: Enter data for advanced accounting needs.
- Budget data: Control budget details for financial planning.
You can compile all of this data easily into an Excel or CSV file for a smooth import into QuickBooks. It’s this functionality that makes QuickBooks a one-stop solution for organizing your company files.
But, it’s just as important to ask: What lists can you not import from Excel into QuickBooks, and is the same true for CSV files?
What lists can you not import into QuickBooks?
When using the toolkit, you may wonder:
- What lists can you not import from Excel into QuickBooks?
- What lists can you not import from CSV into QuickBooks?
The good news is that input limitations don’t depend on whether the data is in Excel or CSV format. But there are some import limitations to keep in mind:
- Types of transactions: QuickBooks has limitations around importing transactions. Not all transaction types, like paychecks and sales orders, are supported for import.
- Advanced inventory: You can’t import advanced inventory fields into QuickBooks.
- Transaction linkages: QuickBooks doesn’t import links between transactions, such as connections between invoices and payments.
- Custom fields on transactions: The platform doesn’t import custom fields on transactions.
Take note of these limitations as you prepare to import your data into QuickBooks.
Can you import bank transactions into QuickBooks as a CSV file?
The answer is yes! Here’s a quick guide:
- Go to the QuickBooks Dashboard and click “Banking” on the left.
- Click the drop-down arrow on the “Link account” button.
- Choose “Upload from file.”
- On the “Import bank transactions” tab, drag and drop your CSV file or click “Select files.”
- Select the account where you want the transactions to go.
- Click “Continue.”
Automate your financial reporting and say goodbye to manual data entry with Method
As the #1 QuickBooks CRM, Method automates every aspect of your business, from lead tracking to financial management. At the heart of its automation capabilities is its two-way, real-time sync with QuickBooks.
Method scales with your business without missing a beat. Say goodbye to the challenges that come with manual data entry and focus on growing your business.
Wrap-up
The QuickBooks Import Excel and CSV toolkit is an excellent tool for business owners and accounting professionals who use Excel or CSV file formats. It offers useful guides and samples for various data types, from customer lists to budget details.
The software tool simplifies data import so you can:
- Make confident decisions.
- Be more proactive.
- Achieve cost savings.
To expand your limits when it comes to inputting data into QuickBooks and improve your bottom line, consider implementing a powerful automation tool like Method.
See how Method masters QuickBooks data integration.
Photo credit: Nataliya Vaitkevich via Pexels